How to Write a Script to Connect PHP to Elasticsearch
Introduction
If you’re looking for a fast, scalable full-text search engine, Elasticsearch is the natural choice. Elasticsearch provides an official API for certain languages, including PHP. Fortunately, connecting to Elasticsearch using PHP is a simple task. In this tutorial, we’ll explain how to write a script to connect PHP to Elasticsearch.
Prerequisites
Before we attempt to write a script to connect PHP to Elasticsearch, it’s important to confirm that a few prerequisites are in place. The system requirements for this task include:
- Your machine or server must be running a UNIX-based OS, like Linux or MacOS.
- You’ll need to have the latest version of Elasticsearch installed. On a UNIX-based system, like MacOS or Ubuntu, you can just use the Debian package installer and Composer, which will provide everything you need to run Elasticsearch.
- You’ll need PHP 7 or higher along with the PHP dependency manager Composer installed.
- If you’re using Composer, you’ll need to include elasticsearch-php in your composer.json file. See Elastic’s version matrix page for more details.
- You need the PHP curl library, or you’ll get the following error:
1 | "Elasticsearch-PHP requires cURL, or a custom HTTP handler." |
Install PHP 7:
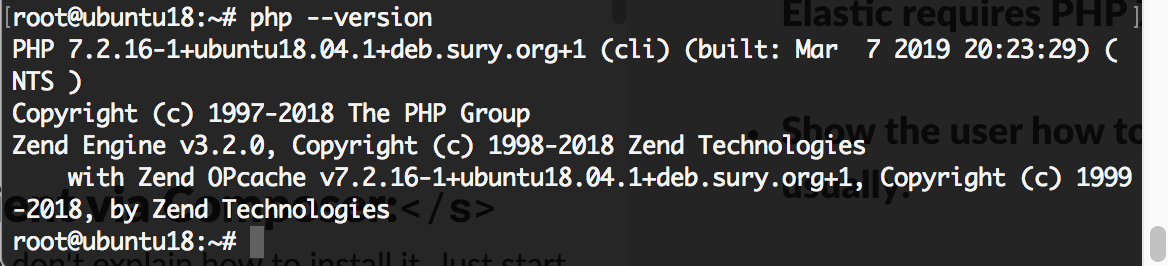
Let’s start our tutorial by confirming that PHP 7 is installed and running. To verify the version of PHP running on your server, use the following code:
1 | php -v |
You can also use this syntax:
1 | php --version |
The output to the terminal should look something like this:
1 2 3 4 | PHP 7.3.1 (cli) (built: Jan 8 2019 13:55:51) ( NTS ) Copyright (c) 1997-2018 The PHP Group Zend Engine v3.3.1, Copyright (c) 1998-2018 Zend Technologies with Zend OPcache v7.3.1, Copyright (c) 1999-2018, by Zend Technologies |
Important: PHP-curl Library Needs to Match PHP Version
If it turns out that you’re running an older version of PHP, it’s important to install PHP 7 before proceeding any further with this tutorial.
Install the curl library:
Once you’ve verified your version of PHP, you’ll need the proper ext-curl Libcurl extension for the version of PHP already installed. Version 6.0 of the Elasticsearch PHP client library requires at least PHP version 7 or newer to work, and it also requires the native JSON extension to be version 1.3.7 or higher. Be sure you’re running compatible versions of all these components before moving forward to the next steps.
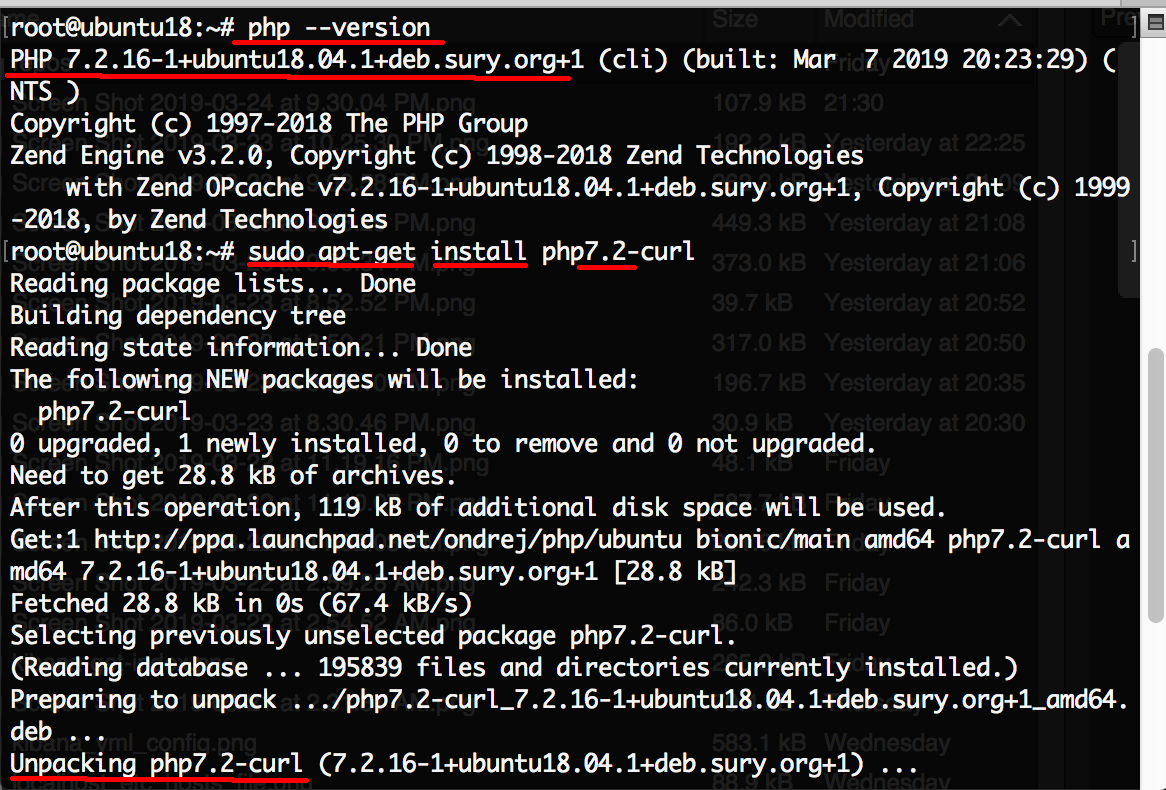
For Debian-based Linux use apt-get:
Run the following command, replacing the {x} with the appropriate version number:
1 | sudo apt-get install php7.{x}-curl |
For Red Hat Linux (CentOS) use the yum package manager:
Red Hat Linux users will use a different command to install the curl library:
1 2 | sudo yum install curl yum install php-curl |
Tarball Installation for Red Hat Linux:
For a tarball installation, choose the appropriate version of curl from the Curl library for the tar archives.
To download the library for v7.2 use the wget command:
1 | wget https://curl.haxx.se/download/curl-7.20.0.tar.gz |
Next, uncompress the tarball:
1 | tar -xvf curl-7.20.0.tar.gz |
Once you’ve extracted the files, cd into the uncompressed archive:
1 | cd curl-7.20.0 |
You can use the native C compiler to install and compile the source code:
1 2 3 | ./configure make make install |
NOTE: Be sure to restart your server after you’ve installed, or re-installed, PHP 7.x and its respective curl library. On an Apache server, you can run the following command:
1 | sudo service apache2 restart |
Install PHP Client Library Using Composer:
At this point, we’re ready to install the PHP client library. Elastic maintains an official Github repository for their PHP-client library. Check their version matrix before installing the Composer package to be sure it’s compatible with your version of Elasticsearch.
You can install composer via the following command:
1 | curl -s http://getcomposer.org/installer | php |
Be sure that you’re in the directory for your Elasticsearch project (in this example, we’re using elastic-php), and create the composer.json file that will contain the Elasticsearch dependency. The following code will accomplish the task:
1 2 | cd elastic-php sudo nano compose.json |
Paste the following JSON text into the file to add the dependency:
1 2 3 4 5 | { "require": { "elasticsearch/elasticsearch": "~6.0" } } |
Simply press CTRL + O to save the file, and then CTRL + X to exit.
Next, install the dependencies via composer using the commands shown below:
1 2 | curl -s http://getcomposer.org/installer | php php composer.phar install --no-dev |
After installing the dependencies, you should see a vendor folder located in the project’s directory. If you don’t see this, something may have gone wrong with your Composer installation; there might also be an issue with the dependency in the Elasticsearch composer.json file.

Connecting PHP Client to Elasticsearch
Next, we’re going to create a new PHP script for the code that will interface with the Elasticsearch cluster. We’ll edit the script, adding the autoload.php file for the PHP client at the beginning of the script. This auto-loads all of the classes for the library.
NOTE: Be sure that the path in the file matches the location of the vendor directory:
1 2 | <?php require 'vendor/autoload.php'; |
Alternatively, you can use __DIR__, which will return a string representation of the current working path for the PHP script if it’s located in the same directory as the vendor folder:
1 2 | <?php require_once __DIR__ . '/vendor/composer/autoload.php'; |
If you like, you can use the following code to display errors on the webpage if your website or webapp is still in the testing phase and not yet in production:
In the next step, we’ll create a $hosts variable which contains all of the necessary credentials for the Elasticsearch server. Make sure that the domain, port, username, and password all match the values in your configuration, which can be found in the elasticsearch.yml file:
1 2 3 4 5 6 7 | $hosts = [ 'host' => '{SOME_DOMAIN}', 'port' => '9200', 'scheme' => 'https', 'user' => 'username', 'pass' => 'password!#$?*u&i' ]; |
Once this step is complete, you can instantiate a new $client variable building from the $hosts variable:
1 2 3 | $client = ElasticsearchClientBuilder::create() ->setHosts($hosts) ->build(); |
Another option is to simply instantiate a generic Elasticsearch client object without any credentials added. In this case, the PHP library will look for the Elasticsearch cluster running on its default port of 9200:
1 | $client = ClientBuilder::create()->build(); |
If you try adding var_dump($client); at the end of your PHP script, you’ll see information on your screen of the client object Array() which confirms that you connected:
1 2 3 | object(ElasticsearchClient)#18 (12) { ["transport"]=> object(ElasticsearchTransport)#16 (5) { ["connectionPool"]=> object(ElasticsearchConnectionPoolStaticNoPingConnectionPool)#15 (7) { ["pingTimeout":"ElasticsearchConnectionPoolStaticNoPingConnectionPool":private]=> int(60) ["maxPingTimeout":"ElasticsearchConnectionPoolStaticNoPingConnectionPool":private]=> int(3600) ["connections":protected]=> array(1) { [0]=> object(ElasticsearchConnectionsConnection)#13 (14) [...] [...] |
Conclusion
If you’d like to interact with Elasticsearch through PHP, a bit of setup is required before you can begin storing and searching data. This tutorial showed you how to write a client instance of the Elasticsearch PHP library, which connects your Elasticsearch cluster to the PHP running on your server. With these instructions and explanations, you’ll be able to connect PHP to Elasticsearch in just a few simple steps.


Pilot the ObjectRocket Platform Free!
Try Fully-Managed CockroachDB, Elasticsearch, MongoDB, PostgreSQL (Beta) or Redis.
Get Started