How To Use Python To Download Photos From An Elasticsearch Index
Introduction
This tutorial will demonstrate how to store an image on an Elasticsearch index and embed its raw encoded data and the EXIF meta data into an image using Python’s PIL and Piexif libraries. Examples will include how to export an elasticsearch image with python, export elasticsearch documents with python, convert base64 to pil images, create pil image elasticsearch document, create python elasticsearch images, how to use elasticsearch python pil, exif data python pil and an elasticsearch python piexif.
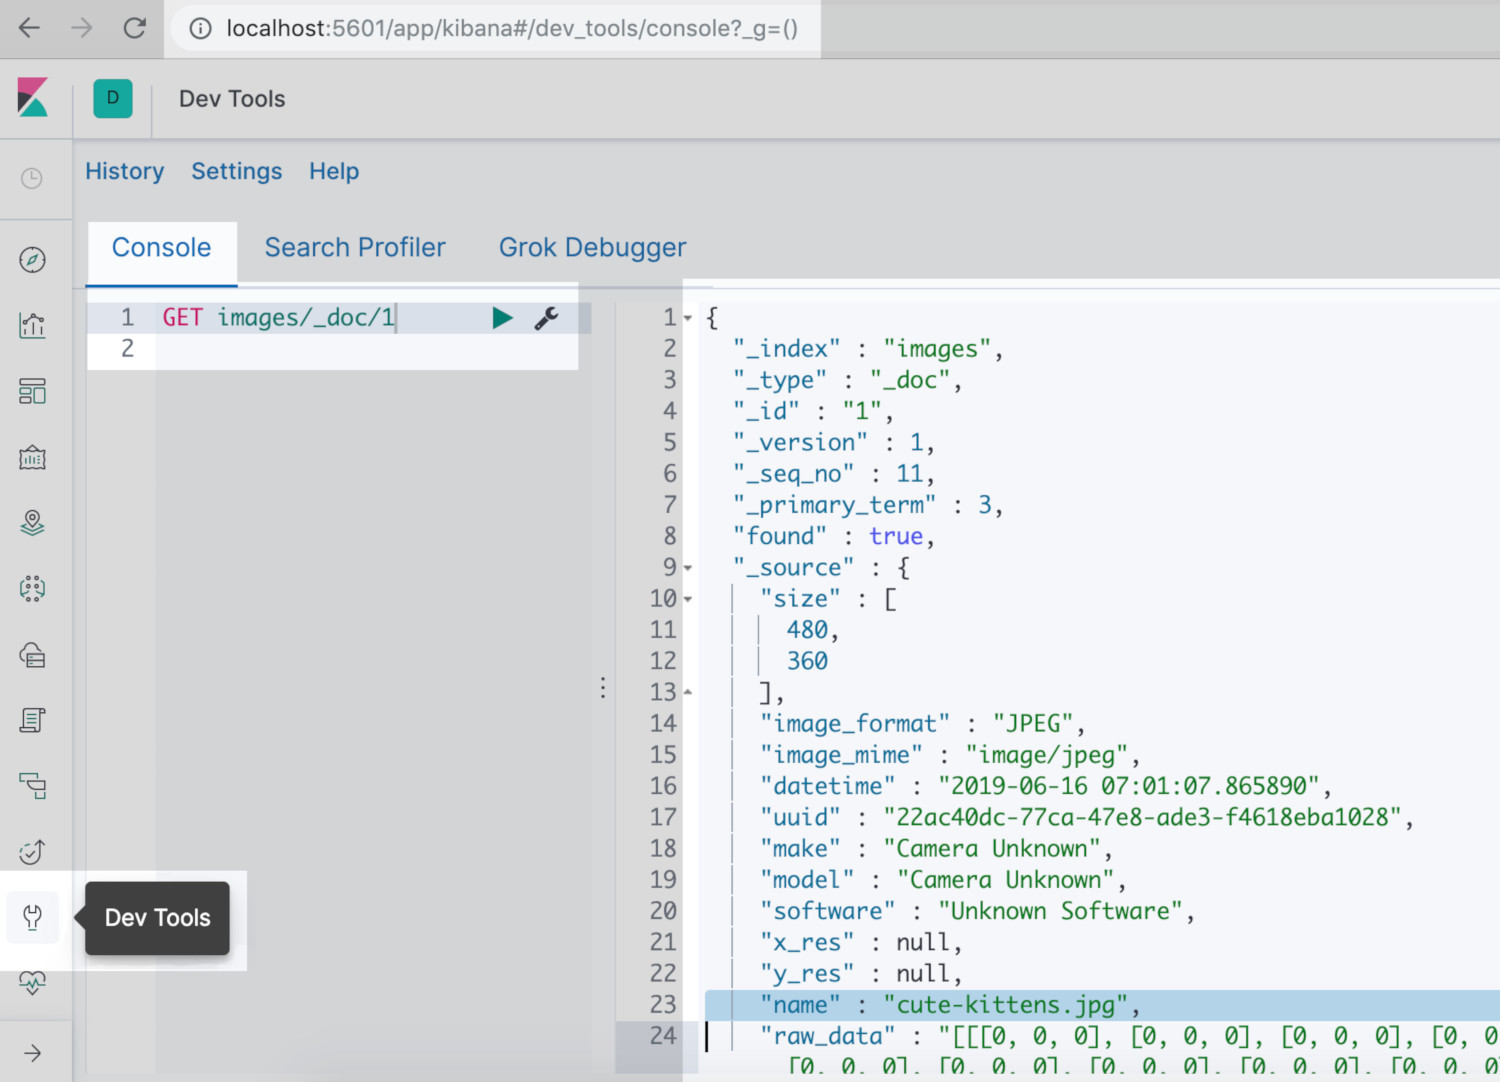
The example documents used in this tutorial have some very specific EXIF data stored on the Elasticsearch document, as shown here:
The results of using the code provided here may vary depending on how the image was originally indexed and what EXIF data was included at the time of indexing.
Prerequisites for Indexing Photos to Elasticsearch
- The Elasticsearch cluster must be properly installed and running. With the server running on the default
9200port, execute the following HTTP cURL request to the server to return cluster information:
1 | curl -XGET "localhost:9200" |
- The Kibana service must be running in order to use the Kibana Console UI to make HTTP requests to verify the images uploaded correctly, as follows:
1 | https://{YOUR_DOMAIN}:5601 |
- An Elasticsearch index must be created to upload images. This tutorial will briefly explain the process and also how to create a mapping for the index.
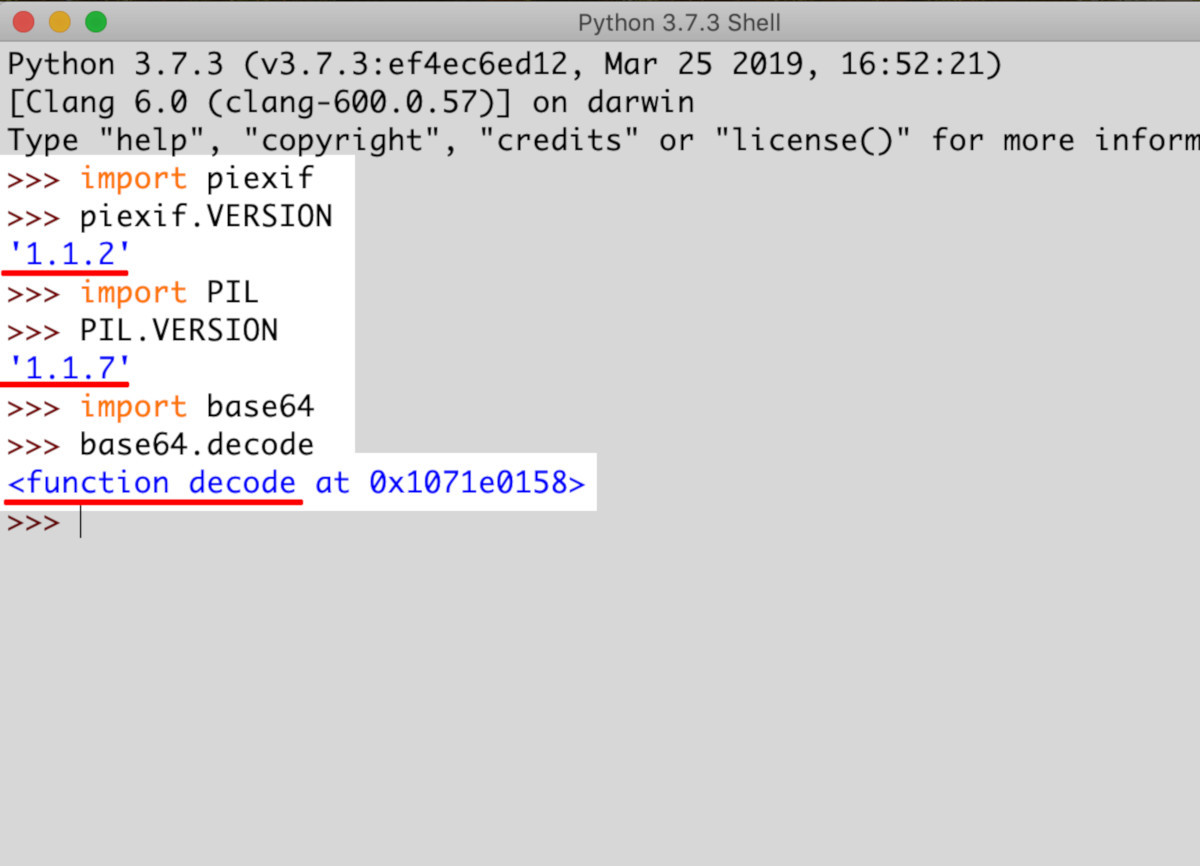
How to install all the Python libraries and dependencies using pip3
Python 2.7 is now deprecated and is scheduled to lose support by January 2020. The Python code used in this tutorial was written and tested with Python 3. As such, it is required to use the pip3 command for the PIP package manager for Python 3 to install the necessary libraries and modules.
How to install Pillow (PIL) for Python 3
Install the Python Imaging Library (PIL) with the following command:
1 | pip3 install Pillow |
The following command will upgrade Pillow to the latest version:
1 | pip3 install -U Pillow |
>NOTE: Older versions of PIP allowed for the entire Pillow library to be imported (e.g. import PIL). However, since v2.0 of PIL only its classes can be imported (e.g. from PIL import Image)
How to install pybase64 for the Base64 Python encoding library
To properly decode the images stored on the Elasticsearch index, install and upgrade the Base64 library for Python (libbase64) with the following command:
1 | pip3 install -U pybase64 |
How to install the piexif Python library for the Elasticsearch images
Execute the following pip3 command to install the Piexif library. This will allow the image’s EXIF data to be edited and saved after it is exported from an Elasticsearch index:
1 | pip3 install piexif |
How to import the Elasticsearch client library
Import the Elasticsearch client class to declare an instance of the low-level client library with the following command:
1 2 | # import the Elasticsearch low-level client from elasticsearch import Elasticsearch |
How to Import Other Python Libraries to Create a PIL Image from Elasticsearch Data
Import Python’s time library to create timestamp strings as follows:
1 | import time |
How to import the Base64 library for Python when the data is encoded
Import base64 to decode Base64 data on the Elasticsearch document as follows:
1 2 | # import Base64 to decode Elasticsearch _source image import base64 |
How to import the PIL Image library for Python
Execute the following command to convert the Elasticsearch document into an image:
1 2 | # use Python's PIL (Pillow) library to create an Image instance from PIL import Image |
How to import the PIEXIF library for Python
Execute the following command to change an image’s EXIF data:
1 2 | # import piexif to write EXIF data to new image import piexif |
How to import the AST library for its literal_eval class to create a list of image pixels from string
The ast library’s literal_eval() method is a safer way to evaluate string expressions than using Python’s eval() as it will only work on regular Python datatypes. Use the following command:
1 2 | # use to convert string to nested list import ast |
How to import NumPy to create a NumPy array from the Python list() object of pixel data
Import the numpy library using the alias np as the PIL has the fromarray() method that allows the creation of a PIL Image instance from a NumPy ndarray object, as shown here:
1 2 | # import the NumPy library using the 'np' alias import numpy as np |
How to Declare an Elasticsearch Client Instance and Get the Document Image
Declare an instance of the Elasticsearch low-level client library as follows:
1 2 | # create a client instance of Elasticsearch elastic_client = Elasticsearch([ {'host': 'localhost', 'port': 9200} ]) |
Call the client instance’s get() method to obtain the image’s EXIF and raw pixel data from the Elasticsearch cluster:
1 2 3 4 5 6 | # call Elasticsearch's get() method to retrieve a document data _doc = elastic_client.get( index = 'images', doc_type = '_doc', id = 1 ) |
How to Get the Image Data from the Elasticsearch Document Object
Execute some try and exception indentation blocks to obtain the image’s meta, EXIF, and raw data. Be aware the field names or dictionary keys for the document on the Elasticsearch cluster may be different from the examples in this tutorial.
Use the following commands to check for a Python KeyError exception when retrieving data:
1 2 3 4 5 6 7 8 9 10 11 12 13 14 15 16 17 18 19 20 21 22 23 24 25 26 27 28 29 30 31 32 33 34 35 36 | try: # get the document's _source data _source = _doc["_source"] except KeyError: print ("The Elasticsearch document is not valid") quit() try: raw_data = _source["raw_data"] except KeyError: print ("The Elasticsearch document is not a valid image") quit() # try to get image size from Elasticsearch try: img_size = _source["size"] except KeyError: img_size = (0, 0) # get the image's filename try: filename = _source["name"] if "." in filename: filename = filename[:filename.find(".")] except KeyError: # generate filename using timestamp filename = "unknown_" + str( int(time.time()) ) # get the image's file extension try: image_format = _source["image_format"] except KeyError: image_format = get_img_type(filename) if image_format == None: image_format = "jpeg" filename = filename + "." + image_format |
How to use Python’s AST Library to Convert an Image’s String Data to a List Object
Execute the below command to pass the raw string data for the image to the AST library’s literal_eval() method to create a Python list of the image’s pixel values by evaluating the Python list object casted as a string:
1 2 | # use literal_eval() to eval a Python list of pixel data img_list = ast.literal_eval( raw_data ) |
>NOTE: The Base64 library’s b64decode() method must first be called if the data is an encoded Base64 object.
How to Pass the Data as a Numpy Array to Pil’s Image Class to Create a New Image Object
Execute the following command to pass the data as a Numpy array:
1 2 3 4 5 6 7 8 9 | # create a NumPy array from the eval string array img_nparray = np.array( img_list ) # create a PIL image from the NumPy array try: img = Image.fromarray( img_nparray.astype('uint8'), 'RGBA') except Exception as err: print ("Image.fromarray() ERROR:", err) img = Image.fromarray( img_nparray.astype('uint8'), 'RGB') |
How to Create EXIF Data for the Image Object with Elasticsearch Data
This example will attempt to create an image that includes the RGBA alpha channel. It will create an RGB image instead if an exception is raised.
If there is some EXIF data stored in Elasticsearch document along with the pixel data, this example will parse it out of the dict object returned by Elasticsearch and put it in the PIL instance.
There are four different EXIF data types, and, depending on the data type, must be put into the correct dict object, as follows:
1 2 3 4 5 6 7 8 9 10 11 12 13 14 15 16 17 18 19 20 21 22 23 24 25 26 27 28 29 30 31 32 33 34 35 36 37 38 39 40 41 42 43 44 45 46 | # create new dict objects for the EXIF meta data zero_data = {} first_data = {} exif_data = {} gps_data = {} # iterate the Elasticsearch document's _source data for key, val in _source.items(): # parse out the Exif meta data for the image if val != None: # get datetime and unique ID data if "datetime" in key.lower(): exif_data[ piexif.ExifIFD.DateTimeOriginal ] = val zero_data[ piexif.ImageIFD.DateTime ] = val if "uuid" in key.lower(): exif_data[ piexif.ExifIFD.ImageUniqueID ] = val first_data[ piexif.ImageIFD.RawDataUniqueID ] = val # get XResolution and YResolution elif "x_res" in key.lower() or "xres" in key.lower(): zero_data[ piexif.ImageIFD.XResolution ] = val elif "y_res" in key.lower() or "yres" in key.lower(): zero_data[ piexif.ImageIFD.YResolution ] = val # get the image's name, make, and model elif key == "name": first_data[ piexif.ImageIFD.OriginalRawFileName ] = val new_file = val elif key == "make": zero_data[ piexif.ImageIFD.Make ] = val zero_data[ piexif.ImageIFD.DocumentName ] = val elif key == "model": zero_data[ piexif.ImageIFD.Model ] = val elif key == "software": zero_data[ piexif.ImageIFD.Software ] = val # print the image's parsed meta data print ("\n0th:", zero_data) print ("\nExif:", exif_data) print ("\nGPS:", gps_data) print ("\n1st:", first_data) |
>NOTE: This example does not include all of the available EXIF data fields.
How to Put the EXIF Data Together in One Dictionary and Pass it to Piexif’s Dump() Method
Nest all four of the data types inside another Python dictionary using the "0th", "Exif", "GPS", and "1st" dictionary keys, as shown here:
1 2 3 4 5 6 7 | # put the image's meta data into a nested dictionary exif_dict = { "0th": zero_data, "Exif": exif_data, "GPS":gps_data, "1st": first_data } |
Now create a bytes object of the EXIF data using the Piexif library’s dump() method with the following command:
1 2 | # create a piexif bytes object from nested Exif dict exif_bytes = piexif.dump(exif_dict) |
How to Save the PIL Image as an Image File
The final step is to save the PIL Image file in order to export the image as a file. The exif option must be set to the exif_bytes Piexif object created earlier:
1 2 | # export the image using the PIL's instance's save() method img.save(filename + "." + image_format, exif=exif_bytes) |
Now open up a Finder or Windows folder window to confirm the image was created.
How to view the EXIF data of the exported Elasticsearch image
The image’s EXIF data can be viewed on macOS by opening the file using the “Preview” application for images. Inside Preview click on “Tools” in the menubar and then on “Show Inspector.” The inspector feature should have a (i) (information) tab and then an Exif section, as seen here:

Conclusion
This tutorial demonstrate examples of how to store an image on an Elasticsearch index and embed its raw encoded data and the EXIF meta data into an image using Python’s PIL and Piexif libraries Examples included how to export an elasticsearch image with python, export elasticsearch documents with python, convert base64 to pil images, create pil image elasticsearch document, create python elasticsearch images, how to use elasticsearch python pil, exif data python pil and an elasticsearch python piexif. Bear in mind there are four different EXIF data types, and, depending on the data type must be placed into the correct dictionary object.
Just the Code
1 2 3 4 5 6 7 8 9 10 11 12 13 14 15 16 17 18 19 20 21 22 23 24 25 26 27 28 29 30 31 32 33 34 35 36 37 38 39 40 41 42 43 44 45 46 47 48 49 50 51 52 53 54 55 56 57 58 59 60 61 62 63 64 65 66 67 68 69 70 71 72 73 74 75 76 77 78 79 80 81 82 83 84 85 86 87 88 89 90 91 92 93 94 95 96 97 98 99 100 101 102 103 104 105 106 107 108 109 110 111 112 113 114 115 116 117 118 119 120 121 122 123 124 125 126 127 128 129 130 131 132 133 134 135 136 137 138 139 140 | #!/usr/bin/env python3 #-*- coding: utf-8 -*- # import the Elasticsearch low-level client from elasticsearch import Elasticsearch import time # use Python's PIL (Pillow) library to create an Image instance from PIL import Image # import piexif to write EXIF data to new image import piexif # use to convert string to nested list import ast # import the NumPy library using the 'np' alias import numpy as np # create a client instance of Elasticsearch elastic_client = Elasticsearch([ {'host': 'localhost', 'port': 9200} ]) # call Elasticsearch's get() method to retrieve a document data _doc = elastic_client.get( index = 'images', doc_type = '_doc', id = 1 ) try: # get the document's _source data _source = _doc["_source"] except KeyError: print ("The Elasticsearch document is not valid") quit() try: raw_data = _source["raw_data"] except KeyError: print ("The Elasticsearch document is not a valid image") quit() # try to get image size from Elasticsearch try: img_size = _source["size"] except KeyError: img_size = (0, 0) # get the image's filename try: filename = _source["name"] if "." in filename: filename = filename[:filename.find(".")] except KeyError: # generate filename using timestamp filename = "unknown_" + str( int(time.time()) ) # get the image's file extension try: image_format = _source["image_format"] except KeyError: image_format = get_img_type(filename) if image_format == None: image_format = "jpeg" filename = filename + "." + image_format # use literal_eval() to eval a Python list of pixel data img_list = ast.literal_eval( raw_data ) # create a NumPy array from the eval string array img_nparray = np.array( img_list ) # create a PIL image from the NumPy array try: img = Image.fromarray( img_nparray.astype('uint8'), 'RGBA') except Exception as err: print ("Image.fromarray() ERROR:", err) img = Image.fromarray( img_nparray.astype('uint8'), 'RGB') # create new dict objects for the EXIF meta data zero_data = {} first_data = {} exif_data = {} gps_data = {} # iterate the Elasticsearch document's _source data for key, val in _source.items(): # parse out the Exif meta data for the image if val != None: # get datetime and unique ID data if "datetime" in key.lower(): exif_data[ piexif.ExifIFD.DateTimeOriginal ] = val zero_data[ piexif.ImageIFD.DateTime ] = val if "uuid" in key.lower(): exif_data[ piexif.ExifIFD.ImageUniqueID ] = val first_data[ piexif.ImageIFD.RawDataUniqueID ] = val # get XResolution and YResolution elif "x_res" in key.lower() or "xres" in key.lower(): zero_data[ piexif.ImageIFD.XResolution ] = val elif "y_res" in key.lower() or "yres" in key.lower(): zero_data[ piexif.ImageIFD.YResolution ] = val # get the image's name, make, and model elif key == "name": first_data[ piexif.ImageIFD.OriginalRawFileName ] = val new_file = val elif key == "make": zero_data[ piexif.ImageIFD.Make ] = val zero_data[ piexif.ImageIFD.DocumentName ] = val elif key == "model": zero_data[ piexif.ImageIFD.Model ] = val elif key == "software": zero_data[ piexif.ImageIFD.Software ] = val # print the image's parsed meta data print ("\n0th:", zero_data) print ("\nExif:", exif_data) print ("\nGPS:", gps_data) print ("\n1st:", first_data) # put the image's meta data into a nested dictionary exif_dict = { "0th": zero_data, "Exif": exif_data, "GPS":gps_data, "1st": first_data } # create a piexif bytes object from nested Exif dict exif_bytes = piexif.dump(exif_dict) # export the image using the PIL's instance's save() method img.save(filename + "." + image_format, exif=exif_bytes) |

Pilot the ObjectRocket Platform Free!
Try Fully-Managed CockroachDB, Elasticsearch, MongoDB, PostgreSQL (Beta) or Redis.
Get Started