How To Update And Delete an Elasticsearch Document Using The PHP Client
Introduction:
If you’re looking for a scalable full-text search engine, Elasticsearch is the natural choice. Elasticsearch provides users with an official API for some popular languages, including PHP. Elasticsearch’s low-level PHP client offers a streamlined interface that makes it easy to communicate with Elasticsearch. Common tasks such as indexing, deleting, updating and retrieving documents can be accomplished quickly and easily. In this tutorial, we’ll explain how to update an Elasticsearch document in PHP using the PHP client library, and we’ll also show you how to delete a document in a similar fashion.
Prerequisites
Before we can attempt to update or delete an Elasticsearch document using PHP, it’s important to make sure a few prerequisites are in place. There are a number of system requirements for this task:
- First, be sure that the Elastic Stack as well as Java are properly installed and configured on your server.
- Keep in mind that the examples shown in this tutorial assume that you’ve gathered data that can be modified during the demonstration.
- You can check to see if the Elasticsearch service is running by navigating to
http://localhost:9200in a browser if you’re running Elasticsearch locally, or tohttps://{YOUR_DOMAIN}:{ELASTICSEARCH_PORT}if it’s running on another server. You should see a JSON object response containing the Elasticsearch cluster information:
JSON Response from the Elasticsearch cluster by navigating to port 9200 in a browser:

- Be sure that the Elasticsearch PHP low-level client is installed properly (See Elastic’s official Git repo for the PHP client for more details).
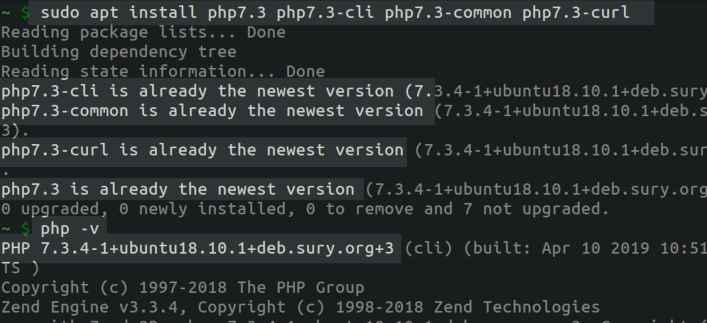
- Keep in mind that the Elastic Stack’s PHP client requires PHP version 7.x or greater to work properly, To see which version of PHP is running on the machine or server, use the
phpcommand with the-voption in a terminal:
1 | php -v |
- If you’re running PHP 7, then you’re ready to move forward!
Create a new PHP script for the Elasticsearch client
The first thing we need to do is to create a new PHP script for the Elasticsearch client. Navigate to the directory where the PHP client vendor library is located using the cd command in your terminal. Once you’re in that directory, create a new PHP script for your API code. You can create the file and give it a name using the touch command:
1 2 | sudo touch my-elastic.php # sudo touch {SOME_NAME}.php |
You can use nano, vi or another terminal-based text editor to edit your script, which will connect with the Elasticsearch PHP library:
1 | sudo nano my-elastic.php |
Connect the PHP script to the low-level Elasticsearch client
Next, we need to connect our script with the Elasticsearch client. In our example, the connection settings utilize HTTPS. If you’re using HTTP, simply change your $hosts array setting to http and set your port to 9200. All the other settings can stay the same.
You can use the PHP require() function to include the vendor directory’s autoload.php script:
The vendor folder we mentioned earlier contains the entire Elasticsearch PHP library that was created by Composer. This folder should be in the same directory as your script; if it isn’t, then the low-level client either wasn’t installed properly, or Composer was run in a different directory.
You can also specify the path, or use the current working path for the script by appending the __DIR__ constant:
`php
require DIR . ‘/vendor/autoload.php’ “
Configure the PHP $hosts array to match the Elasticsearch configuration
The next step will be to configure the $hosts array so that it’s consistent with the settings in your server or machine’s elasticsearch.yml file:
1 2 3 4 5 6 7 | $hosts = [ 'host' => 'localhost', 'port' => '9200', 'scheme' => 'https', 'user' => 'username', 'pass' => 'password!#$?*yeshua' ]; |
Once your $hosts array is configured correctly, you can use it to create a new $client instance of the client library.
NOTE: Certain options in the array (such as user and password) may not be necessary if they haven’t been configured yet.
Create a new client instance of the Elasticsearch PHP library
You can create a new client instance of the PHP low-level client for Elasticsearch
by invoking the create() method in the ClientBuilder library:
1 2 3 | $client = Elasticsearch\ClientBuilder::create() ->setHosts($hosts) ->build(); |
The built-in methods of this $client object can be used to make changes to an Elasticsearch document.
Create a $params PHP object array to select a document of an Elasticsearch index
You can create a $params PHP object array, which is used to select a document in an Elasticsearch index by passing the index name and document’s "_id" as parameters:
1 2 3 4 5 | $params = [ 'index' => 'index_name', 'type' => 'doc_type', 'id' => '1' ]; |
When you create this object array, be sure the values are properly passed as they are case sensitive. Also keep in mind that the document 'id' must be passed as a string, not as an integer.
Updating an Elasticsearch document in PHP
- WARNING: Updating a document will write over old information that was in the document previously.
Let’s look at an example of the code needed to update an Elasticsearch document in PHP. To accomplish this, you need to specify the index, type, and the id to identify which document is getting updated. Any fields and values you include in doc, which is inside the body parameter, will be merged into the updated document. In this example, we’re setting the value of age to 7:
1 2 3 4 5 6 7 8 9 10 | $params = [ 'index' => 'children', 'type' => 'child', 'id' => 'child2' 'body' => [ 'doc' => [ 'age' => 7 ] ] ]; |
As you can see in the example above, you can pass integers as well as strings when you update a document. Just make sure the index’s _mapping defines the field being updated as an integer type.
Getting a response from Elasticsearch
You can use a try and catch block to catch an Elasticsearch exception by calling the update() method within the try brackets:
1 2 3 4 5 6 7 8 | try{ // Calling the update method $response = $client->update($params); } catch (Exception $e) { // var_dump will serialize the error message response // and display it on the webpage var_dump($e->getMessage()); } |
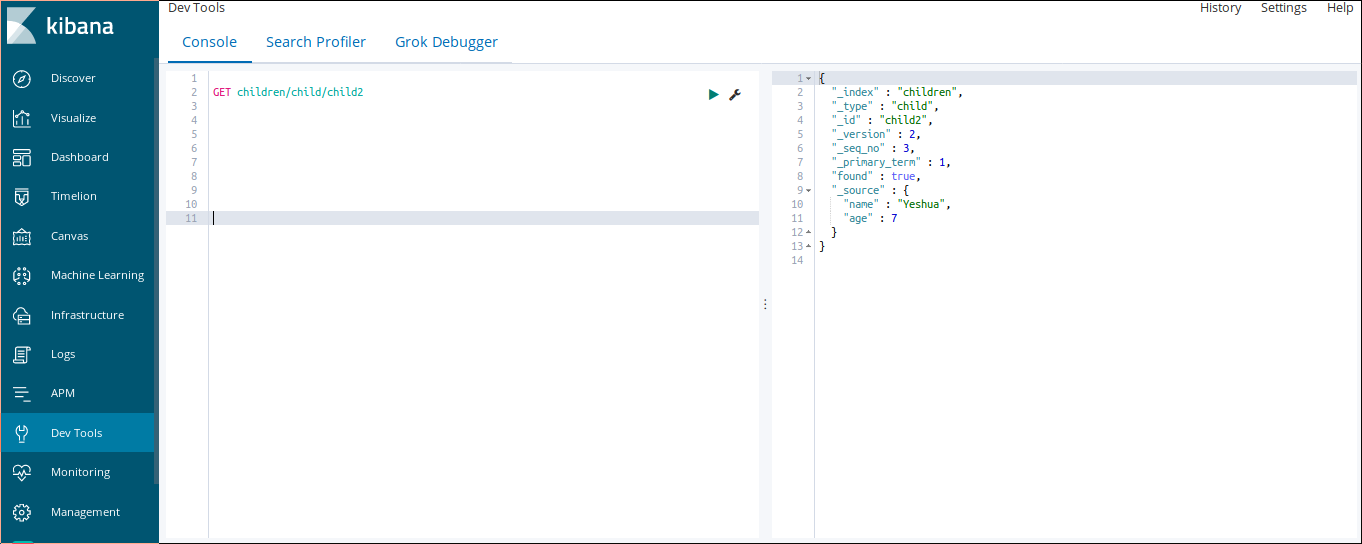
Use Kibana to verify the API call was successful
You can also use the Kibana Console to verify if your update was a success. Simply make a GET request in the Kibana Console UI:
1 | GET children/child/child2 |
You should see something similar to the image below in Kibana’s result pane:
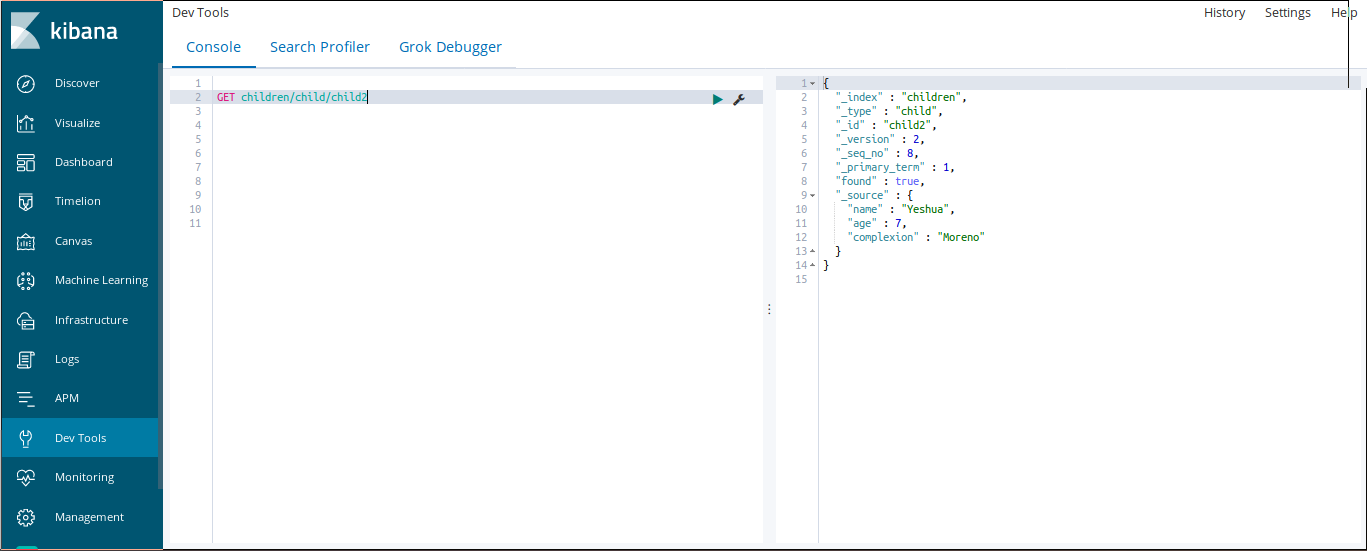
Another way to update an Elasticsearch document is to add a new field to the document.
In this example, we’re adding a field named complexion:
1 2 3 4 5 6 7 8 9 10 11 | $params = [ 'index' => 'children', 'type' => 'child', 'id' => 'child2', 'body' => [ 'doc' => [ 'complexion' => "Moreno" // new field with value ] ] ]; |
1 2 3 4 5 | try{ $response = $client->update($params); // Calling the update method. } catch (Exception $e) { var_dump($e->getMessage()); } |
As we did with the previous update, we can use the Kibana Console to verify that our update operation was successful:
Deleting an Elasticsearch document using the PHP client
Not only can you update an Elasticsearch document in PHP, but you can also delete a document using the PHP client. To delete a document, you need to indicate the index, type and the id as the parameters:
1 2 3 4 5 6 7 8 9 | $params = [ 'index' => 'children', 'type' => 'child', 'id' => 'child2', ]; $response = $client->delete($params); |
In the example shown above, the document with the id of child2 will be deleted. This means the document will not be searchable anymore.
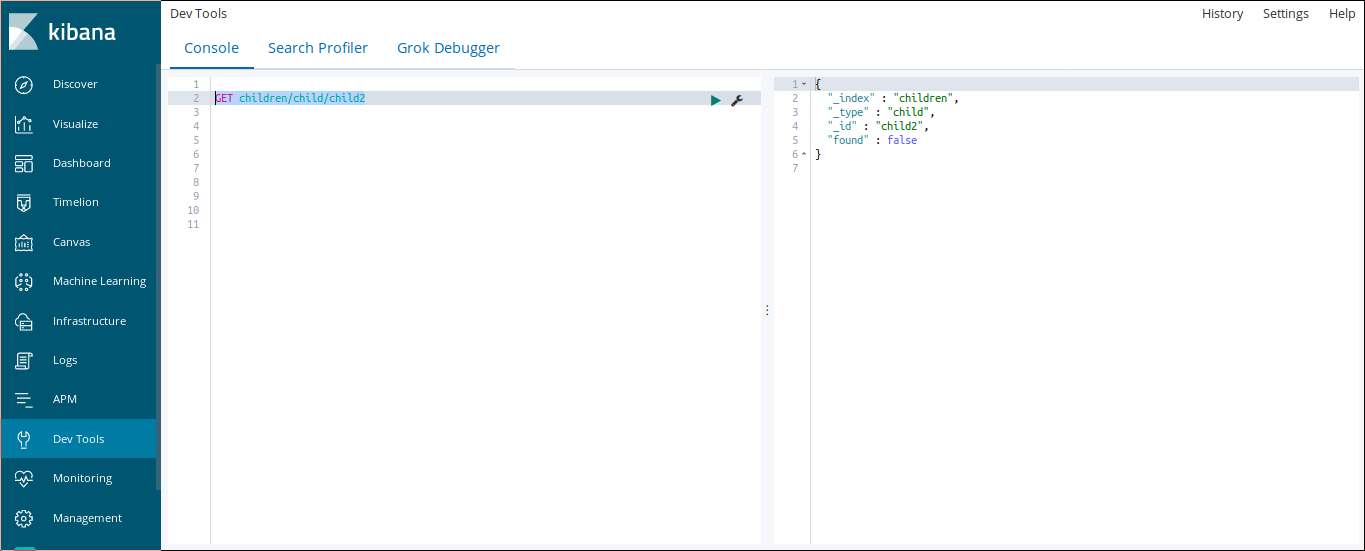
You can use the command shown below to verify the deletion in Kibana:
1 | GET children/child/child2 |
If the delete was successful, you should see something like the following in your Kibana’s result pane:
 * Notice that it returned
 found : false.
Conclusion
When you’re working with data in Elasticsearch, updating and deleting documents are common tasks. Fortunately, the Elasticsearch PHP client offers a simple interface for performing these operations. With the instructions provided in this tutorial, you should have no trouble updating and deleting documents from your Elasticsearch indexes using the Elasticsearch PHP client.
Although we examined the code one section at a time in this tutorial, you can check out the PHP script in its entirety below:
1 2 3 4 5 6 7 8 9 10 11 12 13 14 15 16 17 18 19 20 21 22 23 24 25 26 27 28 29 30 31 32 33 34 35 36 37 38 39 40 41 42 43 44 45 46 47 48 49 50 51 52 53 54 55 56 57 58 | require 'vendor/autoload.php'; # include client library // or uncomment this to specify the current directory: //require __DIR__ . '/vendor/autoload.php'` // create a "hosts" array with the Elasticsearch // cluster's configuration passed as parameters $hosts = [ 'host' => 'localhost', 'port' => '9200', 'scheme' => 'https', 'user' => 'username', 'pass' => 'password!#$?*yeshua' ]; // create a new client instance $client = Elasticsearch\ClientBuilder::create() ->setHosts($hosts) ->build(); /* GETTING AN ELASTICSEARCH DOCUMENT pass the index name and doc id as parameters in a PHP associative array */ /* $params = [ 'index' => 'index_name', 'type' => 'doc_type', 'id' => '1' ]; */ // update a document in the parameters $params = [ 'index' => 'children', 'type' => 'child', 'id' => 'child2' 'body' => [ 'doc' => [ 'age' => 7 // changes the age to 7 // when passed to client ] ] ]; // use a try and catch block to pass the parameters to // the PHP client library to make a request to Elasticsearch try{ // Calling the update method $response = $client->update($params); } catch (Exception $e) { // var_dump will serialize the error message response // and display it on the webpage var_dump($e->getMessage()); } |

Pilot the ObjectRocket Platform Free!
Try Fully-Managed CockroachDB, Elasticsearch, MongoDB, PostgreSQL (Beta) or Redis.
Get Started