How to password protect and secure Kibana
Introduction
In order to prevent unauthorized users from gaining accessing to your Elasticsearch cluster, you need to be able to authenticate the users’ authorization. This is a simple as setting up a way to validate each user. The Elasticsearch security features provides a standalone verification mechanism that allows you to easily configure passwords for Kibana.
The Elastic Stack security features allows you to easily password protect Kibana and utilize more advanced security features, such as encryption, IP filtering, role-based access control and auditing. This tutorial will show you how to configure the security features and interact with your secured cluster. When you secure Kibana you prevent unauthorized access and preserve the integrity of your data.
Prerequisites
- Java 8, Kibana, and Elasticsearch must be properly installed, configured and running on your server before you will be able to secure Kibana.
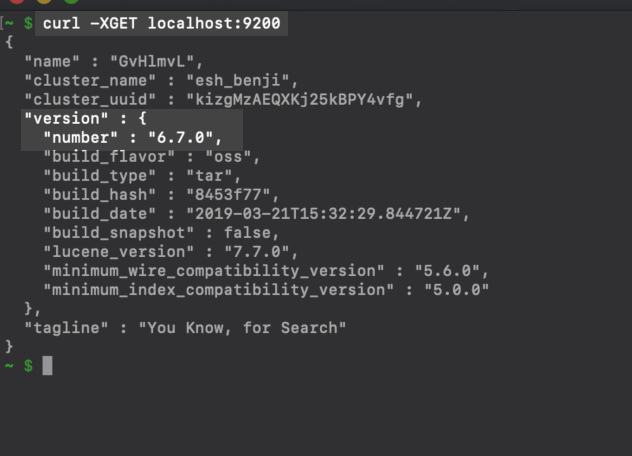
- Confirm that Elasticsearch is running by navigating to
https://{YOUR_SERVER}.com:9200orhttp://localhost:9200in your web browser, or you can alternatively use this cURL request:
1 2 | curl -X GET localhost:9200 # or curl -XGET "https://{DOMAIN_NAME}:9200" |
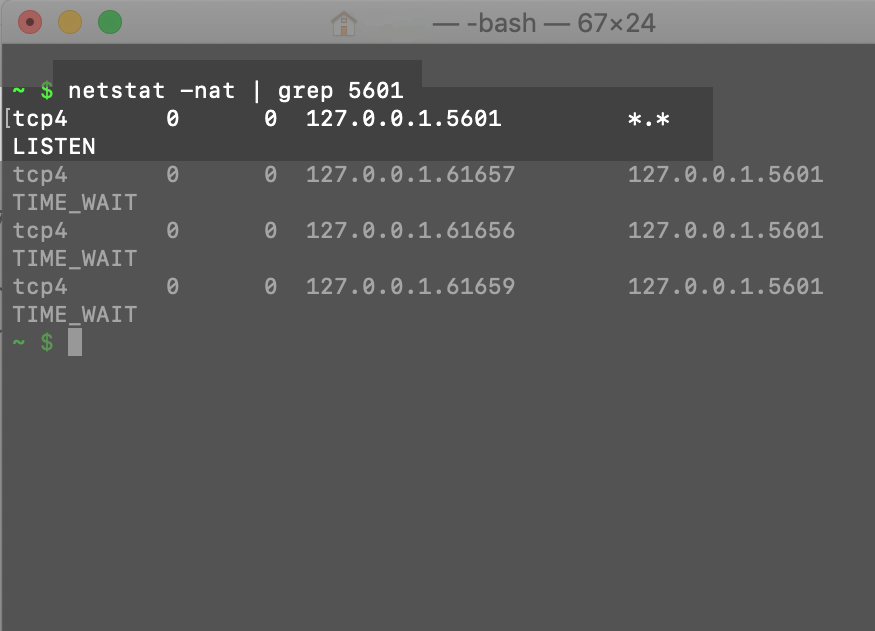
 You should confirm Kibana is running by navigating to port
 5601 in new tab in your browser. Use netstat -nat | grep 5601 or ps aux | grep 5601 to confirm Kibana is actually running on the default port. Alternatively, you can look in the kibana.yml configuration file that will typically be located in the /etc/kibana/ directory, depending on the system and how it was installed:
- You must execute these commands with
sudoprivileges and have root access to your server or machine. If you are securing Kibana on a server, make certain you have SSH remote access with a private key and a solid working of knowledge of UNIX commands.
NOTE: All of the command examples in this tutorial should be executed while signed into the user (most likely root) which the Elasticsearch services will be operating under. Use the whoami command to see what user you are currently signed in as.
Creating a Kibana-Keystore for Credentials
- A common mistake many users make is hard-coding their authentication credentials in the
kibana.ymlfile. This will typically leads to security issues as this password will be stored as plain-text that can lead to login errors due to typos as shown in the below image. - Creating a Kibana keystore is a good alternative to hard-coding credentials. However, you will need to access the
kibana.ymlfile and make a few changes if you want to store the credentials in the Elastic Stack’s configuration files.
Configure the Elasticsearch User Credentials in the kibana.yml File
You need to find and edit the kibana.yml configuration file in order to configure the Elasticsearch username and password.
If it’s for a Homebrew installation, the path will resemble:
1 2 3 4 | # for Elasticsearch version 6.7.0 on macOS Homebrew: sudo nano /usr/local/Cellar/kibana/6.7.0/config/kibana.yml # for Elasticsearch version 7.0.0 on macOS Homebrew: sudo nano /usr/local/Cellar/kibana/7.0.0/config/kibana.yml |
If you are trying to configure passwords for Kibana on a Linux server, then the file will usually be located at:
1 | sudo nano /etc/kibana/kibana.yml |
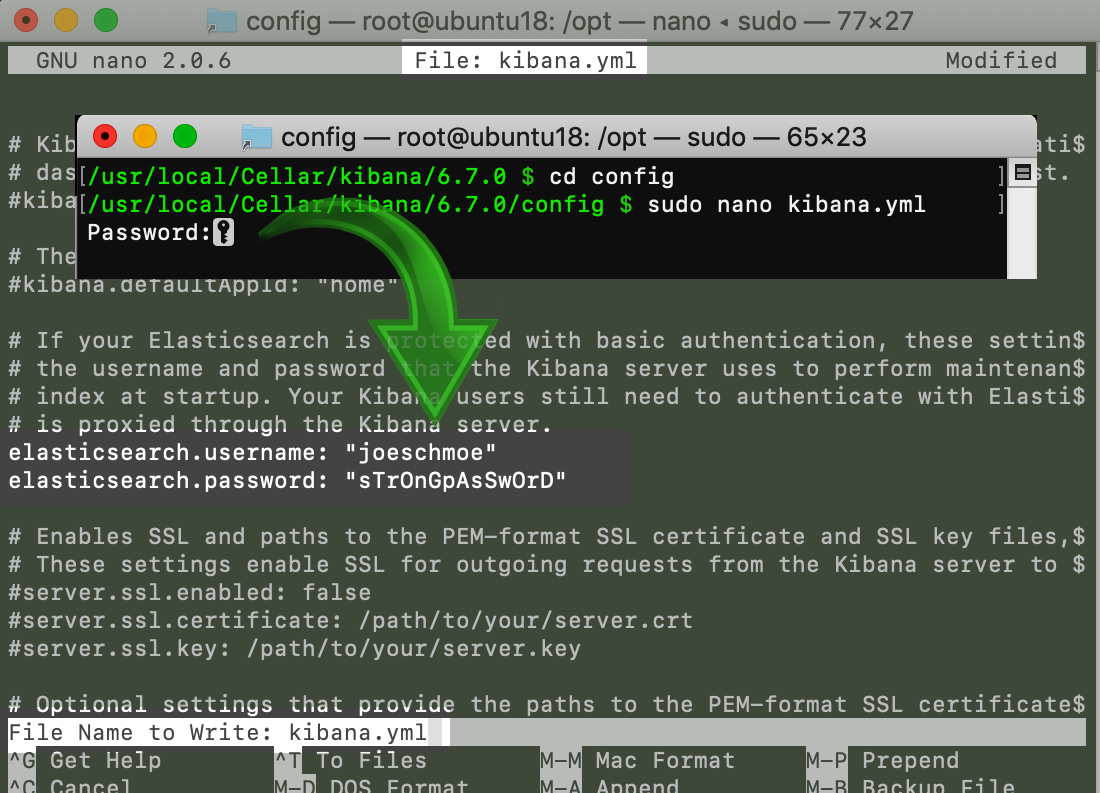
Once you have access to the YAML file, be sure you uncomment the elasticsearch.username and elasticsearch.password fields by removing the # at the beginning of the line and then place the username and password inside the respective quotation marks ("") on each line.
Configure the Elasticsearch Username and Password in the kibana.yml Configuration File:
 If you’re using the
 nano text editor, be sure you press the CTRL+O keys, to save your changes, and then the CTRL+X keys to exit nano.
Creating a Kibana Keystore
- To create the keystore you will need to execute the following command in the Kibana directory on your machine or server:
1 | ./bin/kibana-keystore create |
- The
kibanadirectory is located in the/usr/local/Cellardirectory on a macOS machine,
provided it was installed with Homebrew.
Most Linux installations will have Kibana installed at /etc/kibana.
If you are running Kibana as a foreground service in a terminal or command prompt window, you will be able to just execute this command in the same directory as the Kibana folder that is running the service.
Creating a kibana-keystore in a macOS terminal:

If done correctly, the terminal should return a response similar to:
1 | "Created Kibana keystore in ...." |
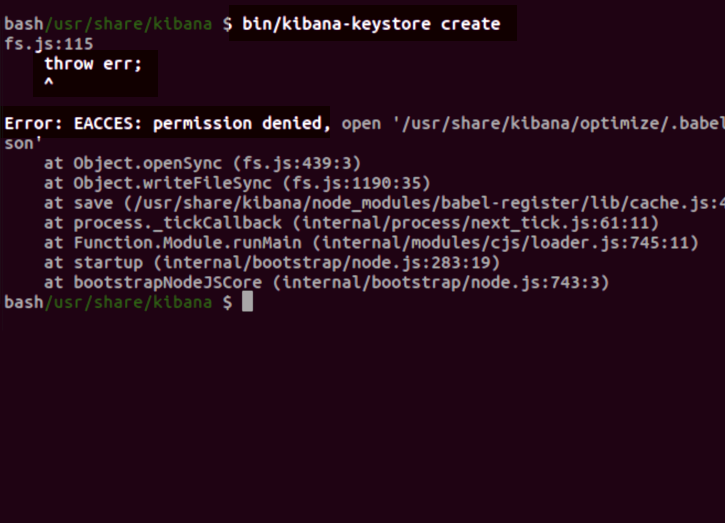
NOTE: You will need sudo privileges on a Linux server to be able to execute the create keystore command to avoid receiving permission errors.
The below graphic is what an error response will look like from attempting to create a Kibana keystore without permissions in Linux:
Adding a Sensitive-String Setting to the Kibana Keystore
WARNING: All credential settings, across all of the cluster’s nodes, must match exactly. Make sure that any Keystore string settings you add match the settings in the kibana.yml file.
- You can append the authentication credentials for Elasticsearch, or any other sensitive string settings, by using the
addcommand. - The
elasticsearch.usernameandelasticsearch.passwordsettings can be added to your keystore using these commands:
1 2 | bin/kibana-keystore add elasticsearch.username bin/kibana-keystore add elasticsearch.password |
Creating an Elasticsearch Username and Password for the Kibana Keystore:
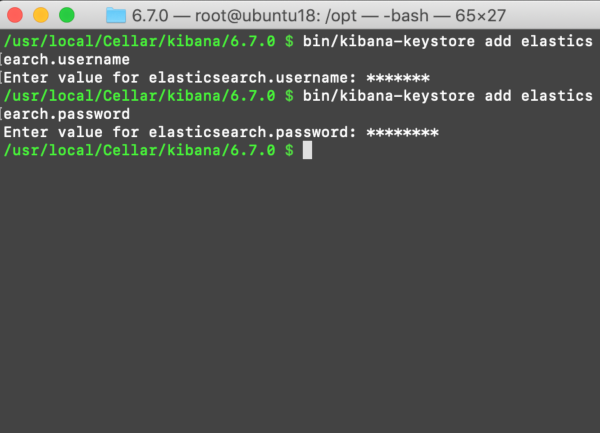
NOTE: The keyboard input for these values will be masked with asterisks (*). Be sure you input the values carefully to avoid errors.
Version 6.2 of Elasticsearch ONLY: If you want to add a password for the Elasticsearch Bootstrap settings for X-Pack:
1 | bin/elasticsearch-keystore add "bootstrap.password" |
X-Pack is installed by default on all Elastic products since version 6.3## How to List the Settings in the Keystore
- Use the
listcommand to view and track all of the sensitive-string settings appended to your keystore:
1 | sudo bin/kibana-keystore list |
Listing All of the Stored Kibana Keystore Settings:

How to Remove the Keystore Settings
- Use the
removecommand to delete a keystore setting. - After removing a keystore setting, use the
listcommand to confirm the remaining keystore settings have not changed:
1 2 | sudo bin/kibana-keystore remove elasticsearch.username sudo bin/kibana-keystore list |
Use cURL to Reload the Settings
Once you have all of the settings entered and you have confirmed that the Keystore’s settings match the settings in the YAML configuration files, execute a cURL POST request to reload the settings:
1 2 3 | curl -X POST "localhost:9200/_nodes/reload_secure_settings" # ..or: curl -X POST "https://{YOUR_DOMAIN}:9200/_nodes/reload_secure_settings" |
NOTE: You must restart the Elasticsearch service for any changes you made to the configuration or Keystore settings to go into effect.
Conclusion
Keeping your system secure requires vigilance and data breeches are an ever-expanding threat in today’s digitally-intense world. This tutorial showed you how to password protect Kibana and secure Kibana from unauthorized users gaining access to your system and precious data. By implementing the Elastic Stack security features and configure passwords for Kibana your will able to restrict access to only authorized users and ensure only those authorized users are accessing your system.


Pilot the ObjectRocket Platform Free!
Try Fully-Managed CockroachDB, Elasticsearch, MongoDB, PostgreSQL (Beta) or Redis.
Get Started