How to Integrate Elasticsearch into a Web App Using NodeJS and Express - Part 1
Introduction
The purpose of this demo is to highlight how to integrate Elasticsearch into a simple web application. Elasticsearch can add advanced search functionality to a web application and can make drastically improve user experience. The demo application we will allow us to search for existing articles based on the title so we don’t accidentally write an article that already exists.
This article is done in two parts. Part 1 mainly deals with creating the backend, connecting to Elasticsearch, and adding some demo data to Elasticsearch while Part 2 mainly consists of creating the front-end and allowing it to communicate with the backend.
We hope this demo helps you in understanding how to integrate Elasticsearch into a web application.
Note
- We are creating our application on localhost on Mac OSX. Your specific parameters will vary so you can use this demonstration as a guide and modify the code to suit your specific situation.
Install NodeJS
The backend of our demo application will run on NodeJS, which allows you to code your backend in Javascript. If you don’t already have NodeJS installed download and run your operating system’s installer from https://nodejs.org/en/download/. NodeJS comes with npm ( node package manager ) which we will also be utilizing to install javascript libraries.
Create the a basic app with NodeJS and Express
Now create your main project folder from the command line or through your OS. We will use the command line.
1 | mkdir search-articles |
Navigate into that directory.
1 | cd search-articles/ |
Initialize your project with npm. This will create a package.json file in your directory which will keep track of the packages you use in this app like Express.
1 | npm init |
Npm will prompt with a few questions but you can hit enter for all of them except one. We change the entry point from index.js to app.js.
1 | entry point: (index.js) app.js |
Next we install the Express package which is a web application framework that will make building our app easier. We use npm to install it like this.
1 | npm install express --save |
This will install the express package into your project. You’ll now have a node_modules folder with the express dependency listed. The -—save flag will add the package as a dependency in your package.json.
File: search-articles/package.json
1 2 3 4 5 6 7 8 9 10 11 12 13 14 | { "name": "search-articles", "version": "1.0.0", "description": "", "main": "app.js", "scripts": { "test": "echo "Error: no test specified" && exit 1" }, "author": "", "license": "ISC", "dependencies": { "express": "^4.16.4" } } |
Create you app.js file
Now we need to create our app.js file which will be then entry point for our application. This file will act as the backend for our application. We’ll make the file using the command line:
1 | touch app.js |
Now open app.js using your preferred IDE and let’s make a simple Hello World app to verify our app is running first and we’ll tack on more functionality after we’ve verified it works. With express creating an application is easy:
File: search-articles/app.js
1 2 3 4 5 6 7 8 | var express = require('express'); var app = express(); app.get('/', function (req, res) { res.send('Hello World!'); }); app.listen(3000, function () { console.log('App listening for requests...'); }); |
Here’s what we did: Imported the express library Used express to create an application Created a GET route on the application that responds to with ‘Hello World!’ whenever the homepage is requested Listens for a connection on port 3000
Now let’s run our application with NodeJS to see if it works.
1 | node app.js |
Now you can see from our console.log that our app is listening for requests.
1 | App listening for requests... |
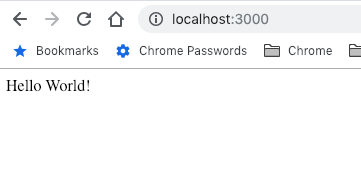
Let’s make sure we can access our app from our browser by going to localhost:3000.
As you can see when we make a request to localhost:3000 from the browser we get our “Hello World!” response
Install Elasticsearch
Now you need to install Elasticsearch for your operating system. You can find specific instructions for each operating system in the Elasticsearch documenation here: https://www.elastic.co/guide/en/elasticsearch/reference/current/targz.html
Find the bin directory where it was installed and execute it from the terminal. Your directory might be different but here is how we executed it.
1 | ~/Documents/DEV/Elastic/elasticsearch-6.6.1/bin/elasticsearch |
You should see a series of messages indicating that Elasticsearch has started up. By default it runs on port 9200 and we can test it by making a GET request using curl:
1 | $ curl -X GET "localhost:9200/" |
If it’s successful you should see something like this:
1 2 3 4 5 6 7 8 9 10 11 12 13 14 15 16 17 | { "name" : "pn0zUv9", "cluster_name" : "elasticsearch", "cluster_uuid" : "GmzCPer3SP-AZ_Nd_zGQ4g", "version" : { "number" : "6.6.1", "build_flavor" : "default", "build_type" : "tar", "build_hash" : "1fd8f69", "build_date" : "2019-02-13T17:10:04.160291Z", "build_snapshot" : false, "lucene_version" : "7.6.0", "minimum_wire_compatibility_version" : "5.6.0", "minimum_index_compatibility_version" : "5.0.0" }, "tagline" : "You Know, for Search" } |
Install the elasticsearch npm package
To interact with the Elasticsearch service we will need to use the elasticsearch npm package. Use npm to install the package like this:
1 | npm install elasticsearch --save |
Create a connection from Node to Elasticsearch
Now we can use the library to create a connection from our application to Elasticsearch. We’ll use a separate Javascript file to create the connection and import it into our application later. Right now let’s concentrate on making the connection. Create a file called connection.js with the following code:
1 2 3 4 5 6 7 | var elasticsearch = require("elasticsearch"); var client = new elasticsearch.Client({ hosts: ["http://localhost:9200"] }); module.exports = client; |
Here’s what we did: We imported the elasticsearch library We created a client which established our connection to Elasticsearch on localhost:9200 and this client will serve as our connection to Elasticsearch. * We exported the client so we could use our Elasticsearch connection in other Javascript files.
Now let’s test the connection with Elasticsearch by requesting the health status from Elasticsearch. We’ll create a new file called health.js to check.
1 | touch health.js |
File: search-articles/health.js
1 2 3 4 5 6 | var client = require("./connection.js"); /* Get the health status */ client.cluster.health({},function(err,resp,status) { console.log("-- Client Health --",resp); }); |
We can run this file by itself like so:
1 | node health.js |
1 2 3 4 5 6 7 8 9 10 11 12 13 14 15 | Health: { cluster_name: 'elasticsearch', status: 'yellow', timed_out: false, number_of_nodes: 1, number_of_data_nodes: 1, active_primary_shards: 47, active_shards: 47, relocating_shards: 0, initializing_shards: 0, unassigned_shards: 43, delayed_unassigned_shards: 0, number_of_pending_tasks: 0, number_of_in_flight_fetch: 0, task_max_waiting_in_queue_millis: 0, active_shards_percent_as_number: 52.22222222222223 } |
We got back the health of our elasticsearch instance which means we’re successfully connected to Elasticsearch! That’s a significant hurdle we just accomplished.
Create an Index
Next we’ll write a script that creates an index in Elasticsearch. Remember that an index in Elasticsearch is essentially creating a database.
Create new file called createIndex.js
1 | touch createIndex.js |
File: search-articles/createIndex.js
1 2 3 4 5 6 7 8 9 10 11 12 | var client = require('./connection.js'); client.indices.create({ index: 'articles' },function(err,resp,status) { if(err) { console.log(err); } else { console.log("Create index response: ",resp); } }); |
Here’s what we did:
We imported our Elasticsearch client
Then we used the client to create an index called articles
Let’s run it and see what happens:
1 | node createIndex.js |
1 2 3 | Create index response: { acknowledged: true, shards_acknowledged: true, index: 'search-articles' } |
As you can see by the response we have successfully created our index.
Populate the Index with demo data
First we’ll create some data for demo in a json file. We’ll just show a small snippet of the actuall data so you can see the fields and structure.
1 | touch articles.json |
File: search-articles/articles.json
1 2 3 4 5 6 7 8 9 10 11 12 13 14 15 16 17 18 19 20 21 22 23 24 25 26 27 28 29 | [ { "ID": "216", "Title": "How to Make a Simple App Using Elasticsearch, NodeJS, Bootstrap, and Express", "Meta Description": "A demo of how to make a simple app using Elasticsearch with NodeJS and Express.", "Meta Keywords": ["make simple app using Elasticsearch"], "Categories": ["Elasticsearch"], "Tags": ["Elasticsearch", "NodeJS", "Bootstrap", "Express"], "Status": "Published" }, { "ID": "215", "Title": "How to update a Document in MongoDB", "Meta Description": "A demo of how to update a Document using MongoDB.", "Meta Keywords": ["update document mongodb"], "Categories": ["MongoDB"], "Tags": ["Elasticsearch"], "Status": "Draft" }, { "ID": "214", "Title": "Why you should use CockroachDB", "Meta Description": "In this article we analyze the reasons you might want to look into CockroachDB.", "Meta Keywords": ["cockroachdb"], "Categories": ["CockroachDB"], "Tags": ["CockroachDB"], "Status": "Draft" } ] |
Now we can create a new script to load our search-articles index with our demo data.
File: search-articles/bulkLoad.js
1 2 3 4 5 6 7 8 9 10 11 12 13 14 15 16 17 18 19 20 21 22 23 24 25 26 27 28 29 30 31 32 33 34 35 36 37 38 39 40 41 42 43 44 45 | var client = require('./connection.js'); var articlesJson = require("./articles.json"); var bulkArticlesArray = []; var makeBulkArray = function(articles, callback){ for (var current in articles){ bulkArticlesArray.push( { index: {_index: 'search-articles', _type: 'articles', _id: articles[current].ID } }, { "Title": articles[current]["Title"], "Meta Description": articles[current]["Meta Description"], "Meta Keywords": articles[current]["Meta Keywords"], "Categories": articles[current]["Categories"], "Tags": articles[current]["Tags"], "Status": articles[current]["Status"] } ); } callback(bulkArticlesArray); } var indexArticlesBulk = function(bulkArr, callback) { client.bulk({ maxRetries: 5, index: 'search-articles', type: 'articles', body: bulkArr },function(err,resp,status) { if (err) { console.log(err); } else { callback(resp.items); } }) } makeBulkArray(articlesJson,function(response){ console.log('Bulk Articles: \n'); console.log(JSON.stringify(response, null, 2)); indexArticlesBulk(response,function(response){ console.log(response); }) }); |
Here’s what was done:
We required the client which has the connection to Elasticsearch
The articles are loaded imported into the variable articlesJson
The function makeBulkArray takes the articles as input and creates an array in the format that Elasticsearch will require for bulk input.
The function indexArticlesBulk uses the client to make a bulk call to Elasticsearch to index the array.
Now run the script:
1 | node bulkLoad.js |
We can tell from the last response that our indexing was successful:
1 2 3 4 5 6 7 8 9 10 11 12 13 14 15 16 17 18 19 20 21 22 23 24 25 26 27 28 29 30 31 32 33 34 35 36 37 38 39 40 41 42 43 44 45 46 47 48 49 50 51 52 53 54 55 56 57 58 59 60 61 62 63 64 65 66 67 68 69 70 71 72 73 74 75 76 77 78 79 80 81 82 83 84 85 86 87 88 89 90 91 92 93 94 95 96 97 98 99 100 | Bulk Articles: [ { "index": { "_index": "search-articles", "_type": "articles", "_id": "216" } }, { "Title": "How to Make a Simple App Using Elasticsearch, NodeJS, Bootstrap, and Express", "Meta Description": "A demo of how to make a simple app using Elasticsearch with NodeJS and Express.", "Meta Keywords": [ "make simple app using Elasticsearch" ], "Categories": [ "Elasticsearch" ], "Tags": [ "Elasticsearch", "NodeJS", "Bootstrap", "Express" ], "Status": "Published" }, { "index": { "_index": "search-articles", "_type": "articles", "_id": "215" } }, { "Title": "How to ...", "Meta Description": "A demo of how to make a simple app using Elasticsearch with NodeJS and Express.", "Meta Keywords": [ "make simple app using Elasticsearch" ], "Categories": [ "Elasticsearch" ], "Tags": [ "Elasticsearch" ], "Status": "Published" }, { "index": { "_index": "search-articles", "_type": "articles", "_id": "214" } }, { "Title": "How to ... Abba Zabba", "Meta Description": "A demo of how to make a simple app using Elasticsearch with NodeJS and Express.", "Meta Keywords": [ "make simple app using Elasticsearch" ], "Categories": [ "Elasticsearch" ], "Tags": [ "Elasticsearch" ], "Status": "Published" } ] [ { index: { _index: 'search-articles', _type: 'articles', _id: '216', _version: 3, result: 'updated', _shards: [Object], _seq_no: 2, _primary_term: 1, status: 200 } }, { index: { _index: 'search-articles', _type: 'articles', _id: '215', _version: 3, result: 'updated', _shards: [Object], _seq_no: 2, _primary_term: 1, status: 200 } }, { index: { _index: 'search-articles', _type: 'articles', _id: '214', _version: 3, result: 'updated', _shards: [Object], _seq_no: 2, _primary_term: 1, status: 200 } } ] |
Now that we have some data in our index, let’s move on to creating some routes that the browser can use to make queries with Elasticsearch. First we’ll make the routes, then we’ll test them, then we’ll create the user-interface so we can finally perform searches from the browser.
Establish our final routes using Express
It’s easy to add and change routes using Express. We’ll do a few things in this next step.
We want to create a GET route that executes an Elasticsearch search.
We want to modify our home route to return an actual HTML page index.html
There’s a lot more code changes so let’s take a look at our new app.js file:
1 2 3 4 5 6 7 8 9 10 11 12 13 14 15 16 17 18 19 20 21 22 23 24 25 26 27 28 29 30 31 32 33 34 35 36 37 38 39 40 41 42 43 | var client = require("./connection.js"); var express = require('express'); var app = express(); const path = require('path'); // Require library to help with filepaths app.use(express.urlencoded({ extended: false })); // Middleware to recognize strings and arrays in requests app.use(express.json()); // Middleware to recognize json in requests app.use(express.static("public")); // Must have this or else access to index.js will 404 // Homepage route app.get('/', function (req, res) { res.sendFile(path.join(__dirname+'/index.html')); }); // Route to search for Articles by title app.get('/search-title/:title', function (req, res) { // Access title like this: req.params.title /* Query using slop to allow for unexact matches */ client.search({ index: 'search-articles', type: 'articles', body: { "query": { "match_phrase": { "Title": { query: req.params.title, slop: 100 } } } } }).then(function(resp) { console.log("Successful query! Here is the response:", resp); res.send(resp); }, function(err) { console.trace(err.message); res.send(err.message); }); }); // Start listening for requests on port 3000 app.listen(3000, function () { console.log('App listening for requests...'); }); |
Here’s what we did:
We added a route that can be reached at http://localhost:3000/search-title/:title where :title is replaced by a term you are searching for like http://localhost:3000/search-title/Express.
Inside the route we use our client to make a .search request which uses the search term passed in req.params.title to find articles with a Title that match. We will test our request by entering http://localhost:3000/search-title/Express into our browser.

The result verifies that our route worked. If you look closely at the result you can see that the number of “hits” (matches) was 1, and it returned the document which had “Express” in the “Title” field.
1 | {"took":2,"timed_out":false,"_shards":{"total":5,"successful":5,"skipped":0,"failed":0},"hits":{"total":1,"max_score":0.2876821,"hits":[{"_index":"search-articles","_type":"articles","_id":"216","_score":0.2876821,"_source":{"Title":"How to Make a Simple App Using Elasticsearch, NodeJS, Bootstrap, and Express","Meta Description":"A demo of how to make a simple app using Elasticsearch with NodeJS and Express.","Meta Keywords":["make simple app using Elasticsearch"],"Categories":["Elasticsearch"],"Tags":["Elasticsearch","NodeJS","Bootstrap","Express"],"Status":"Published"}}]}} |
- In our app.js file we also changed the home route to return an
index.htmlfile. In order to do this we needed to make a directory public. In this public directory is where we will store our html, css, and js that is used on the front-end. We also required thepathpackage to help with directory names. We haven’t created thatindex.htmlfile but keep reading as that’s the next thing we do in Part 2 of this tutorial.
Continue to Part 2
Please continue following on with Part 2 of this tutorial. We have accomplished a great deal in this first part of the article, creating the backend for a simple web app and connecting to Elasticsearch and in Part 2 we will work on creating a front-end and allowing the front and back to communicate.
Click here to continue to Part 2.


Pilot the ObjectRocket Platform Free!
Try Fully-Managed CockroachDB, Elasticsearch, MongoDB, PostgreSQL (Beta) or Redis.
Get Started