How to install the low-level .NET client for Elasticsearch
Introduction
The dependency-free low-level .NET client for Elasticsearch is ElasticLowLevelClient. It has a few conventions, mainly; it takes post data and uses it to send data.
Just so that you know, the other .NET client is a high-level NEST client called ElasticClient. It’s used for mapping document IDs, naming properties, and index names, to name a few. It is also JSON .NET dependent. We won’t focus on the high-level client for now.
This tutorial shows you step-by-step how to install low level .net client Elasticsearch. The ElasticLowLevelClient let’s you can post or send a group ofstring or even object, and then Elasticsearch will use a special format to serialize it. With Elasticsearch’s low-level .NET client, you’ll be able to post a string or byte[] array or pass an object and the special conversion formatting still applies in those cases. Consistent and reliable describes the low-level .NET client for Elasticsearch.
Prerequisites
.NET Core – Install .NET SDK and the .NET Core Runtime environment. They’re available for macOS, Windows, and Linux platforms.
Elasticsearch – To work with the .NET, you must have Elasticsearch v5 or a higher version. As a rule, download the latest version.
Install the library using the NuGet Package Manager Console.
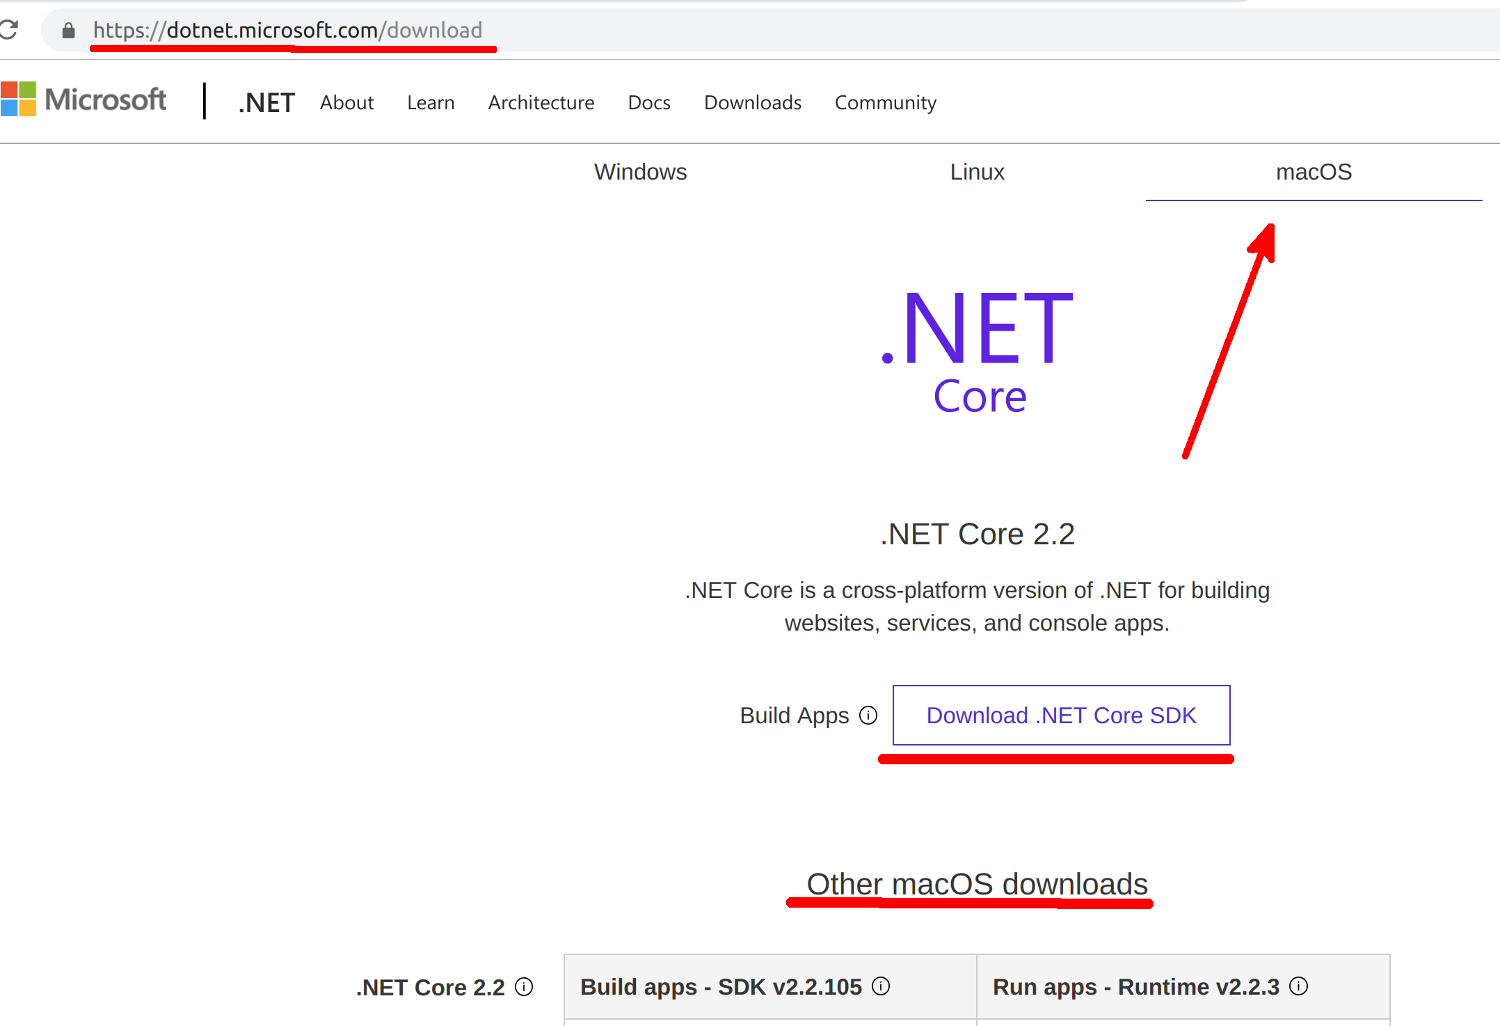
.NET Core SDK and .NET Runtime Downoad and Installation Instructions for the macOS Platform
After downloading the .NET core SDK and .NET runtime for macOS, install both environments on the macOS platform.
This image shows where you would access the required downloads for the macOS platform from the Microsoft Dot Net Download page.

.NET Core SDK and .NET Runtime Download and Installation Instructions for Debian-based Platform
Install the .NET Core SDK and .NET runtime environments for Debian in this way:
1 2 3 4 | sudo add-apt-repository universe sudo apt-get install apt-transport-https sudo apt-get update sudo apt-get install aspnetcore-runtime-2.2 |
Alternatively, visit Microsoft’s .NET download website and download and install the environments for platform manually. It will require that you register the Microsoft key prior to downloading. From the downloads page, click the arrow under Linux Distribution to register the Microsoft key for your environment. Options include CentOS/Oracle, Debian, Fedora, RHEL, Open SUSE Leap, SLES, and Ubuntu.
After you register the Microsoft key, download packages repository
If you haven’t already registered the Microsoft key from your download, do so and then you can downloaded the packages repository.
For Ubuntu use
wget.Below is the code for Ubuntu 18.
1 | wget -q https://packages.microsoft.com/config/ubuntu/18.10/packages-microsoft-prod.deb |
- ..For Unbuntu 16, here’s the code.
1 | wget -q https://packages.microsoft.com/config/ubuntu/16.04/packages-microsoft-prod.deb |
Next, install Linux’s .deb package repository for Microsoft products:
1 | sudo dpkg -i packages-microsoft-prod.deb |
Install the .Net Core SDK for the Linux platform:
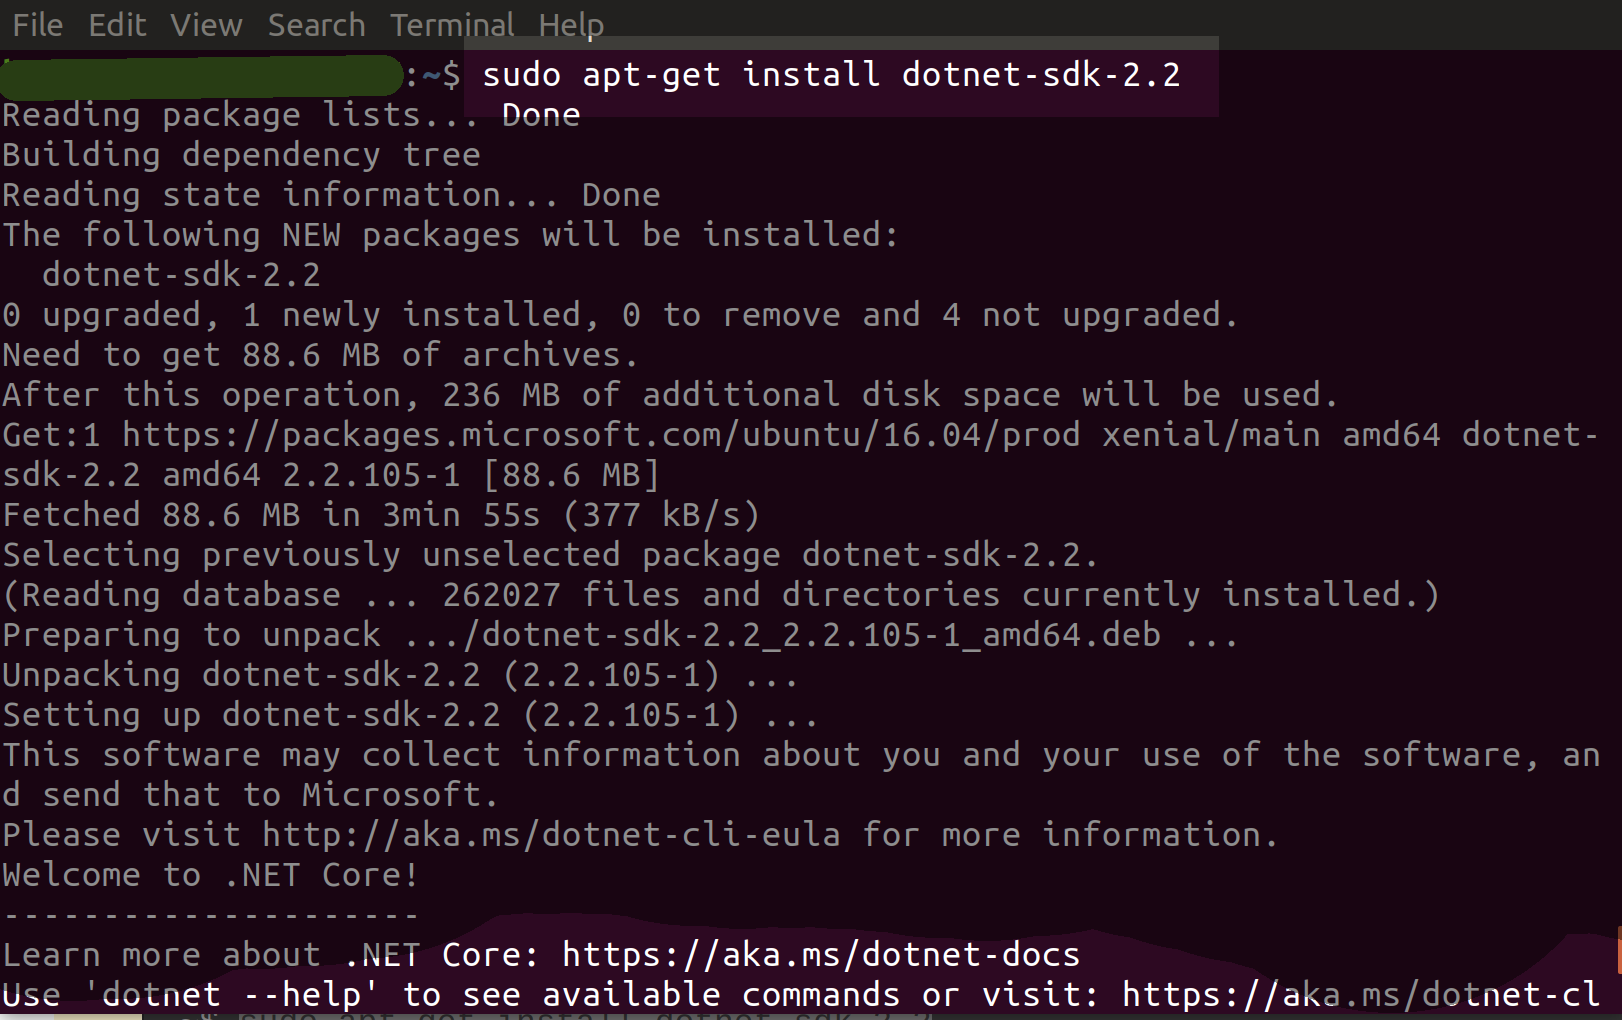
1 | sudo apt-get install dotnet-sdk-2.2 |
Here’a an example of the .Net client package installation for Ubuntu.

Here’s what you should do if you have problems installing the package repositories.
Error Message states cannot find the dotnet package:
- Uninstall the package repositories and then reinstall them. Here’s how.
1 2 3 | sudo dpkg --purge packages-microsoft-prod && sudo dpkg -i packages-microsoft-prod.deb sudo apt-get update sudo apt-get install dotnet-sdk-2.2 |
Use the [manual download]https://dotnet.microsoft.com/download/linux-package-manager/ubuntu18-04/runtime-2.2.0) if problems persist.
Instructions for installing .NET Core SDK on Red Hat Linux
1 2 | yum install rh-dotnet22 -y scl enable rh-dotnet22 bash |
Instructions on how to install the .NET framework on the Windows platform
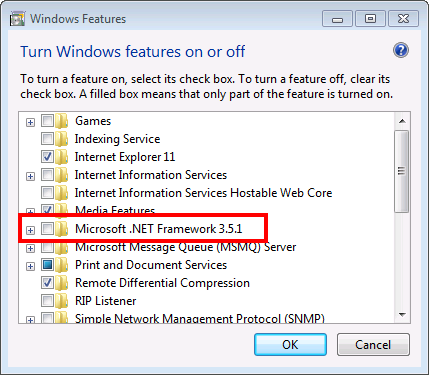
Conduct a search bar of the Start menu . Look for "turn windows features on". Another way to get to Windows Features is by way of the Control Panel.
Windows Features and the Microsoft .NET Framework option is shown below.

Select Microsoft "Microsoft .NET Framework" and then click “OK.” Restart your computer.
For more information including support for the .NET framework for Windows, visit Microsoft’s .NET Framework website.
Instructions for installing the NET Low-Level Client for Elasticsearch
Before you begin, run the programs to verify that you’ve downloaded and installed the .NET Core SDK correctly.
1 | dotnet --version |
Below is an example of the .NET version on a macOS platform.

In Visual Studio, now you can open a document you created previously if you want to use it with Elasticsearch’s low-level .Net client. However, I recommend that you create a new test project first.
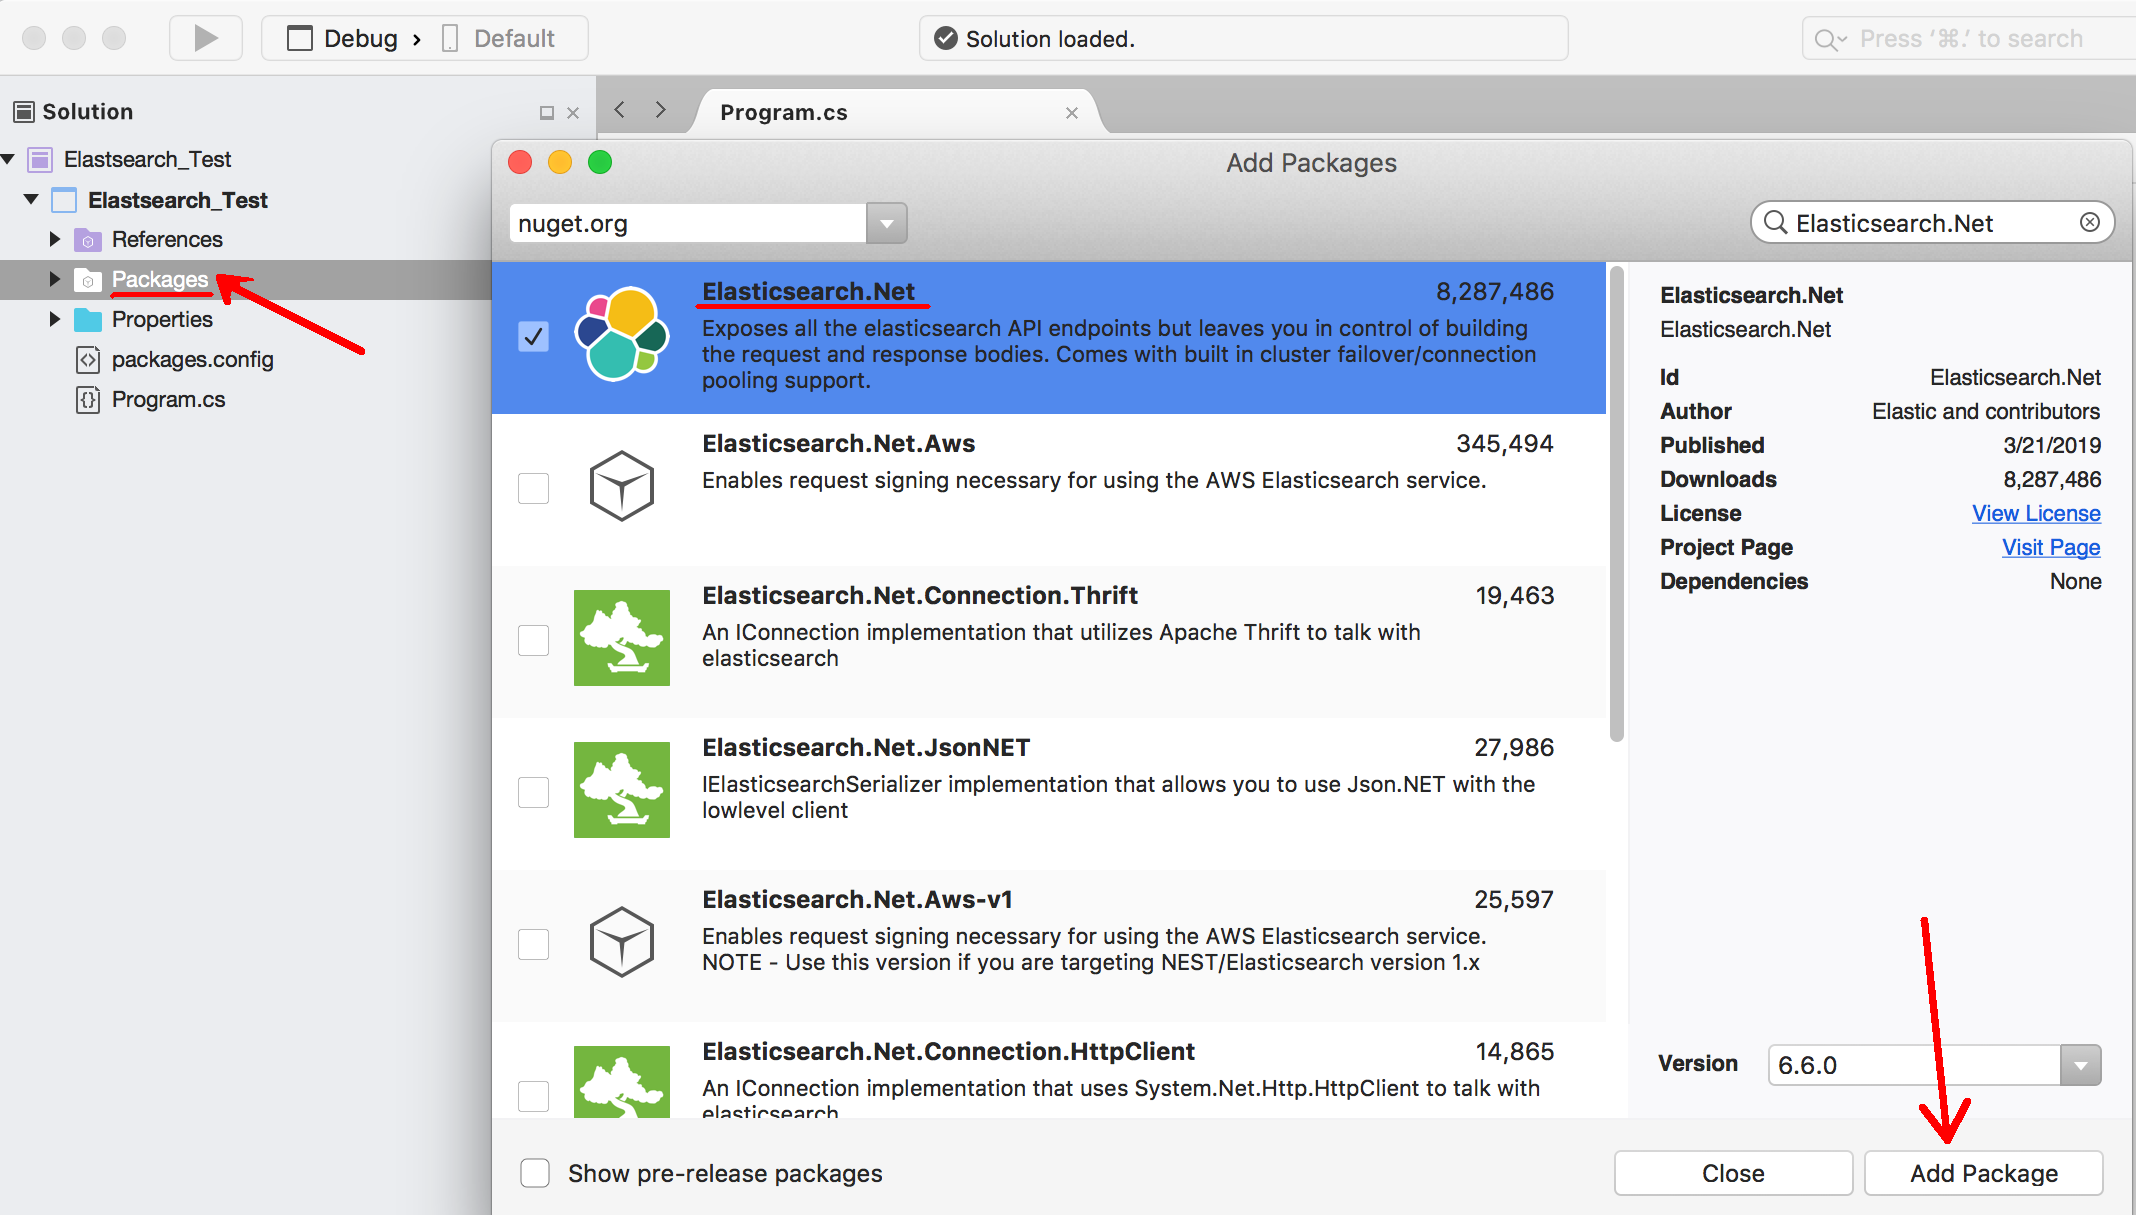
Double-click the Packages folder, and then select “Elasticsearch.net” package from the list. Click “Add Package” to install it.
The image below shows Visual Studio and the Elasticsearch.NET package option.

You’ve done it! Elasticsearch.NET low-level client is on your operating platform.
Conclusion
Elasticsearch uses two .NET clients. A high-level .NET NEST client that is dependent on third-party JSON .NET. It is responsible for mapping and inferences for many document-naming conventions. It gets much praise.
However, this tutorial focused on the other low-level client, which is free of dependents. Today you learned how to install low level .NET client Elasticsearch, the ElasticLowLevelClient. It has fewer conventions in number, yet handles important functions.
Pilot the ObjectRocket Platform Free!
Try Fully-Managed CockroachDB, Elasticsearch, MongoDB, PostgreSQL (Beta) or Redis.
Get Started


