How To Install And Set Up The Go Client For Elasticsearch
How To Install And Setup The Go Client For Elasticsearch
Introduction
Elasticsearch is known for its speed and flexibility, allowing you to store and query large volumes of data with ease. It currently has clients for several programming languages, including the popular Go (GoLang) language. The install and set up of the Go client for Elasticsearch is a simple process that will enable you to communicate with Elasticsearch from any GoLang application. In this tutorial, we’ll show you how to install and setup the GoLang Elasticsearch client.
NOTE: As of April 2019, the stable version for Golang is 1.12.
Installing the GoLang programming language
If you’ve already installed both GoLang and the Elasticsearch client for Go, you can safely skip this section. If not, then visit the downloads page for GoLang. You can get the MSI installer for Windows or just download the TAR source for Linux.
Installing GoLang on macOS:
You can find a package for macOS on the GoLang downloads page, but the easiest way to install Go is to use the Homebrew package manager for macOS. This can be accomplished using the following commands:
1 2 | brew update brew install go |
Set up the ‘GOPATH’ on your system
Next, you’ll need to set up the GOPATH for your system. The default GOPATH on UNIX-based systems like Linux or macOS is $HOME/go, while on Windows it will be %USERPROFILE%\go.
Export the Elasticsearch project path to ‘GOPATH’:
Use the pwd command to determine the current directory. Then, use that path in the following command to append it to GOPATH:
1 | export GOPATH={THE_PWD_PATH} |
If the Go compiler running on the server is version 1.11 or newer, GOPATH is no longer mandatory, which means you’re able to build your application outside of the GOPATH.
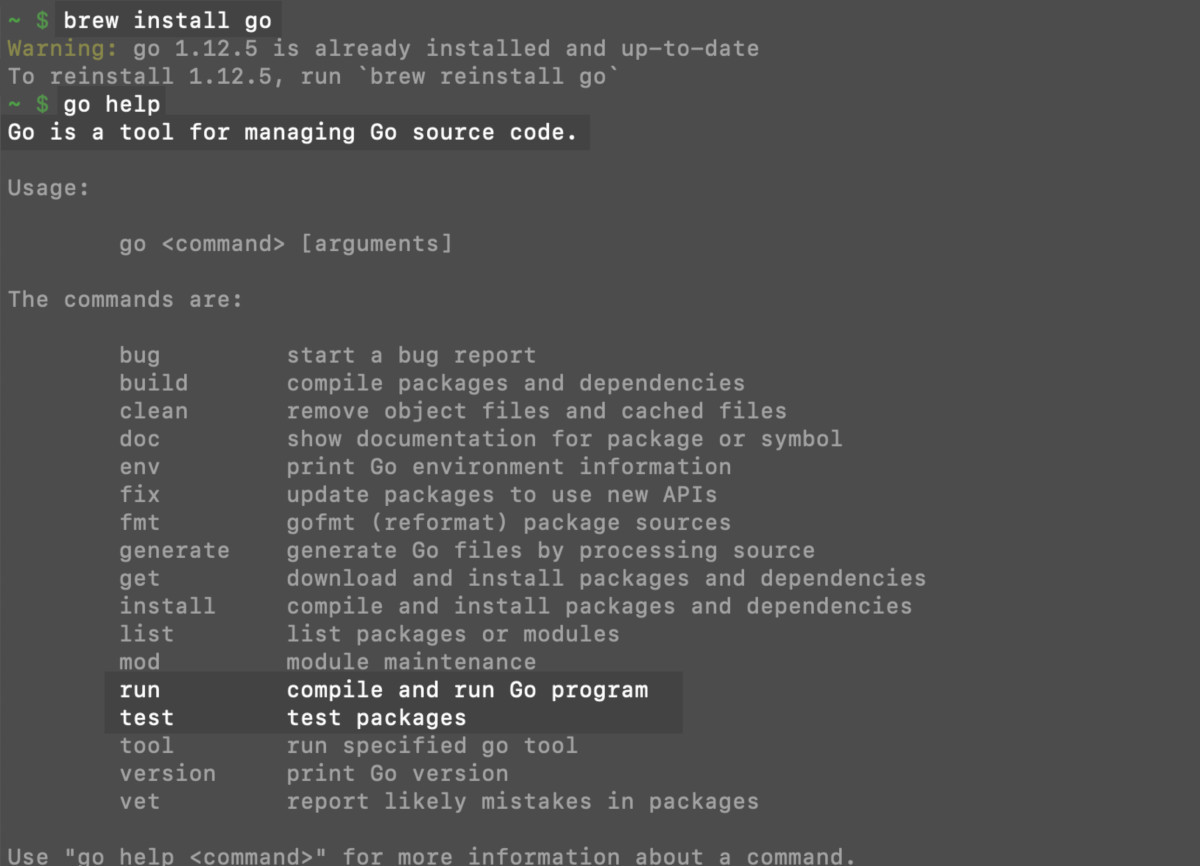
Running the Golang ‘go’ command in the terminal
Once you’ve finished installing everything, open up a terminal or command prompt window, type go, go version, or go help, and press Return. You should see output that looks like the following:
Install the ‘go-elasticsearch’ GoLang module for Elasticsearch:
A GoLang library package that includes a go.mod file is called a ‘module’. In this tutorial, we’ll be installing the GoLang Elasticsearch module, go-elasticsearch.
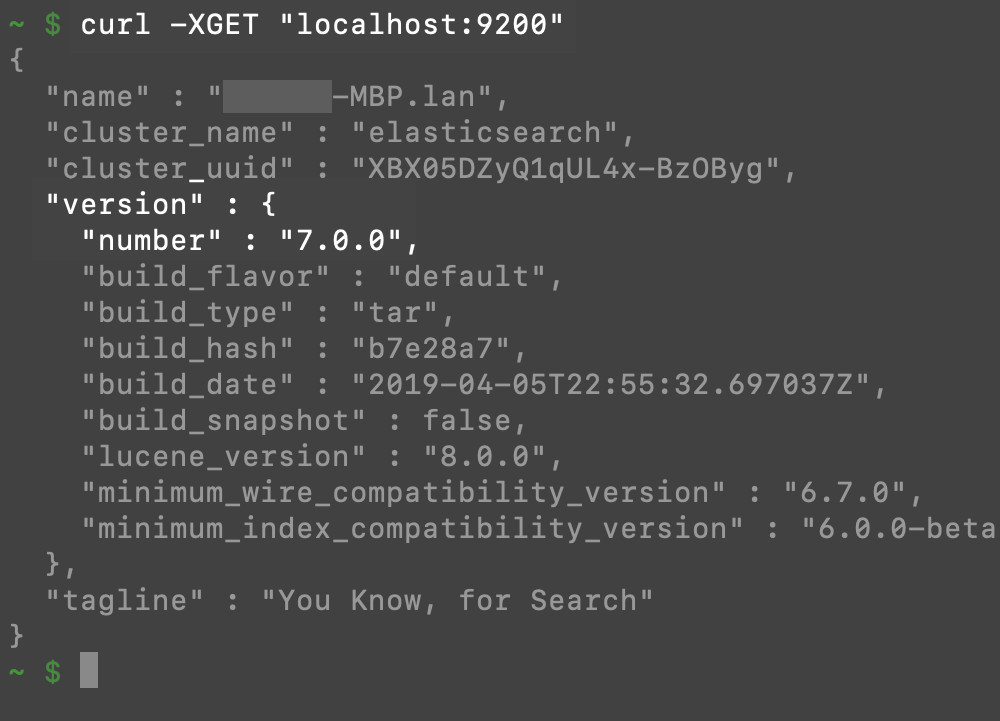
NOTE: The major version of the go-elasticsearch GoLang module must match the major version of the Elasticsearch cluster that you’re running on the server. For example, you would use version 6.x of go-elasticsearch if your Elasticsearch cluster is version 6.x. If you’re not sure what version of Elasticsearch is running, use the following cURL command:
1 | curl -XGET ""localhost:9200"" |
Make a cURL request to the port that Elasticsearch is running on to get information about the cluster:
Set up a project for the GoLang Elasticsearch app
Now that we’ve installed the GoLang Elasticsearch module, it’s time to set up a project for the app. To setup the GoLang Elasticsearch project, create a new directory using the mkdir command and then cd into it:
1 2 | mkdir elastic-app cd elastic-app |
You can add the go-elasticsearch package to your go.mod file with the cat command. You’ll be adding a require statement to this file. In our example, we’re using the name elastic-app for our Elasticsearch application, but you’ll substitute the name of the Elasticsearch application you’re building:
1 2 3 4 5 | cat > go.mod <-END module elastic-app require github.com/elastic/go-elasticsearch/v8 master END # make sure that version of the package is compatible with the Elasticsearch cluster |
NOTE: You can use another version besides require github.com/elastic/go-elasticsearch/v8 master; in fact, even multiple Elasticsearch versions in the same project are supported.
If you use sudo to create the project directory, or if the permissions for this folder are not 755, you’ll need to use chmod to avoid a permissions-related error:
1 | sudo chmod 755 elastic-app |
At this point, you will see that the GoLang compiler created a go.mod file in the directory for you.
Create the ‘main.go’ file and use the ‘go run’ to run the app
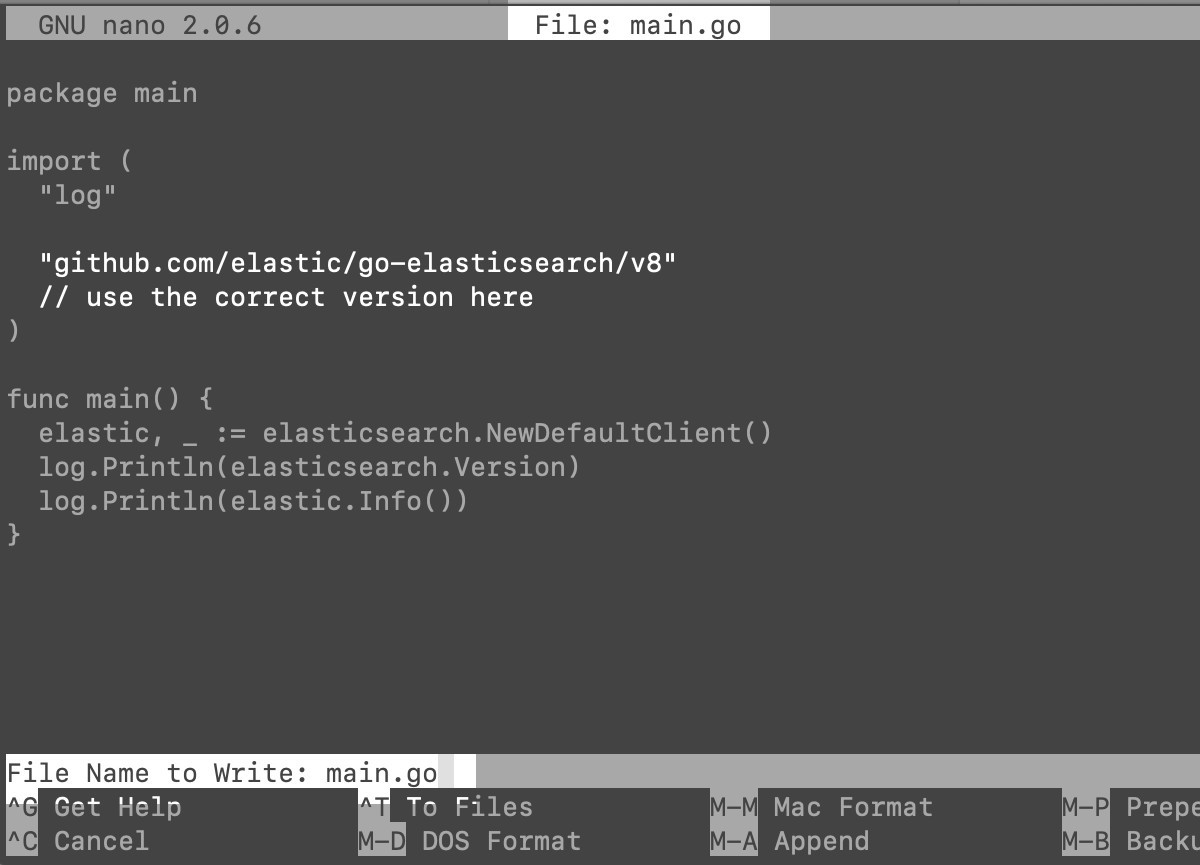
The next step is to create a new file called main.go and use an editor such as nano to edit it. The file should contain the following:
1 2 3 4 5 6 7 8 9 10 11 12 13 14 | package main import ( ""log"" ""github.com/elastic/go-elasticsearch/v8"" // use the correct version here ) func main() { elastic, _ := elasticsearch.NewDefaultClient() log.Println(elasticsearch.Version) log.Println(elastic.Info()) } |
Paste the package main text shown above into your main.go file and press CTRL+O and CTRL+X to save and exit:
In a terminal window, navigate into the application directory and use Go’s run command to test your connection to the Elasticsearch cluster:
1 | go run main.go |
Installing the ‘go-elasticsearch’ package in a GoLang directory:
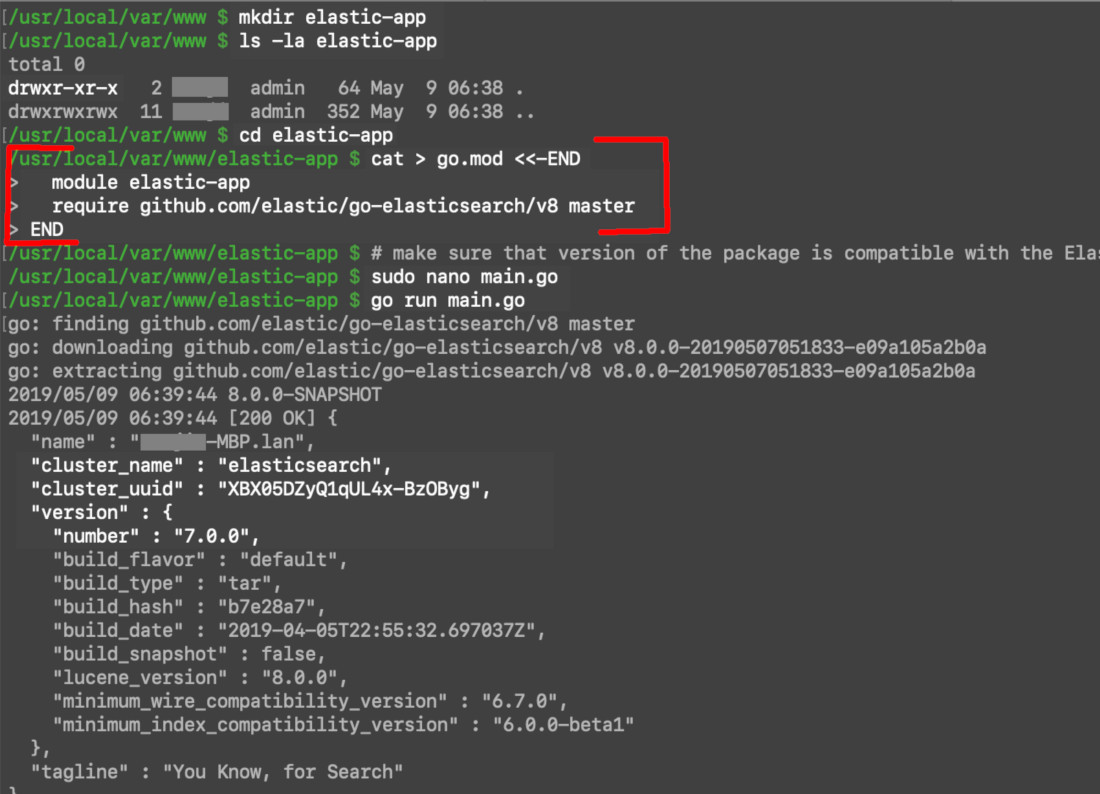
If the setup process was completed correctly, the Elasticsearch app should return some cluster information after calling the elastic.Info() method in the main.go file. The screenshot above shows an example of the type of information that would be returned to you.
Conclusion
If you want to store and analyze large volumes of data quickly and efficiently, Elasticsearch is the way to go. The go-elasticsearch client allows you to easily communicate with Elasticsearch from the popular Go programming language. Setup for the GoLang Elasticsearch client doesn’t take long– you’ll be ready to start writing code in minutes. With the instructions provided in this tutorial, you should have no trouble installing the Go Elasticsearch client and setting it up.

Pilot the ObjectRocket Platform Free!
Try Fully-Managed CockroachDB, Elasticsearch, MongoDB, PostgreSQL (Beta) or Redis.
Get Started