How to index data in Elasticsearch using the PHP client library
Introduction:
If you’re looking for a powerful full-text search engine, Elasticsearch is the logical choice. Elasticsearch offers users an official API for a few different languages, including PHP. The PHP library offers a simplified interface that maps closely with PHP syntax and makes it easy to perform Elasticsearch-related tasks like indexing, retrieving and deleting documents. In this tutorial, we’ll explain how to index an Elasticsearch document in PHP using the PHP client library.
Prerequisites
Before we attempt to index an Elasticsearch document in PHP, it’s important to make sure a few prerequisites are in place. For this task, there are a number of system requirements:
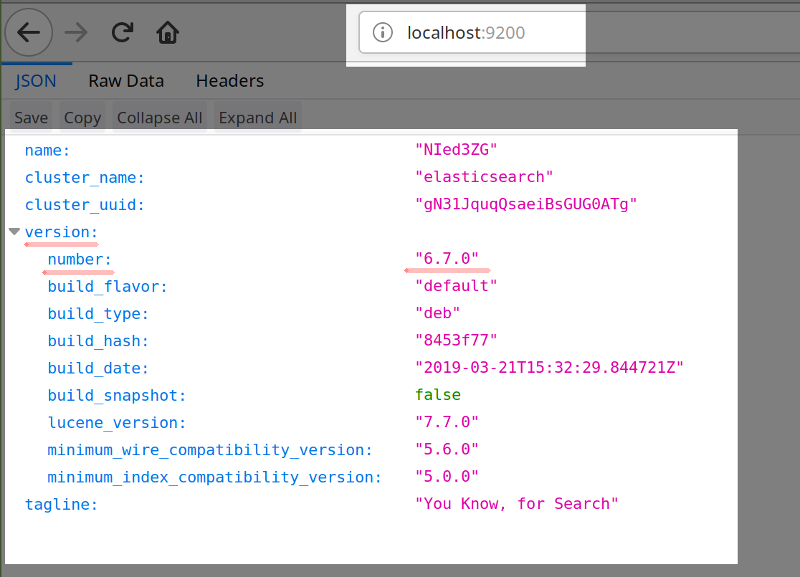
* First, an Elasticsearch cluster needs to be running. This service typically runs on port 9200 on your server. You can use your terminal or command prompt to make a cURL request (curl -XGET localhost:9200), or you can navigate to that port on your server’s domain to confirm that it’s working:
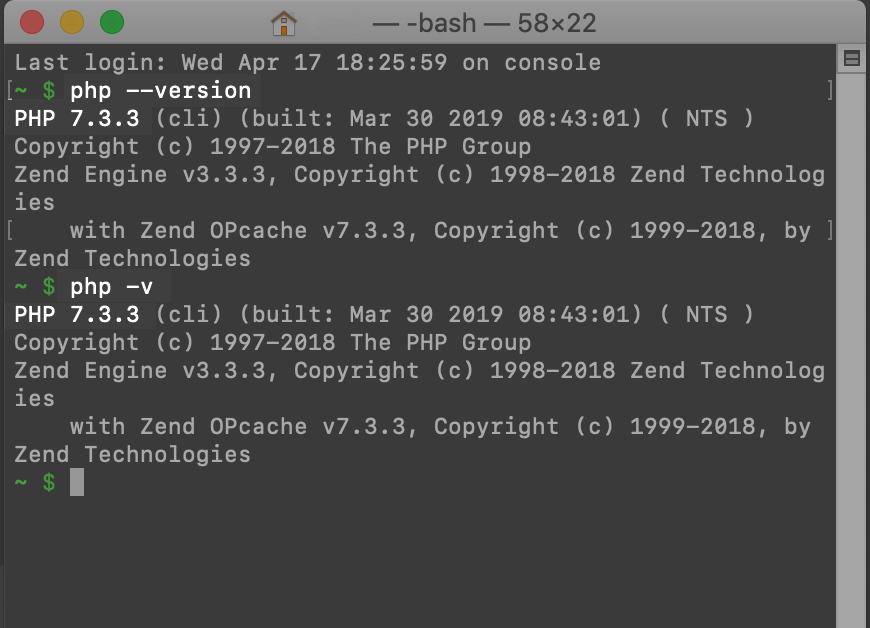
- You’ll also need to be running PHP version 7.0, or newer, in order to make use of Elasticsearch’s PHP client libraries. If you’re currently running PHP 5, you’ll have to upgrade before proceeding with this tutorial. To see what version of PHP you’re running, use the
-vor--versionoption in your terminal window:
1 2 3 | php -v # .. or: php --version |
Upgrading to version 7.x of PHP is recommended because this version has more support and also also runs much faster than version 5.
- Once you have the correct version of PHP running, confirm that the PHP low-level client
vendorlibrary is found in your project folder. If needed, you can create avendordirectory in your project folder for the client library using Composer: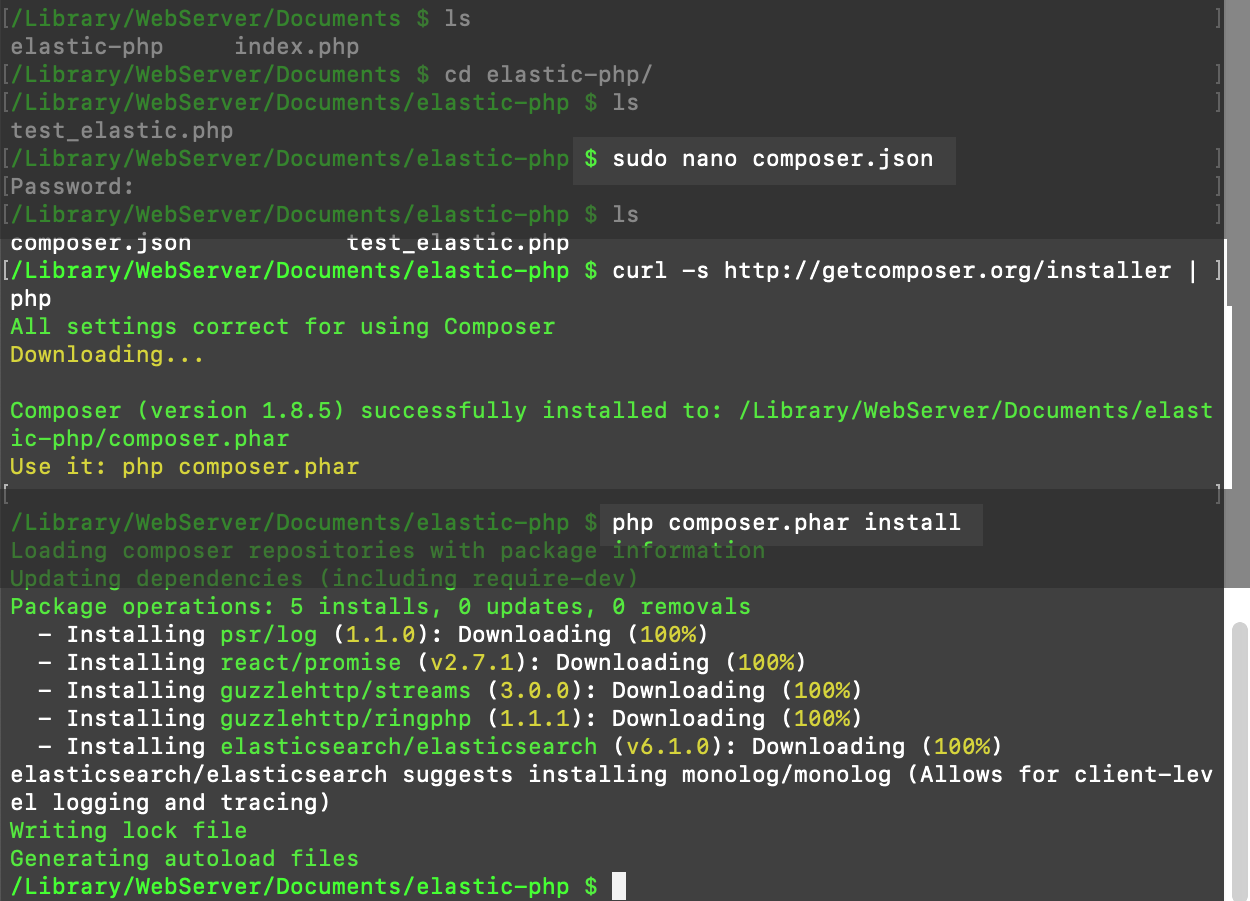
- You’ll also need to install the
ext-curlclient URL library extension for cURL. - Make sure you have SSH remote access to the server where Elasticsearch is installed; alternatively, you can have a localhost server running on your PC or Mac.
- If you planning to use Kibana to make HTTP requests, then you need to confirm that the Kibana service is running. The default port for the Kibana UI is
5601.
Setup your Elasticsearch PHP project directory
Once you’ve confirmed all your system requirements, you’ll be ready to set up your Elasticsearch PHP project directory. Simply use the cd command in your terminal to navigate to the directory containing the PHP client vendor library. If you haven’t yet created this folder, this task should be completed first. You can use the mkdir command in your terminal to create a new directory, then cd into that directory, and follow the instructions provided in Elasticsearch’s official git repository to install the PHP library via Composer.
Create a new PHP script
After navigating into the directory structure so that you’re at the same level as the vendor folder, you’ll need to create a PHP script that you’ll use to index Elasticsearch documents. To accomplish this task, use the touch command in your terminal to create a new PHP script. You might need to use sudo privileges to do this. Be sure to provide the name of the script as a parameter for the touch command:
1 2 | sudo touch index_document.php # ..or: sudo touch {SOME_NAME}.php |
NOTE: The typical naming conventions for a PHP script are camelCase or underscore_names rather than hyphenated names.
If you’re accessing a server remotely using SSH, then you’ll need to use gedit, vi, nano or another terminal-based text editor to edit the PHP script that you just created with touch. The following command can be used to edit a file using nano with sudo privileges:
1 | sudo nano index_document.php |
Include the PHP Client using the require() function
The new PHP script you just created won’t have access to the Elasticsearch client by default. To load the Elasticsearch library and its client, use the PHP require() function:
1 | Remember that the `vendor` folder, which contains the entire Elasticsearch PHP library, needs to be in the same directory as your PHP script. If it's not, then either [the low-level client either wasn't installed properly](https://github.com/elastic/elasticsearch-php#installation-via-composer), or the Composer commands were executed in another directory. If it turns out that the `vendor` folder resides in a different directory from the script's path, you'll need to specify the path so that PHP can locate it. You can also modify the script's current working path to include the `vendor` folder by using the `__DIR__` constant: |
require DIR . ‘/vendor/autoload.php’ “
Configure the PHP $hosts array to match the Elasticsearch cluster configuration
You may need to do some custom configurations to match the settings in your server or machine’s elasticsearch.yml file. To accomplish this, simply create a PHP associative array to pass as an argument when creating a client instance:
1 2 3 4 5 6 7 | $hosts = [ 'host' => 'localhost', // domain name 'port' => '9200', 'scheme' => 'https', // or 'http' 'user' => 'username', 'pass' => 'password!#$?*yeshua' ]; |
Once your $hosts array has been configured properly, you can use it to create a new $client instance of the client library.
NOTE: In most use cases, this PHP configuration will not be necessary. Certain options in the associative array (such as the user and password keys) must be configured in the YAML configuration file first. After modifying the configuration file, the Elasticsearch service will need to be restarted.
Create a new client instance of the Elasticsearch PHP library
After you’ve created the $hosts array, you can call the library’s create() method using a :: (PHP Scope Resolution Operator), which allows the ClientBuilder to create a new Elasticsearch client instance:
1 2 3 4 5 6 7 8 9 | $client = Elasticsearch\ClientBuilder::create() ->setHosts($hosts) ->build(); // Another way to create a client instance is to // use the "use" identifier at // the beginning of the script: use Elasticsearch\ClientBuilder; $client = ClientBuilder::create()->build(); |
The built-in methods that are part of this $client object are used to make changes to an Elasticsearch document.
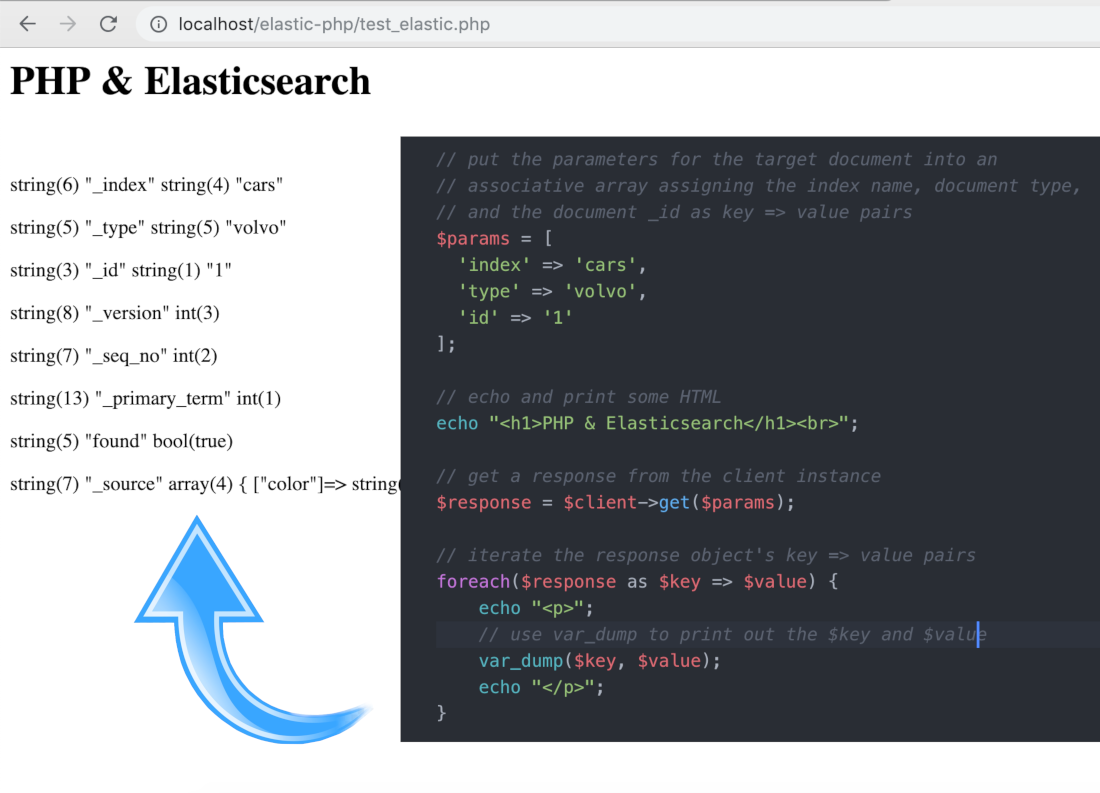
Create a $params PHP object array to get a document in an Elasticsearch index
Next, we’ll create another associative array ($params): This one will be used to select a document in an Elasticsearch index by creating keys comprised of the index’s name and document’s "_id". Let’s look at the code needed to accomplish this:
1 2 3 4 5 6 7 8 | // we're putting the parameters for the target document into an // associative array, while assigning the index name, document type, // and the document _id as key => value pairs $params = [ 'index' => 'index_name', 'type' => 'doc_type', 'id' => '1' // or 1 ]; |
NOTE: String values are case sensitive, but the document 'id' can be passed either as a string (be sure it’s enclosed in "" or ''), or as an integer.
Once your array is correctly declared, you can pass it as an argument to the $client instance, and you’ll get a response returned:
1 2 3 4 5 6 7 8 9 10 11 12 13 | // get a response from the client instance $response = $client->get($params); // iterate through the key => value pairs of the response objects foreach($response as $key => $value) { echo " "; // use var_dump to print out each $key and $value var_dump($key, $value); echo " "; } |
 NOTE: Refresh the page whenever changes are made to the script and you want to re-run it.
Indexing just one Elasticsearch document using PHP
Similar to our previous example, we’re going to create another PHP associative array that contains some key-value pairs. This time, we’re going to create an array containing a 'body' field which will serve as our new document’s "_source" data:
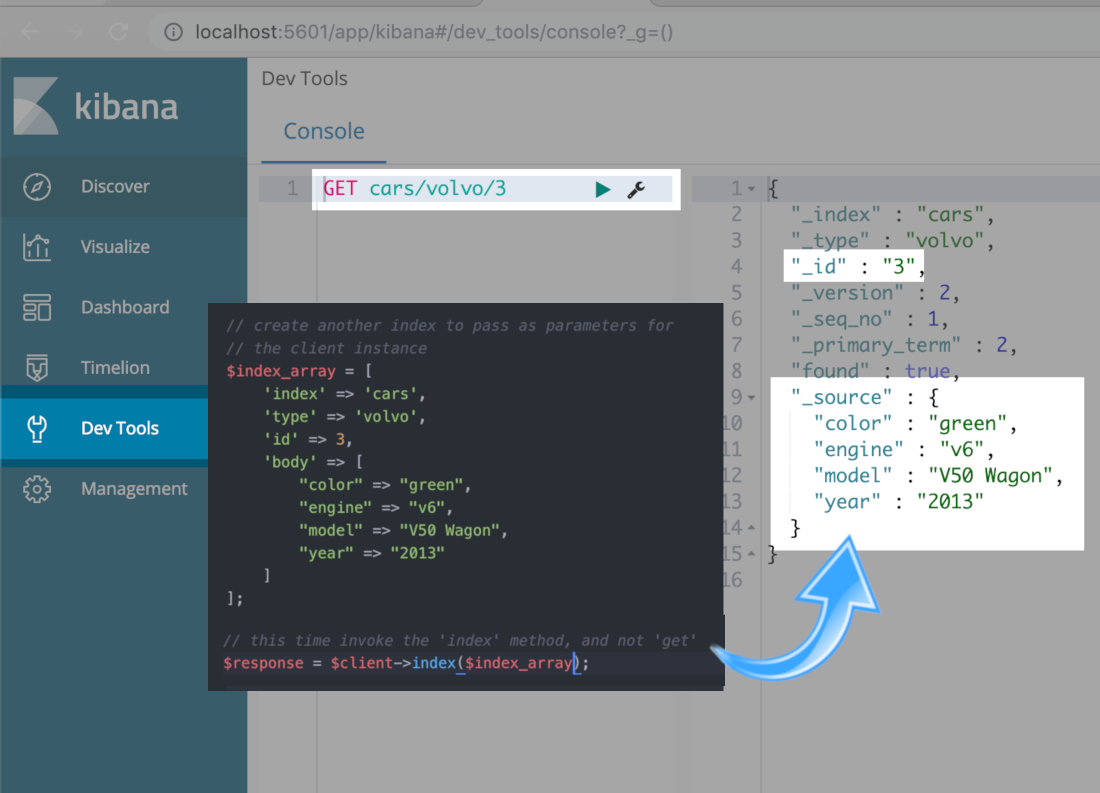
1 2 3 4 5 6 7 8 9 10 11 12 13 | // create another index to pass as parameters for // the client instance $index_array = [ 'index' => 'cars', 'type' => 'volvo', 'id' => 3, 'body' => [ "color" => "green", "engine" => "v6", "model" => "V50 Wagon", "year" => "2013" ] ]; |
In our last example, we invoked the GET method for the PHP client API. This time, we’ll use the $client instance’s index() method to create a new document:
1 2 | // this time invoke the 'index' method, and not 'get' $response = $client->index($index_array); |
Next, make a GET request in Kibana to confirm that your call to the PHP client’s index() method was successful:
You can have Elasticsearch dynamically create an ID for a new document by not declaring the id key in the PHP associative array:
1 2 3 4 5 6 7 8 9 10 11 12 13 14 15 | // no ID this time $no_id_parameters = [ 'index' => 'cars', 'type' => 'volvo', // NO 'id' is declared this time 'body' => [ "color" => "purple", "engine" => "v6", "model" => "S80 Sedan", "year" => "2008" ] ]; // call the `index` method again and receive a response $response = $client->index($no_id_parameters); |
If no id is declared when the API call is made, Elasticsearch dynamically creates one:
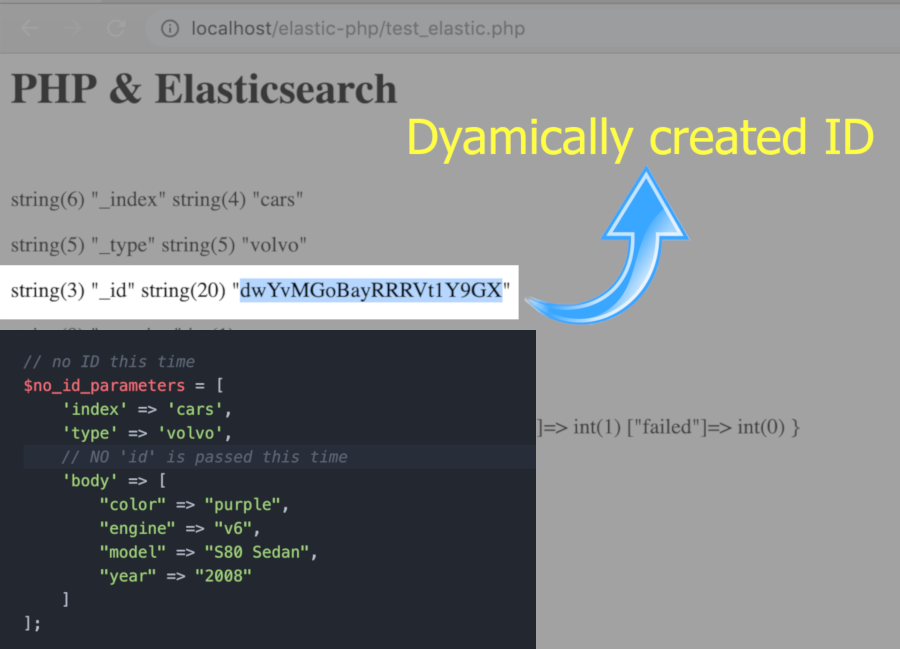
In the example pictured above, you can see that Elasticsearch created an alphanumeric _id of "dwYvMGoBayRRRVt1Y9GX" for the document.
Passing other parameters as Elasticsearch fields in PHP
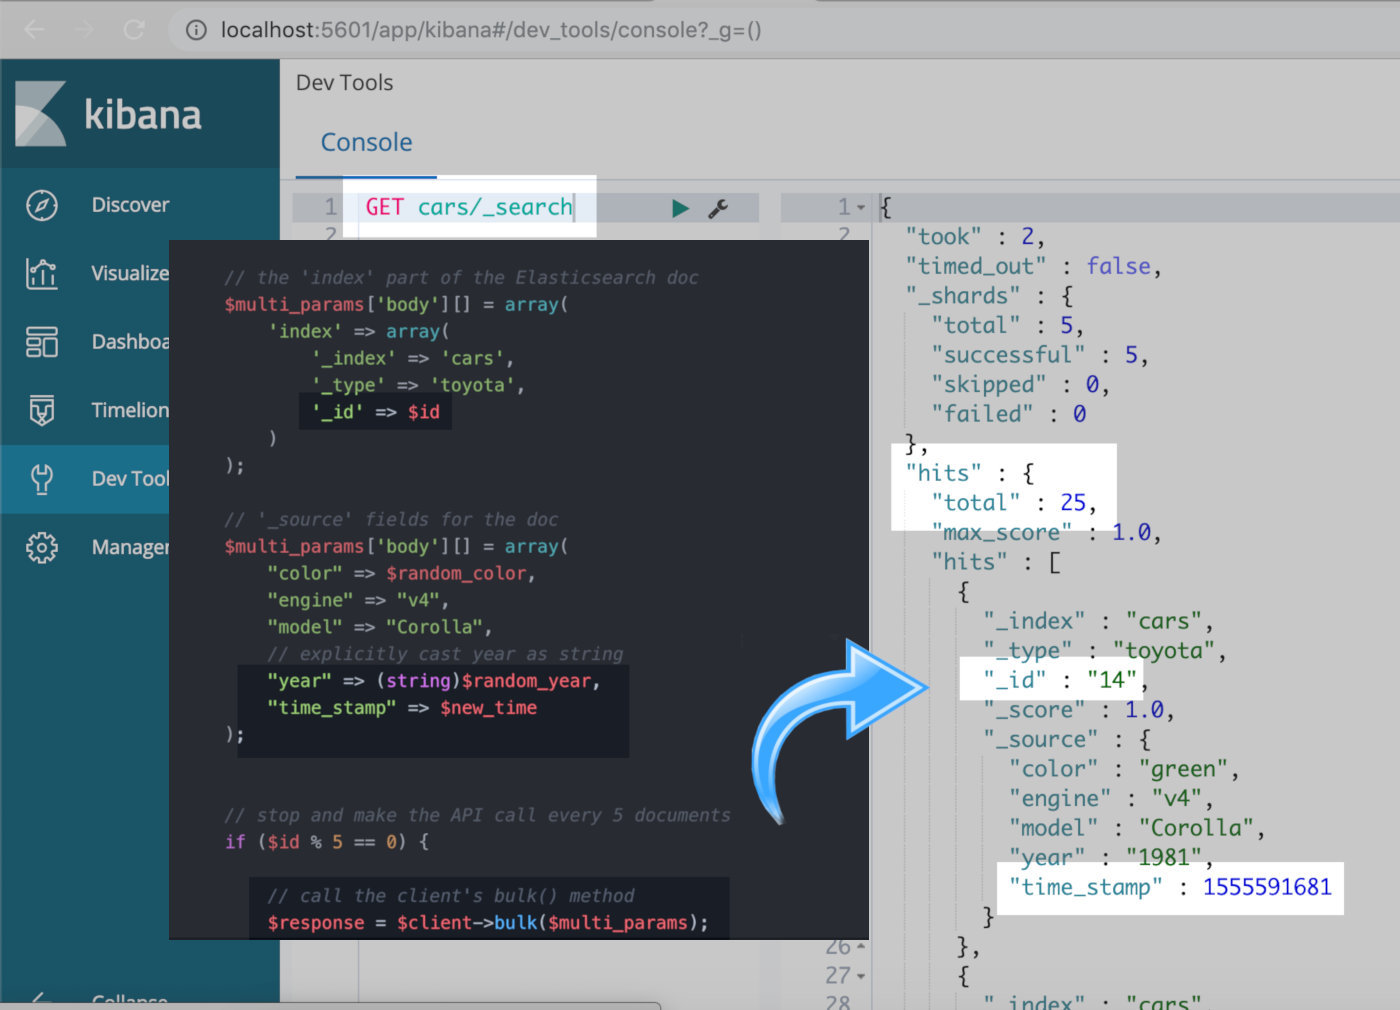
There are a number of other Elasticsearch “fields” that can be set as parameters in the array. A couple of examples include routing or a timestamp field. These fields must be declared as PHP keys, like the others, in the parameter’s associative array:
1 2 3 4 5 6 7 8 9 10 11 12 13 14 15 16 | $parameters_with_timestamp = [ 'index' => 'cars', 'type' => 'toyota', 'id' => 123456, 'body' => [ "color" => "white", "engine" => "v4", "model" => "Corolla", "year" => "1987", // the time() function returns an // integer representing the number of // seconds passed since epoch time "time_stamp" => time() ] ] |
If you’re going to create an index containing a "time_stamp" field, be sure to set the field type as a number when you create the _mapping for it. This is necessary because the PHP time() function returns an integer value representing all of the seconds that have passed since epoch time (e.g. 1555587739). If you prefer an actual date string, use PHP’s mktime() function instead.
Bulk indexing with PHP arrays
The PHP client for Elasticsearch also has a bulk() method that maps nicely with Elasticsearch’s Bulk API. To create the parameters for the bulk() method, we’ll use a PHP iterator to push multiple “document” arrays into one outer array. In other words, each element of the outer array is a “document” array itself. This process creates a multidimensional array populated with data that will be indexed as Elasticsearch documents.
It’s also possible to use the PHP array_push() function to push document arrays into an outer array. This will allow the data to be iterated through and indexed in a similar fashion.
In the next example, we’ll show how to make calls to the bulk() method in batches. Breaking up the API calls into batches helps you avoid bottleneck issues with your server; it also helps ensure that the API calls are actually going through. In a real-world application, this batching method for API calls would allow thousands of documents to be indexed per call. Let’s take a look at the code we’ll need to get this done:
NOTE: To see the PHP code in its entirety, scroll to the bottom of the article.
- If you have the Kibana Console open in your browser window, try making a
GETrequest to_searchto retrieve all of the newly indexed documents in thecarsindex. This request will verify that the bulk API call was successful.
25 total “hits” in Kibana after using the PHP client’s bulk() method to index multiple Elasticsearch documents:
Conclusion
Elasticsearch’s low-level client library for PHP offers several ways to index documents in Elasticsearch. In this tutorial, we provided example code that shows you how to use these different indexing methods. Before you test out this code yourself, make sure the index already exists to avoid any errors. To create an Elasticsearch index for your cluster, simply use the client’s indices()->create() method:
1 2 | $new_index = "cars"; $response = $client->indices()->create($new_index); |
Here’s the complete PHP code that randomly generates data to create PHP arrays to be indexed as Elasticsearch documents:
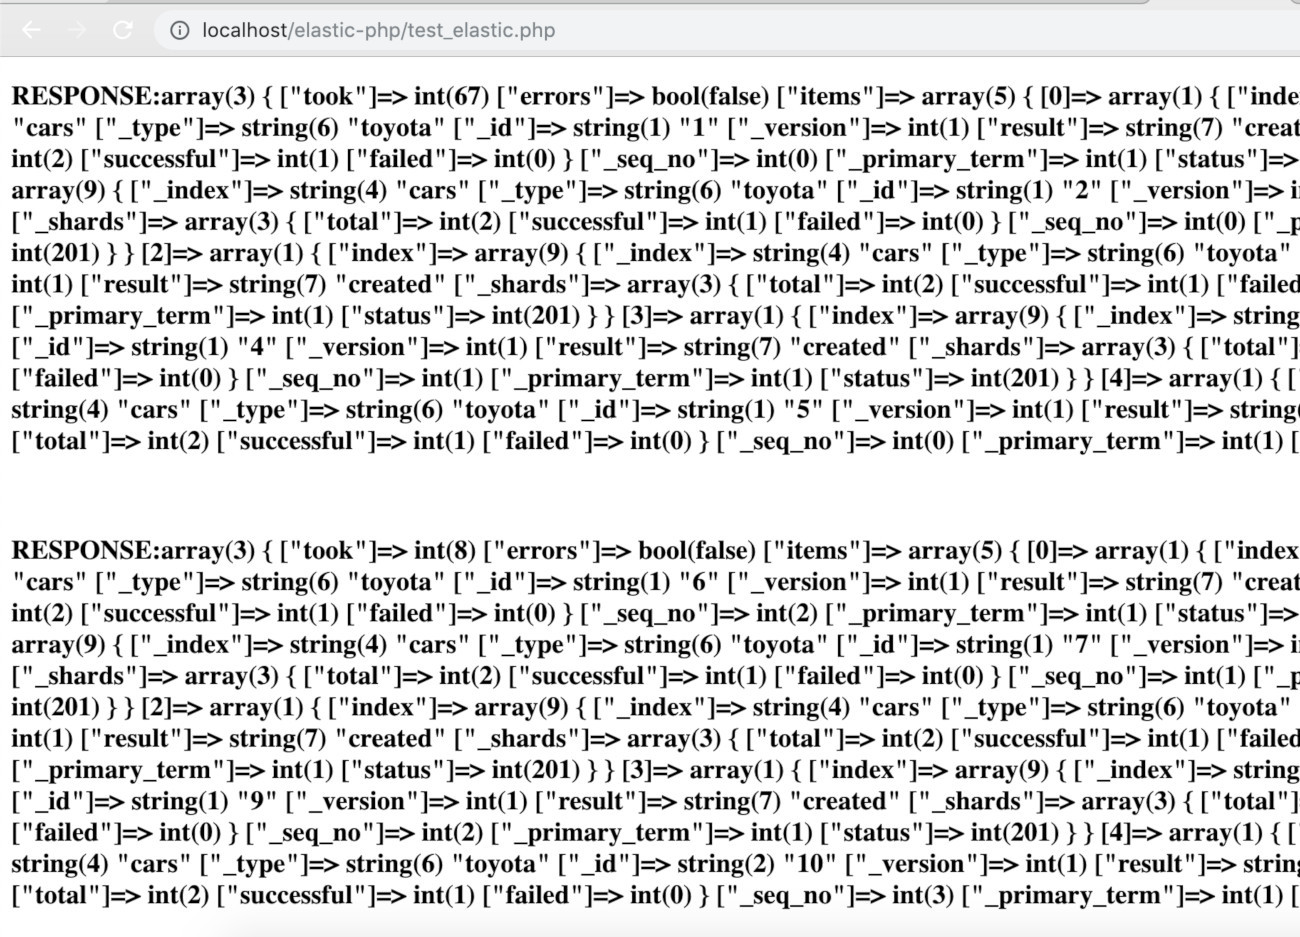
Using PHP’s var_dump to print the bulk() Elasticsearch method’s $response object on the screen as an HTML header:
index elasticsearch document in php

Pilot the ObjectRocket Platform Free!
Try Fully-Managed CockroachDB, Elasticsearch, MongoDB, PostgreSQL (Beta) or Redis.
Get Started