How to Create simple Search Engine using Elasticsearch PHP Client
Introduction:
If you’re looking for fast, powerful search functionality, Elasticsearch is the logical choice. This scalable search engine can perform speedy, efficient full-text searches and other complex queries. You can use PHP to create a simple search engine that demonstrates the capabilities of Elasticsearch. In this tutorial, we’ll show you how documents can be created and indexed using PHP by building a simple search engine with Elasticsearch.
Prerequisites
Before we attempt to build our search engine in Elasticsearch, it’s important to make sure certain prerequisites are in place. For this task, there are a few key system requirements:
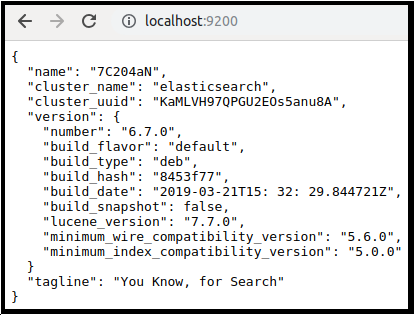
- Elasticsearch needs to be running on your server. You can see if the Elasticsearch service is running by visiting
https://{YOUR_DOMAIN}:9200orlocalhost:9200in your browser:
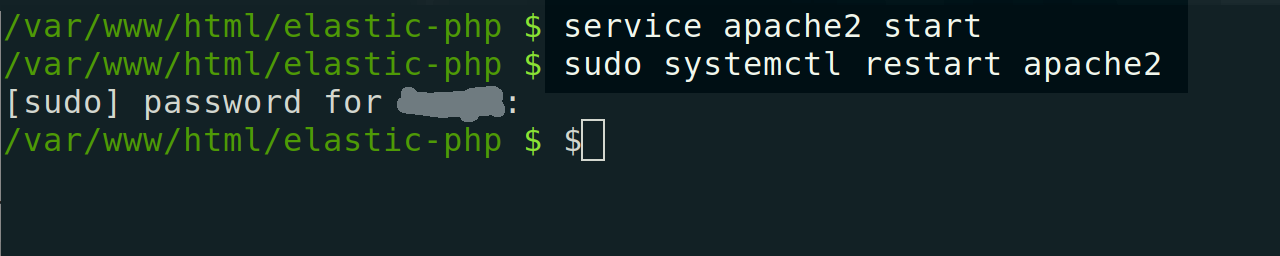
- You’ll need to have SSH access to the server where Elasticsearch is running, or at least confirm that your local Apache server is running on your Mac, Linux, or Windows localhost.
- The Elasticsearch client requires that PHP be installed and running on your server. Elastic currently recommends and supports PHP 7.x or higher. To see what version of PHP is running, use the following command:
1 2 3 | php -v # .. or: php --version |
- The PHP low-level client for Elasticsearch needs to be installed (typically using the Composer package manager, which will create a
vendorfolder of the client library for you).
NOTE: If you’re running a version of the Elastic Stack that’s 6.0 or higher, please remember to include a “content-type checking” header option whenever you make a cURL request that contains JSON in the request’s body:
-H 'Content-Type: application/json'
Omitting this header option will return a 406 Content-Type error.
Set up the folder for the Elasticsearch PHP search engine
Once we’ve confirmed that all the system requirements are in place, we can set up the folder for our Elasticsearch PHP search engine.
First, navigate to the directory that contains the client
vendorlibrary using thecdcommand in your terminal window. You can also just make note of the relative path of the thevendorlibrary, so that you can include it in your script.Next, create a new directory that will contain your PHP scripts and the
vendordirectory. In a UNIX terminal window, use the following command:
1 | sudo mkdir elastic-php |
If you encounter any issues creating this directory, it’s likely due to permission issues with the parent directory.
The search engine we’ll be creating uses two PHP scripts: one with HTML to create search queries, and another to put the HTML data into an Elasticsearch index.
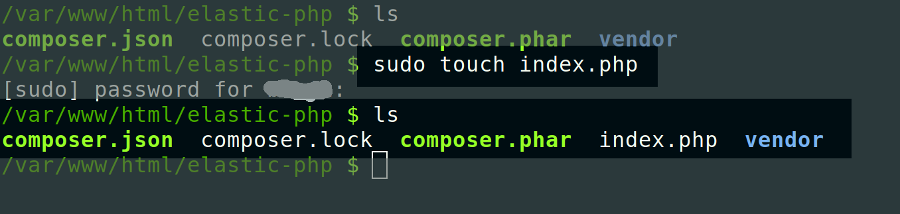
Use the
cdcommand to navigate into the directory, and then usetouchin a terminal window to create the two PHP scripts. The main PHP script that will run by default without a specified path will be theindexscript:
1 2 | sudo touch index.php sudo touch add.php |
- You can edit the
index.phpscript using a terminal editor likegeditornano:
1 | sudo nano index.php |
- It’s important to include the
require()function at the beginning of the script, because this tells PHP to include the Composer-createdvendordirectory and itsautoload.phpscript:
1 | require '/vendor/autoload.php'; |
- You can specify a relative path to the
vendorfolder, or you can just use the current working path of the script by appending the__DIR__constant as shown below:
1 | require __DIR__ . '/vendor/autoload.php'` |
If you plan to continue using
nanoto edit the script, proceed to the next section. Otherwise, press CTRL + O to save and CTRL+X to exitnanoif you plan to write the rest of the PHP on a local IDE and upload the script to your server later.As we mentioned earlier, the PHP client library for Elasticsearch is contained in the
vendorfolder created by Composer. If any errors occur, it may be because the low-level client wasn’t installed properly, or it may be because Composer created the package in a different directory.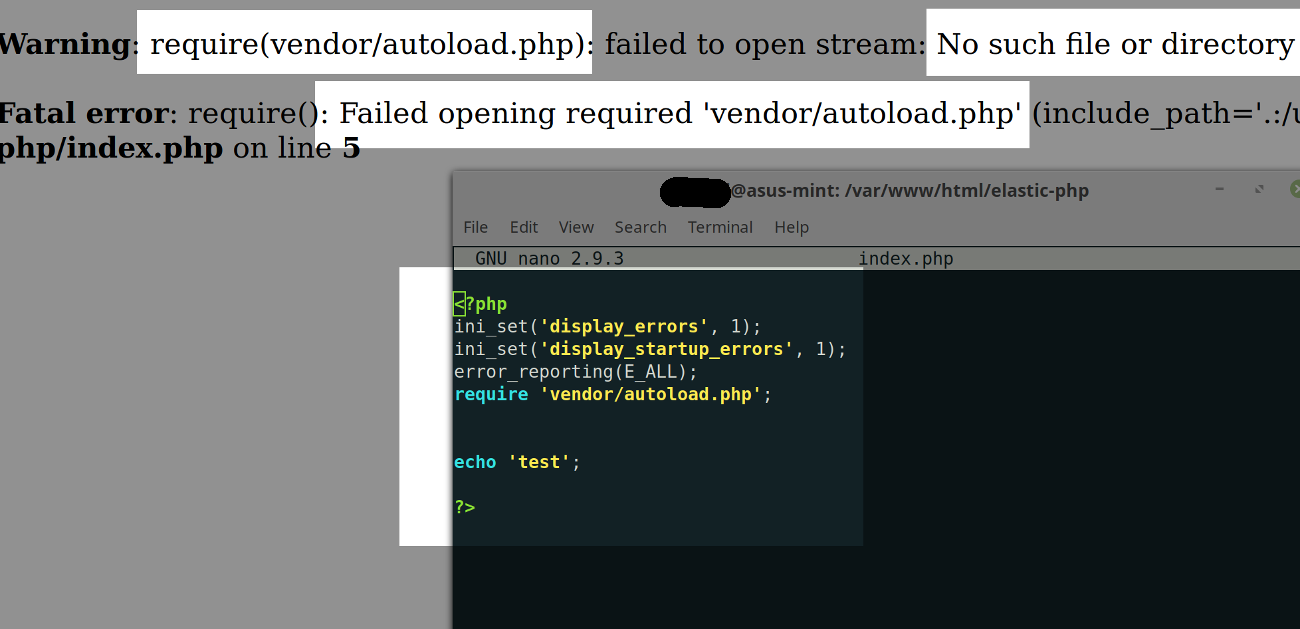
Connect the PHP script to the low-level Elasticsearch client
At this point, we’re ready to connect our PHP script to the low-level Elasticsearch client. In the code shown below, you can see the $hosts PHP associative array, which contains the connection settings for a domain with an HTTPS protocol. If your domain isn’t SSL-certified, you’ll need to change the value of 'scheme' in the $hosts array to http:
1 2 3 4 5 6 7 8 9 | $hosts = [ 'host' => 'localhost', // or your domain name 'port' => '9200', // or another port 'scheme' => 'https', // or http 'user' => 'some_name', // optional 'pass' => 'very_secure_password' // optional ]; // the end of the PHP code in this script |
NOTE: The user and password parameters in this array are optional.
- In this example, the Elasticsearch port being used is the default
9200; if you’re running Elasticsearch on a different port, you’ll need to change that setting as well. - Be sure to properly end your PHP code with the closing
?before adding HTML to the document.
HTML for the PHP Elasticsearch search engine
In order to build out our Elasticsearch search engine, we’re going to need some HTML. The index.php script is where the PHP connects to Elasticsearch, but it will also need an HTML input field where users can enter search terms. These terms will form the basis for the queries made via HTTP requests to the Elasticsearch cluster running on the server.
The HTML markup for the index.php script is shown below:
1 2 3 4 5 6 7 8 9 10 11 12 13 14 15 16 17 18 19 20 21 22 23 24 25 26 | <?php // the end of the PHP code in this script ?> <!-- HTML STARTS HERE --> <!DOCTYPE> <html> <head> <meta charset="utf-8"> <title>Search Elasticsearch</title> <link rel="stylesheet" href="css/main.css"> </head> <body> <form action="index.php" method="get" autocomplete="off"> <label> Search for Something <input type="text" name="q"> </label> <input type="submit" value="search"> </form> <div class="res"> <a href="#id">Name</a> </div> <div class="res">Attributes</div> </body> </html> |
After saving and refreshing the page in your browser, it should look like the following:
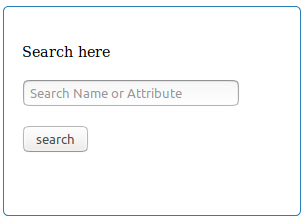
HTML form to post data to an Elasticsearch index using PHP
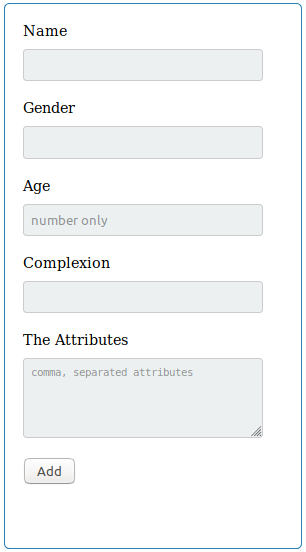
The next HTML form we’ll be looking at takes user input and posts it to the add.php script. In the add.php page, the user can input information for their child that can be used by the search engine we’re putting together:
1 2 3 4 5 6 7 8 9 10 11 12 13 14 15 16 17 18 19 20 21 22 23 24 25 26 27 28 29 30 31 32 33 34 35 36 37 38 39 40 41 | <!DOCTYPE> <html> <head> <meta charset="utf-8"> <title>Add Child Details</title> <link rel="stylesheet" href="css/main.css"> </head> <body> <form action="add.php" method="post" autocomplete="off"> <div class="box"> <label class="lbl"> Name <input type="text" name="name" class="c"> </label> <br> <label class="lbl"> Gender <input type="text" name="gender" class="c"> </label> <br> <label class="lbl"> Age <input type="text" name="age" placeholder="number only" class="c"> </label> <br> <label class="lbl"> Complexion <input type="text" name="complexion" class="c"> </label class="lbl"> <br> <label class="lbl"> The Attributes <textarea type="text" name="attributes" rows="4" placeholder="comma, separated attributes" class="c" ></textarea> </label> <input type="submit" value="Add" class="btn"> </div> </form> </body> </html> |
It will look something like this in the browser:
Adding PHP code to the add.php script
Our add.php page allows you to input details in the form. The form is designed to be “same page processing”– it does this by leveraging the $_POST “superglobal” variable. In the background, Elasticsearch processes the details from the form input and indexes a document based on this information. Let’s see how to build this page:
- At the very beginning of the
add.phpscript, before any HTML, add the following PHP code:
1 2 3 4 5 6 7 8 9 10 11 12 13 14 15 16 17 18 19 20 21 22 23 24 25 26 27 28 29 30 31 | require 'vendor/autoload.php';//(1) use ElasticsearchClientBuilder; $client = ClientBuilder::create() // (2) ->build(); // (3) if(!empty($_POST)){ // (4) if(isset($_POST['name'],$_POST['gender'], $_POST['age'], $_POST['complexion'], $_POST['attributes'])){ $name = $_POST['name']; $gender = $_POST['gender']; $age = $_POST['age']; $complexion = $_POST['complexion']; $attributes = explode(',', $_POST['attributes']); // (5) // (6) $indexed = $client->index([ 'index' => 'children', 'type' => 'child', 'body' => [ 'name' => $name, 'gender' => $gender, 'age' => $age, 'complexion' => $complexion, 'attributes' => $attributes ], ]); } } |
There’s a lot going on in this code, so let’s look at a few key parts in order to understand it better:
At the top of the code, notice that the composer’s
autoload.phpis required. This loads all of the classes in any of the libraries that it downloaded.Next, we instantiate a new ClientBuilder, and we build the client object.
We then check to make sure the
$_POST“superglobal” variable actually contains values when submitting the form.The explode() function is used to split the string into an array.
We then create and pass associative arrays to the Elasticsearch client for indexing, and a new
'child'document is indexed into the'children'index specified in the code.
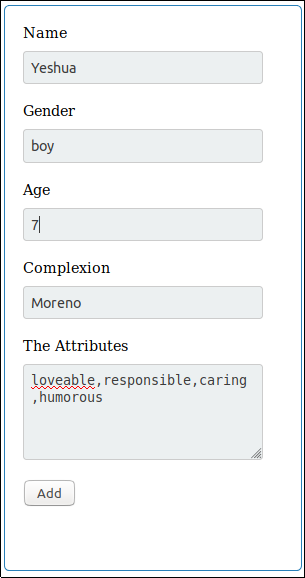
The screenshot shown below depicts sample information being entered into the add.php form that we just created.
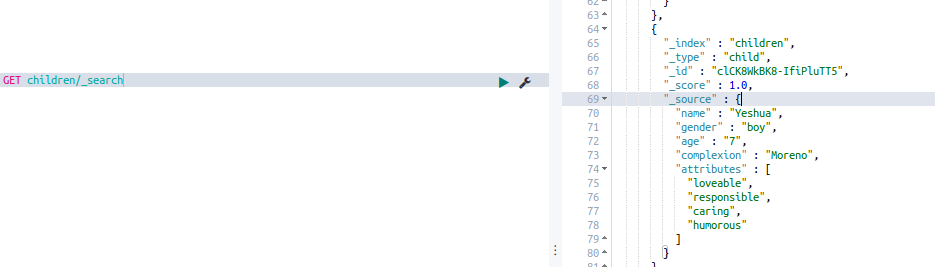
To verify that this document was successfully created and indexed using php, we’ll view it in the Kibana UI. Use the following command in the Kibana UI’s query pane:
1 | GET children/_search |
You should see something like this.
Adding the PHP Script index.php Page
Let’s add some code to our index.php page that will simply search the data that we have entered into Elasticsearch. We will be using a multi-query string in this example, which is shown below:
1 2 3 4 5 6 7 8 9 10 11 12 13 14 15 16 17 18 19 20 21 22 23 24 25 26 27 | require_once 'initialize.php'; // (1) use ElasticsearchClientBuilder; $client = ClientBuilder::create()-> // (2) build(); // (3) if(isset($_GET['q'])) { // (4) $q = $_GET['q']; $query = $client->search([ 'body' => [ 'query' => [ // (5) 'bool' => [ 'should' => [ 'match' => ['name' => $q], 'match' => ['attributes' => $q] ] ] ] ] ]); if($query['hits']['total'] >=1 ) { // (6) $results = $query['hits']['hits']; } } |
Like we did in the previous code example, let’s take a close look at this script so we can better understand what’s going on:
First, the composer’s
autoload.phploads all the classes in any of the libraries that it downloaded.Next, we instantiate a new ClientBuilder, and we build the client object.
We then check to see if values were set in ‘superglobals’
$_GET.This
multi query stringtells us that the query should match the parameter that we passed in the$qvariable.The
'total'for'hits'simply tells us how many results we have.
To test out the code, go to index.php page and enter the word “loveable” in the search box. Then, click search to begin search.
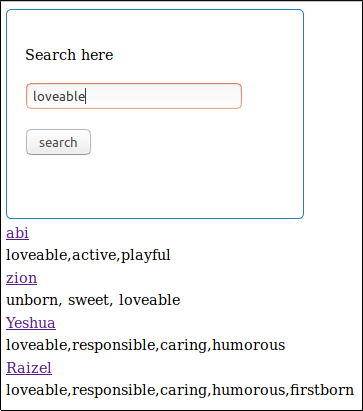
You can see in the screenshot above that that a few records were found. You can also use the name to search for the record.
Conclusion
Elasticsearch’s fast and powerful search capabilities make it the natural choice for both small- and large-scale search applications. You can see these capabilities in action by creating a simple search engine that can both search for documents and index new ones. With the instructions provided in this article, you’ll have no trouble creating and indexing documents using PHP and the Elasticsearch low-level client.


Pilot the ObjectRocket Platform Free!
Try Fully-Managed CockroachDB, Elasticsearch, MongoDB, PostgreSQL (Beta) or Redis.
Get Started