How to Configure Kibana After Installation
Introduction
Kibana reads properties from the configuration file kibana.yml when it starts up. The location of this file depends on how you installed Kibana. For example, the default location for kibana.yml is $KIBANA_HOME/config if you installed Kibana from an archive distribution such as a .tar.gz or .zip file. However, the its default location will be /etc/kibana if you installed Kibana with package distributions such as Debian or RPM.
Kibana runs on localhost:5601 by default. You’ll need to configure Kibana after Installation if you want run Kibana on a different host or port, or connect to an instance of Elasticsearch running on a different machine. You can also modify kibana to enable SSL and set other options. Finally, you can use ${MY_ENV_VAR} syntax to declare environment variables in kibana.yml.
Prerequisites
You need root privileges and SSH access to your server with a private key.
You should have Java version 1.8 of the Java 8 release series installed.
Ensure Elasticsearch and Kibana are already installed and working.
Start the Kibana UI in your browser by appending
:nnnnto your server’s URL, where nnnn is the port Kibana is running on. Kibana is either not installed or not running if your browser can’t find this page.Start Kibana on a Linux server or macOS machine with by using the following commands in terminal:
1 | sudo service kibana start |
or
1 | sudo service kibana restart |
or
1 | sudo systemctl enable kibana.service |
- Use this command to make the changes take effect on the macOS Homebrew installation of Kibana:
1 | brew services restart kibana |
- Go back to the Kibana UI tab in your browser after a minute or so and refresh the page to ensure Kibana is working properly.
IMPORTANT
You should make a backup of your configuration files before you change anything, so you can quickly revert back to the default settings without reinstalling any ELK stack products.
Copy a file on a UNIX system with the
cp(copy) command by changing the file name in the second parameter of the cp command. For example:
1 | sudo cp kibana.yml kibana.bak |
The above command will make a copy of kibana.yml named kibana.bak.
Configuring Kibana
Configure Kibana by opening kibana.yml in an editor. The following command shows how to edit this file with the terminal editor nano, assuming kibana.yml is located in /etc/kibana:
1 | sudo nano edit /etc/kibana/kibana.yml |
NOTE: If nano opens a blank document, you may need to press CTRL + X to close the blank document and display kibana.yml. If this doesn’t work, then you specified the wrong path for kibana.yml in the nano command.
You can find the kibana.yml in
/usr/local/Cellar/kibana/{x.x.x}/config) on a macOS Homebrew installation, wherex.x.xis Kibana’s version number. The commandbrew info elasticsearchwill also give you more details on the location of the config files.The default directory path on a Windows machine will appear as follows assuming you performed a default installation with the MSI installer:
1 | C:\ProgramData\Elastic\Elasticsearch\config\ |
All of the variables and default settings in kibana.yml are commented out by default with
#at the beginning of the line. Delete this symbol and save the file for the changes to take effect.Change the following lines after uncommenting the settings you want:
1 2 3 | #server.host: "localhost" #elasticsearch.url: "[http://localhost:9200](http://localhost:9200/)" |
*NOTE: The elasticsearch.url key has been deprecated as of Elastic search v6.6.0 and replaced by elasticsearch.hosts.
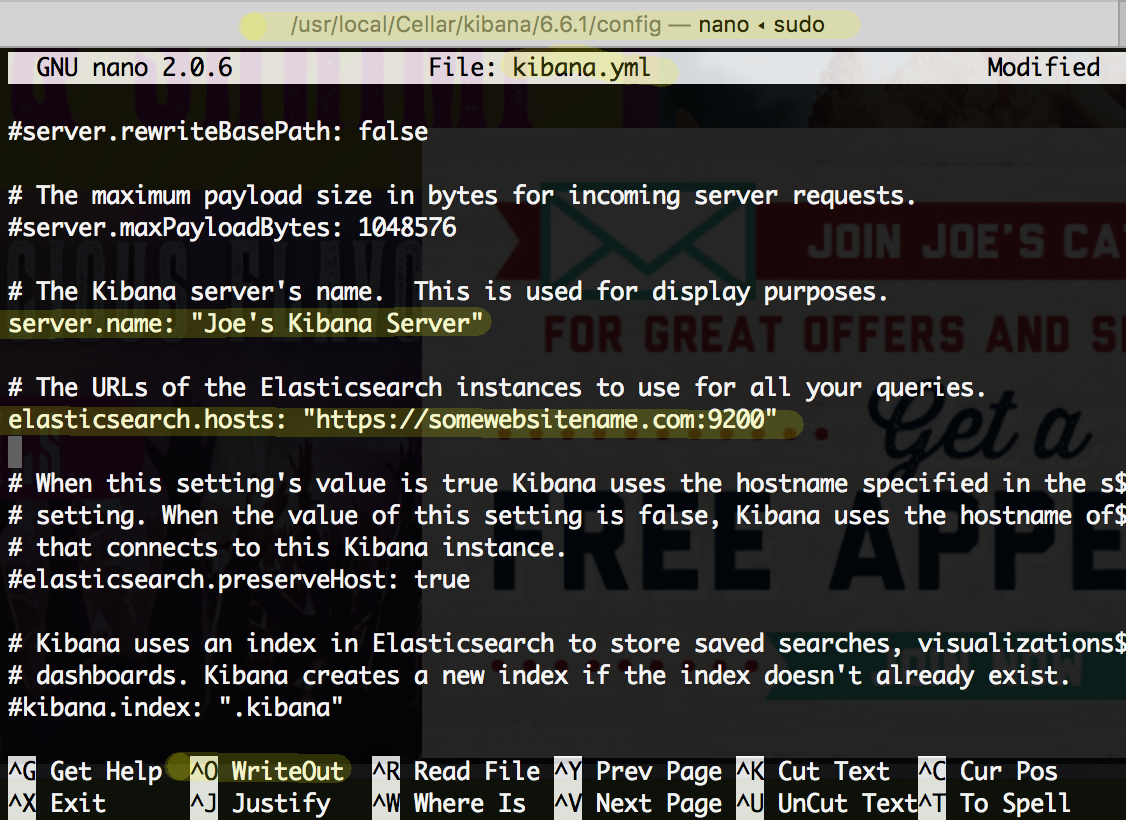
Once you uncomment the settings, you can change the SERVER_IP or localhost portion of the string to match your server’s IP address. For example:
1 2 3 | server.host: "123.456.789" elasticsearch.url: "[https://123.456.789:9200](http://123.456.789:9200/)" |
Press CTRL + O to save changes in nano.
Press CTRL + X to exit nano.
Virtual Memory
- You’ll need to increase the virtual memory for Linux to run Kibana. You can do this with the
sysctlsystem utility by using thesudoprivilege as follows:
1 | sudo sysctl -w vm.max_map_count=262144 |
Reboot Linux and re-enable the Kibana service after making these changes as follows:
1 2 3 | sudo systemctl enable kibana.service sudo systemctl start kibana.service |
- Elastic recommends that you set the JVM heap size to about half of your server’s accessible RAM
Kibana Refuses to Connect
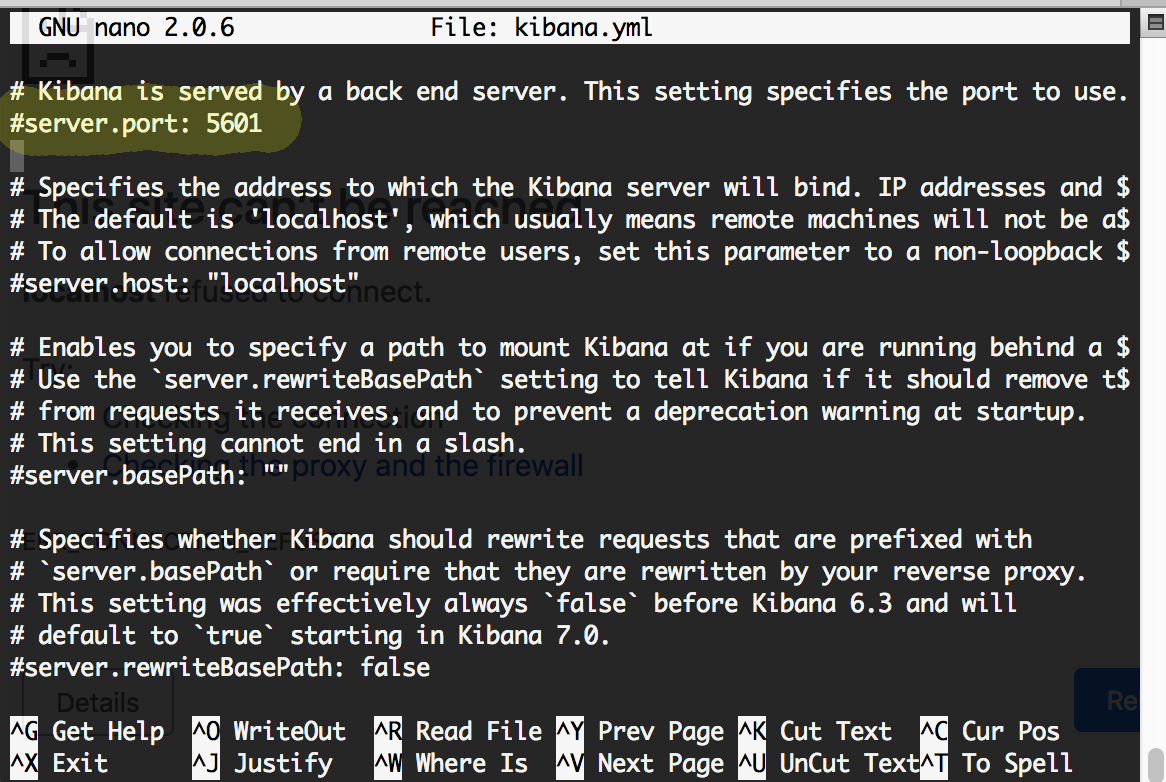
Try changing the port in kibana.yml and restart Kibana if it refuses to connect to
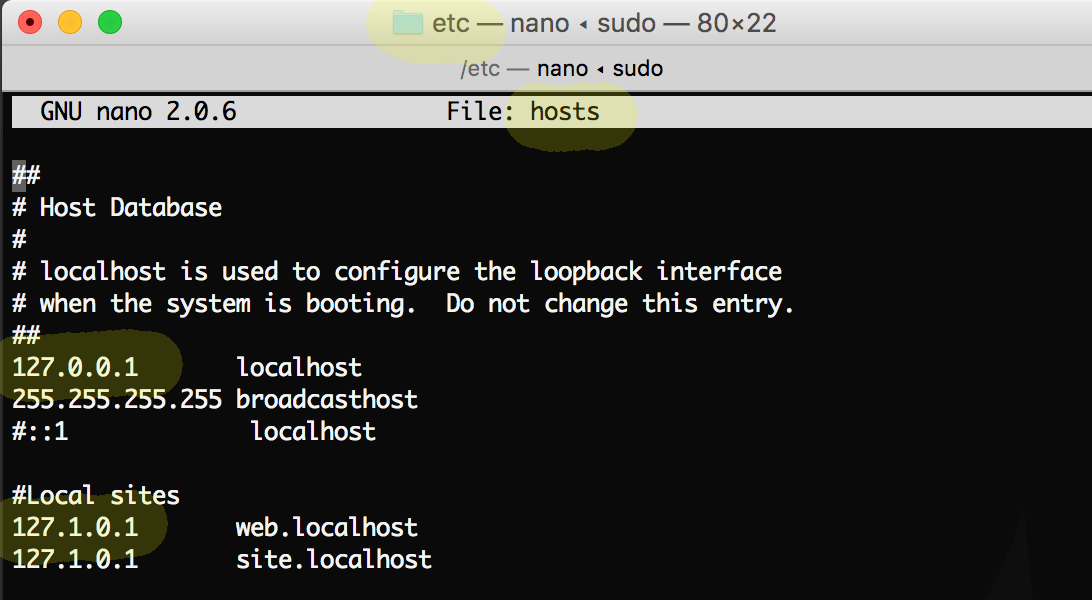
localhost:5601.If that doesn’t work, there may still be a port conflict or some other issue. Try changing your localhost configuration in the
/etc/hostfile as follows and restart Kibana:
1 | sudo nano edit /etc/host |
You may also need to change your server’s localhost port.
Open the Kibana UI in your browser to verify that Kibana is running. Kibana’s default port is
5601, which you can change in thekibana.yml.After you change the port and restart Kibana, navigate to
https://{YOUR_DOMAIN}:5601orlocalhost:5601to open the Kibana UI in a browser tab.
Settings Configuration
You can change many Kibana settings from their default values by modifying Kibana’s configuration file. The step-by-step instructions showed how to do this with different operating systems and configurations of Kibana. Elastic’s website lists all of Kibana’s configuration settings here.


Pilot the ObjectRocket Platform Free!
Try Fully-Managed CockroachDB, Elasticsearch, MongoDB, PostgreSQL (Beta) or Redis.
Get Started