How to Backup an Elasticsearch Cluster with Snapshot
Introduction
Snapshots are an ideal way to backup your Elasticsearch data before performing system upgrades or a potentially breaking change to the cluster. A snapshot is essentially a backup of an Elasticsearch cluster and all its indices, taken from a running Elasticsearch cluster. This function allows you to backup the entire cluster or just a selection of indices when taking a snapshot. Because snapshots are taken incrementally, Elasticsearch will avoid copying data that is already stored as part of an earlier snapshot of the same index.
Prerequisites
Make sure the Elasticsearch service is installed and its cluster running properly before you try to backup an Elasticsearch cluster with Snapshot.
If you are planning to use Elastic’s Curator Index Management Library, you may also need to install other dependencies on your server.
Some of the Curator’s dependencies include:
Python Version 2 or 3
The voluptuous Python data validation library
PyYAML
The Elasticsearch Python module
* The Elasticsearch-Curator Python module
There are also other dependencies, however, the basic requirements should be satisfied once you have the Curator module installed. You can refer to the Curator installation page for a complete list of dependencies. NOTE: Elasticsearch Version 6.x or newer requires a Curator library version of 5.0 or later.
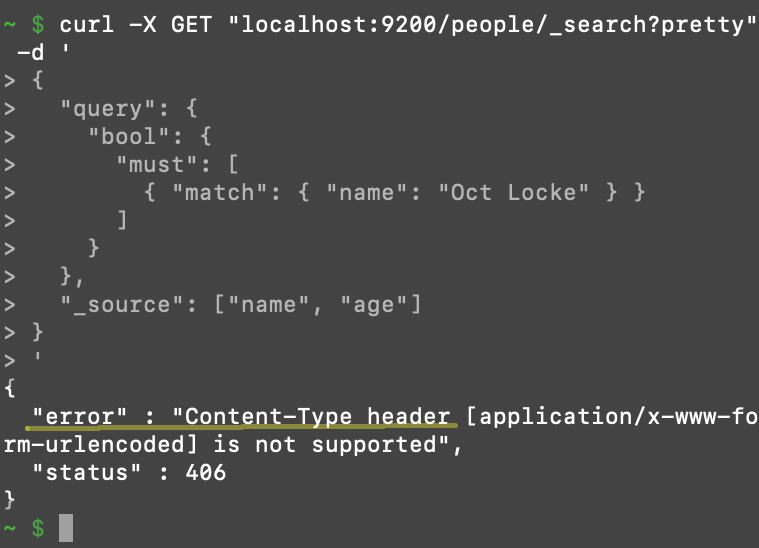
How to avoid the 406 Content-Type HTTP error
- Starting with Elastic Stack version 6.0, all cURL requests that pass something in the content body curly braces must have the content type explicitly declared the in the header.
- Failing to declare the content type will result in a
406 Content-Typeerror. To avoid this, make sure you include-H 'Content-Type: application/json'in the request header.
An example of a 406 Content-Type header error after making a cURL request to Elasticsearch
 Refer to the
 curl --help command to obtain more information.
Using the _Snapshot API to Backup an Elasticsearch Cluster
First, you will need to create a repository for the backup and separate repository for the older indices that will remain in “cold” storage.
Creating the repository:
If you haven’t already done so, create a directory for the backup as follows:
1 2 | sudo mkdir ~/path/to/snapshot/location/ # the backup file will go here |
Execute a cURL request to create a _snapshot, making sure you put the correct path in the ""location"" field:
1 2 3 4 5 6 7 8 9 | curl -X PUT ""localhost:9200/_snapshot/backup_of_cluster"" -H 'Content-Type: application/json' -d' { ""type"": ""fs"", ""settings"": { ""location"": ""~/path/to/snapshot/location/"", ""compress"": true # this field is optional } } ' |
NOTE: In this example, the ""fs"" type is an abbreviation for a shared ""file system"" repository type. In order to share the file system, the backup must be accessible and have the same location as all nodes. You can use the optional ""compress"" setting to save space when making the backup.
You can also use the header option wait_for_completion=true for executing cURL commands.
How to gaining access to the backup:
Just perform a new cURL request to get the backup:
1 | curl -X GET ""localhost:9200/_snapshot/backup_of_cluster"" |
How to restore an Elasticsearch cluster from a backup
You can use the _restore API to restore a cluster, and its indices, from a snapshot backup with the follwing command:
1 | curl -X POST ""localhost:9200/_snapshot/backup_of_cluster/snapshot_name/_restore"" |
Create an Elasticsearch Snapshot Using the Curator Library
- If you are familiar with Python, and its low-level client library, you can use the Curator module to create a snapshot. This is a simple tool that not only helps you manage your Elasticsearch indexes, it allows you to manage you backups and snapshots.
- It is highly recommended you use Python 3, if possible, as Python 2 is depreciating by 2020.
Installing Elastic’s Curator library for Python:
The simplest way to install a module is with Python’s built-in PIP package manager.
- Use the following
installcommands to install packages for PIP:
1 2 3 4 5 | # for Python 3 pip3 install elasticsearch-curator # for Python 2 pip install elasticsearch-curator |
NOTE: Make sure that the Python PIP library is installed and working. You can install it in an Ubuntu terminal with sudo apt install python3-pip or sudo apt install python-pip. To update PIP use sudo python3 -m pip install --upgrade pip.
If the PIP installation should fail, you can also install the library from source. Alternatively, try installing a different version, such as pip3 install -U elasticsearch-curator==5.5.4, or try using the --ignore-installed option at the end of the command.
Download the TAR archive for Curator:
Change your current directory to the location where you want to download the archive, e.g. cd ~/Downloads, and then use the wget command to download the repo by executing the curl command in a macOS terminal. You can also visit the github URL directly to download the archive:
`bash
replace 5.x.x with your version of choice
wget https://github.com/elastic/curator/archive/v5.7.3.tar.gz -O elasticsearch-curator.tar.gz
sudo tar zxf package.tar.gz
cd package-#.#.#
sudo python setup.py install
* The newest version of Curator is v5.7, as of April 2019.bash
yum install elasticsearch-curator
Use the following command in the YUM package manager to install Curator on a Red Hat Linux distro:`
Verify that curator installed properly:
Using Python’s IDLE, or in a built-in Python interpreter in the terminal or command prompt, excute the following command to try to import the library and confirm the module installed correctly:
`python
import curator
`
* Provided you didn’t receive an ImportError warning, or any other type of error message, you should be good to go!
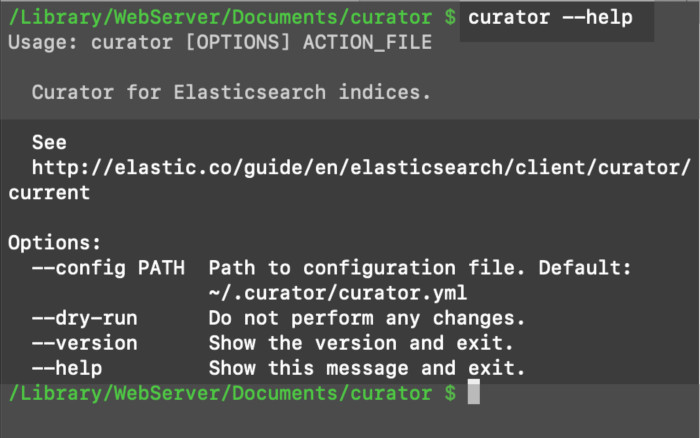
The curator command should now be available in the terminal:
1 | curator --help |

How to use Python and Curator to create an Elasticsearch snapshot of a cluster:
You can use the Curator module to backup an Elasticsearch cluster.
You first need to create the YAML file to facilitate the Curator actions:
While Curator is Python-based and Elasticsearch is Java-based, you cannot pass none, ""none"", or None as a field’s value if there is no option for it. Instead, just leave it blank as passing None as a field’s value will be interpreted by Curator as a string value of ""None"". However, Curator will create a generic name with a date/time stamp if you leave the name field blank.
Each number and colon, such as 2:, represents an action the Curator module will read and execute. For example:
1 2 3 4 5 6 7 8 9 10 11 12 | actions: 1: action: snapshot description: ""A simple action to backup an Elasticsearch cluster with Curator"" options: repository: ""backup_of_cluster"" continue_if_exception: False wait_for_completion: True filters: - filtertype: pattern kind: prefix value: |
Having Curator execute the actions:
Save the YAML file, using the .yml file extension. Then execute the actions by using the curator command followed by the filename, like this:
1 | curator my_curator_snapshot.yml |
Conclusion
This tutorial showed you how to backup an Elasticsearch cluster with Snapshot. This can be especially helpful before you perform any upgrades or make any changes to a cluster. Bear in mind that snapshots are taken incrementally to prevent copying data already stored from an earlier snapshot of the same index. This makes it highly efficient, and convenient, to take frequent snapshots of your cluster.
You can backup an Elasticsearch cluster with Snapshot using cURL commands or with Elastic’s Curator module. However, remember that the Curator has some dependencies, including requiring specific versions of Python and Elasticsearch and their respective modules.
Pilot the ObjectRocket Platform Free!
Try Fully-Managed CockroachDB, Elasticsearch, MongoDB, PostgreSQL (Beta) or Redis.
Get Started


