Guide On How to Install Logstash for Elasticsearch on Windows
Introduction
Setting parameters for the Elasticsearch service is a simple process that yields tremendous control. As a user, it is important to be able to manage the kind of data that is being recovered. Logstash is made for configuring the filters that enable this potential. By using the easy instructions below, it is possible to install this tool to refine Elasticsearch queries. Then data can be analyzed without sifting through large portions of unwanted information by separating it at the source(s).
Prerequisites
- Elasticsearch is only set up to support 64-bit architecture. Many, if not all, of the Elastic products will have trouble working properly on a 32-bit environment. Elastic Discussion for 32-bit
- The windows system being installed onto should already have JDK 8 running. To verify whether JVM is installed, open the window for command prompt (Just type
cmdinto the search bar on the main menu) and typeC:\< jviewinto the command prompt terminal. - If there’s an error, or if the Window’s command prompt doesn’t understand the command, it means JVM is not installed. Otherwise, if it is running, the terminal output will look like this:
1 | Microsoft (R) Command-line Loader for Java Version ... |
- It can also be checked by opening up the Java application listed in the programs menu and clicking on the
"About"tab: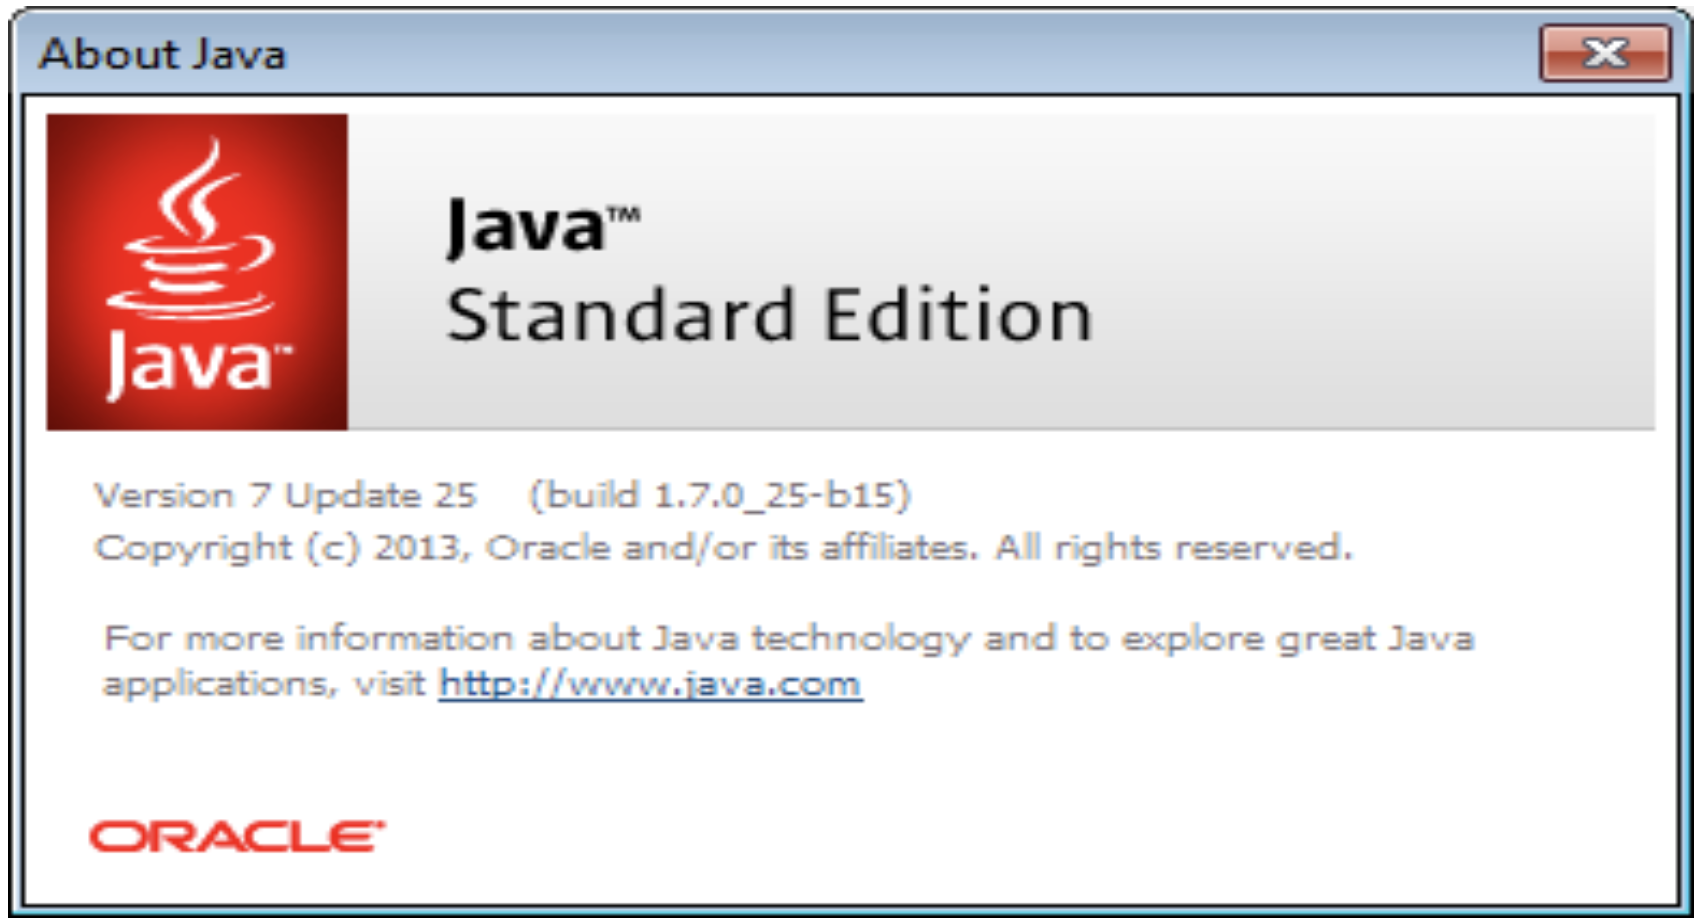
- It is recommended to have Java series 1.8, or later, installed when running Elasticsearch. For more information, or to check the version of Java installed, visit the Java Panel found in the Windows Start Menu.
- To specifically select a Java version to use, it can be directly configured using the
JAVA_HOMEenvironment variable. Just right clickMy Computerand selectProperties. Once there, click on theAdvancedtab, and select theEnvironment Variablesto edit theJAVA_HOMEvariable to point the system to the JDK software location, for example:C:\Program Files\Java\jdk1.X.X(make sure to replaceXwith the proper version number for the installed JDK). - For more information, consult Oracle’s Java Support Map.
- View supported Windows architecture and supported products in Elastic’s website – Support Matrix
Configuring JDK in Windows
- It is recommended to use a supported LTS (“Long Term Support”) version of Elasticsearch. For more information, consult Oracle’s Java Support Map.
- Download to install the Oracle JDK v8. Select all the defaults.
- Click on the Start button, do a search by typing “Environment Variables” and then open the system properties. The advanced tab under “System Properties” should be visible.
- Click the button for Environment Variables.
- On the System Variables tab click “New”.
- Go into the JDK install directory (type the variable name JAVA_HOME)and click OK. The screen will look just like this:

Install Logstash
- Download the Logstash zip package for Windows on the downloads page for Logstash.
- Extract the zip contents using the system’s unzip tool.
- Logstash must be configured before the application can be run.
- It is necessary to save a config file in the bin folder and give it a meaningful name. As an example using “
logstash.config“, the content is shown below.
1 2 3 4 5 6 7 8 9 10 11 12 13 14 15 | input { # Accept input from the console. stdin{} } filter { # Add filter here. This sample has a blank filter. } output { # Output to the console. stdout { codec => "rubydebug" } } |
- To initiate Logstash, use the batch file
-fflag followed by the config file location typed in the command line.
1 | c:\logstash\bin\logstash.bat -f c:\logstash\bin\logstash.conf |
- To stop Logstash, press CTRL+c and it will stop the current process.
Installing Logstash As a Service
Download the NSSM — Non-Sucking Service Manager from NSSM Homepage.
Extract the EXE to the BIN directory of the Logstash location created earlier.
Navigate to the bin directory, then execute the following from the shell.
1 | .\nssm.exe install logstash |
- The NSSM dialog should now be visible.
- In the path application field, provide the location where the Logstash.bat file is located.
- In the startup directory field, provide the full path of the bin directory.
- Lastly in the arguments Enter the following sample arguments
1 | -f C:\elk\logstash\bin\logstash.conf |
- Other options are available, but for this purpose, those will all be left on their defaults
- Click the install service button and confirm the display of a success message. In the powershell, the following message should be seen:
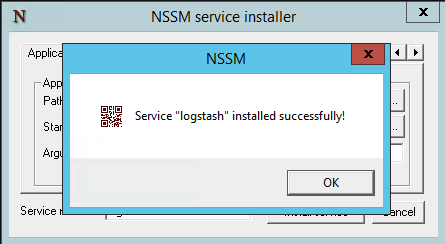
1 | Service "Logstash" installed successfully! |
- Open the Task Manager. From the “Services” tab, the program can be started.
Conclusion:
Logstash is a useful tool when monitoring data being generated by any number of sources. It equips the user with a powerful engine that can be configured to refine input/output to only deliver what is pragmatic. It grants the Elasticsearch service the ability to narrow fields of data into relevant collections. It also makes it easy by allowing automation of this process. All that must be done is to enter the correct values as detailed in the tutorial on configuring Logstash when finished installing it following the directions above.


Pilot the ObjectRocket Platform Free!
Try Fully-Managed CockroachDB, Elasticsearch, MongoDB, PostgreSQL (Beta) or Redis.
Get Started