How to Setup a MongoDB Database in Robo 3T
Introduction
This article will discuss and show the simple steps of configuring a MongoDB database within Robo 3T GUI. Robo 3T, formerly known as “Robomongo” is one of the leading MongoDB GUI ( Graphical User Interface ) tools out there that provides an easy way to interact with MongDB databases instead of the command line or Mongo Shell.
Prerequisites
Ensure that MongoDB is properly installed and running in the background. If you have it installed you can run it in the background with the
mongodcommmand.Ensure that Robo3T is properly installed before hand.
NOTE: If MongoDB is not properly installed you can refer to the following articles on how to install MongoDB in each of the different OSs.
Connecting Robo 3T to MongoDB Deployment
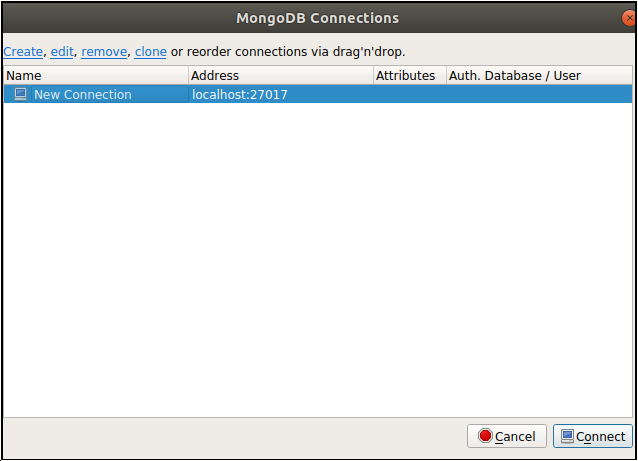
To start the process, open the Robo 3T application and connect to a configured MongoDB Deployment by clicking Connect button at the lower right hand corner of the MongoDB Connections window.
Creating the MongoDB Database in Robo 3T GUI
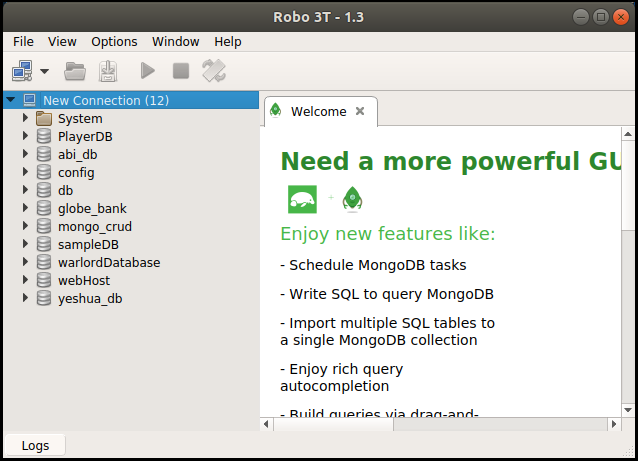
Once the connection is successful, MongoDB will display all the available databases within the MongoDB deployment. To create a new MongoDB database, right-click on the New Connection and select Create Database in the pop-up menu.
The “Create Database” window will appear asking the user to enter the desired database name in the “Database Name” field.
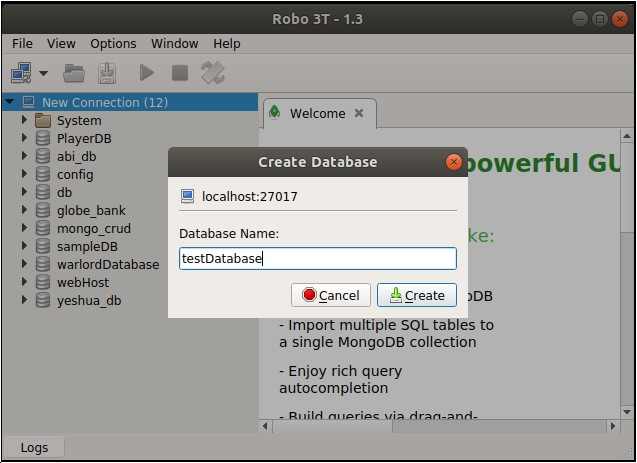
For the purpose of this demonstration the name of the database will be testDatabase, then click on the Create button to create the database.
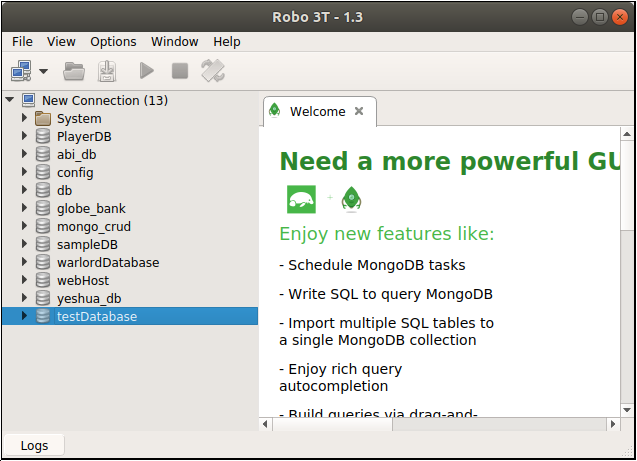
The testDatabase is now listed in the list of databases as shown in the following:
Creating the first Collection in the MongoDB Database using Robo 3T
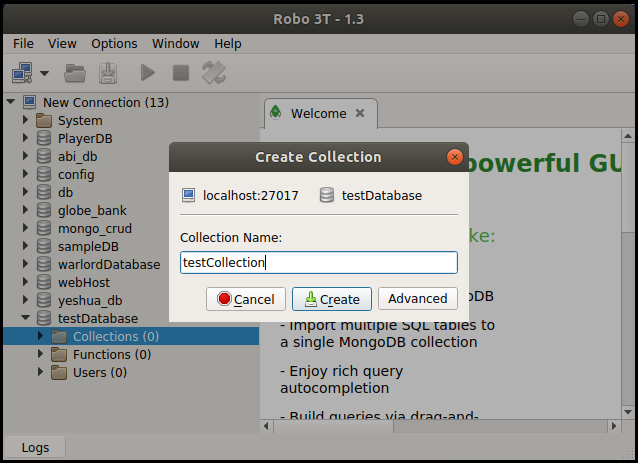
Once the database is created, click the arrow on the left-side of the testDatabase then right click on the Collections(0) folder (0 means no collection) and select the Create Collection... in the menu. Provide the desired collection name in the “Collection Name:” field, this tutorial will use “testCollection” then click Create to create the first collection in this database.
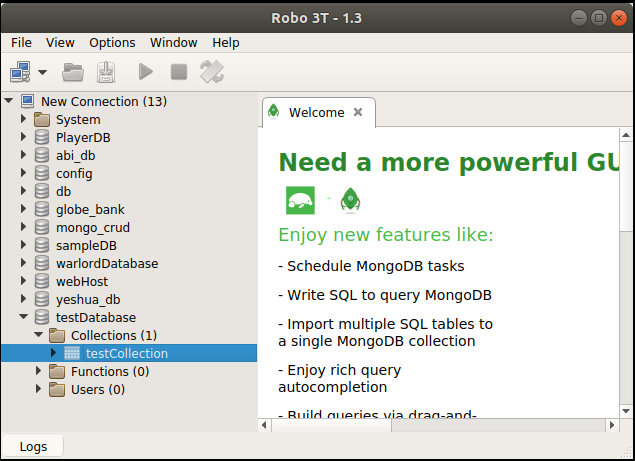
As a result the “Collections (0)” will update to “Collections(1)” and “testCollections” appears within the Collection folder.
Inserting the first Document in the MongoDB Collection using Robo 3T
To insert a new document, simply right-click on testCollection then select the Insert Document... in the menu. The “Insert Document” modal window will appear, presenting the user to enter the Document details in the provided screen as shown in the following:
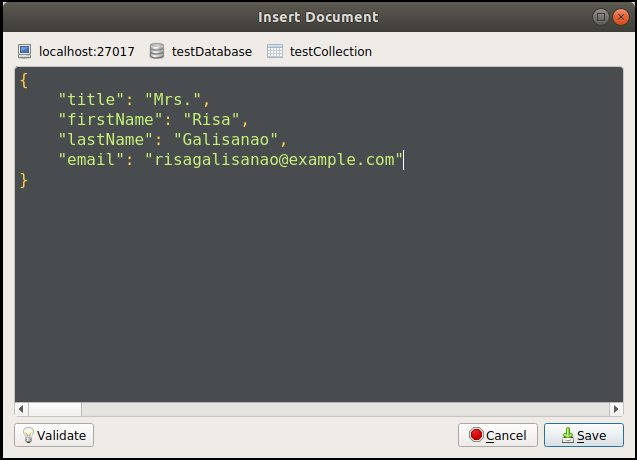
Remember that the document should be in JSON format as shown in the following screenshot. Once done with the details click the Save button in the lower right corner to save/insert the document.
Verifying the first Document inserted in the Collection.
To verify if the document is created, right-click on the testCollection and select the View Documents....
On the right-side pane the first document is listed, click on the arrow(>) beside the document to expand and view all the details therein. See below image.

Conclusion
The article shows how easy it is to setup databases and its corresponding collection using the Robo 3T GUI. If you’re uncomfortable with using the MongoDB Shell to access your data then a Graphical User Interface like Robo 3T is an extremely useful tool. Users can perform the majority of the shell commands without having to know the exact syntax. Robo 3T also provides an embedded shell for users who would still like the ability to use the shell. Thank you for reading this tutorial and please don’t hesitate to reach out to Object Rocket if you need someone you can trust to manage your database.


Pilot the ObjectRocket Platform Free!
Try Fully-Managed CockroachDB, Elasticsearch, MongoDB, PostgreSQL (Beta) or Redis.
Get Started