How to Install and Setup MongoDB on Windows
Introduction
MongoDB is a noSQL document database that streamlines the management of database collections. It stores the information you need to analyze data quickly. It is flexible and scalable, which makes it perfect for businesses of all sizes. MongoDB works with UNIX-like systems and macOS, and it didn’t leave Windows users out. Installing MongoDB Windows application is a straightforward task. You can even setup MongoDB Windows today. This step-by-step tutorial explains how to install and configure the database that makes your data effortless to handle and retrieve so that you can gain meaningful insights fast.
Prerequisites
MongoDB – Installed and running.
Note that the minimum requirement for the Windows architecture is a 64-bit server, 2008 R2 (Windows 7) or 2012 R2 (Windows 8 ) or later Windows Server version.
Windows 8 platforms and beyond must also download this package for universal support for C Runtime.
Free space to accommodate the databases, data collections, and MongoDB server.
The MongoDB Server – Download and Install
If you haven’t already, go ahead visit the MongoDB Download Center to download, then install the MongoDB server.
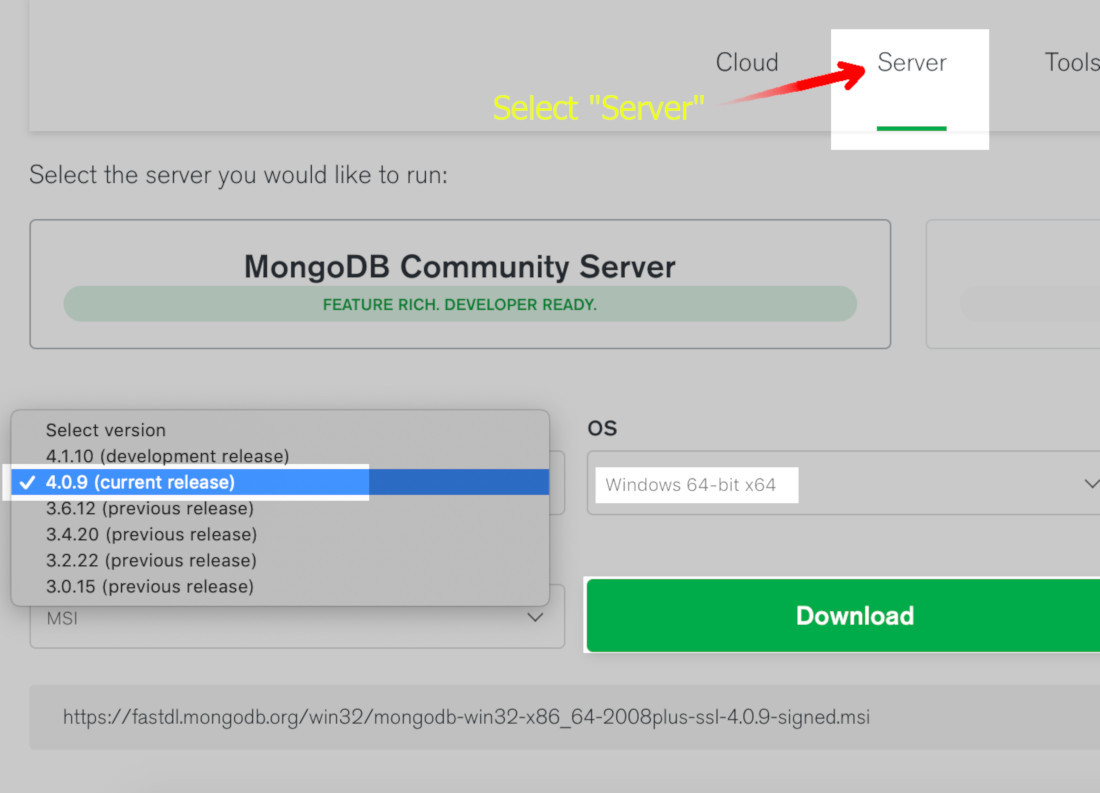
Verify that you are on the “Server” download page.
Next, under “Select Version,” choose the “(current release)” from the dropdown list.
Under “OS” on the right side of the page, select “Windows 64-bit x 64”.
Read the “https:” address listed below and verify that “msi” is at the end of the address.
Click “Download”.
The settings to install the current release of the MongoDB Community Server for 64-Windows.
Use the Setup Wizard to Install MongoDB
To bring up the installer wizard, go to where the download is located. If you’re unsure, check the Downloads folder.
Launch the
msiinstaller by double-clicking it.Before you proceed, read the Terms of Agreement, then check the box to accept the terms.
Follow the steps to finish the setup MongoDB Windows.
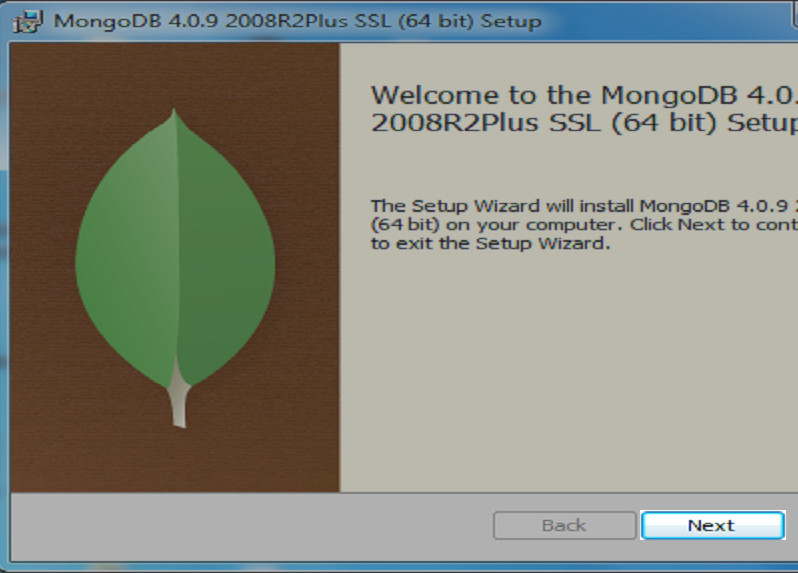
MongoDB Setup page and easy walk through steps. Click “Next” to proceed with the installation.
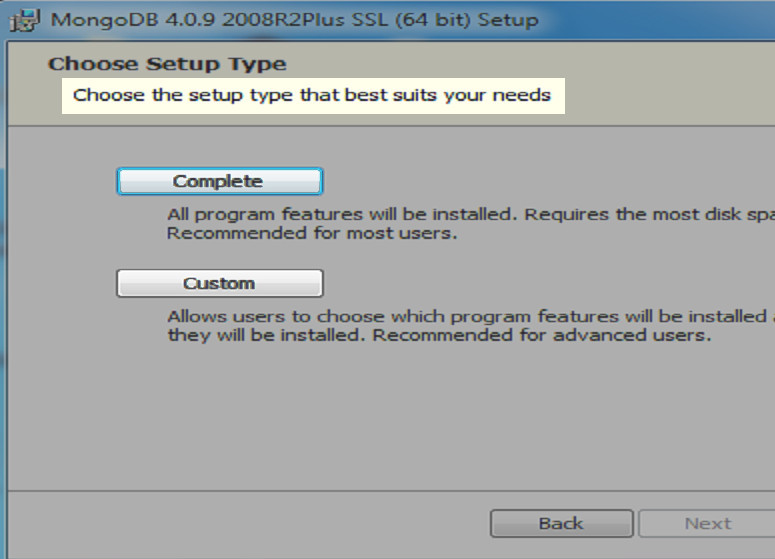
Choose the kind of installation you need
- You can select either a Complete installation to install all the features. This is the recommended option. Alternatively, you can choose a Custom installation. It’s the option where you can pick the features you want to install. If you’re unsure, go with the Complete option.
NOTE: A complete installation is what most users pick; however, it does use a lot of space. If you’re concerned about how much space you have for the download, select Custom to personalize your installation.
The MongoDB Setup page and installation options.
Configure MongoDB Service
To simplify the MongoDB setup, the Service Configuration page will allow you to either “Run the service as Network Service user” or “Run service as a local or domain user.”
Next, select the directory for the MongoDB databases. Copy the path of the directories because you’ll refer to them later.
The MongoDB Service Configuration page.

Store MongoDB databases in a newly-created data folder
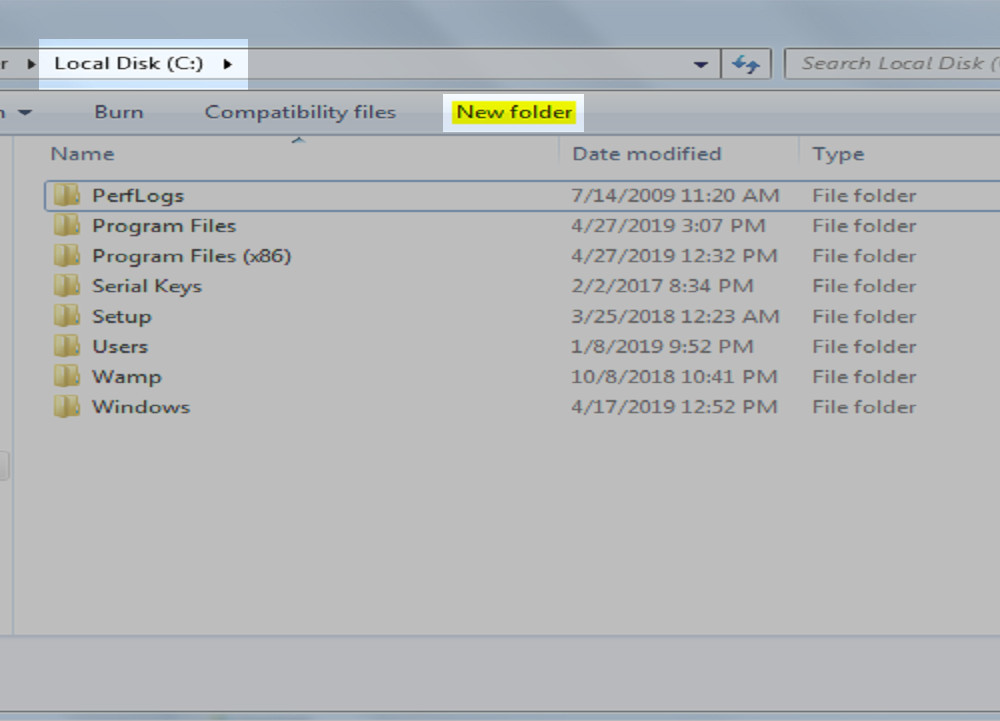
You’ll need a data folder to store the MongoDB databases. Use one of the two options below to start the process.
- In a new window in File Explorer, go to the data directory absolute path that you just set up during the installation. Click “New folder” on the menu bar located at the top. Call it
data\db.
The “New folder” option is selected in Windows File Explorer
Here’s another way to create the data\db folder.
Use the command prompt
cdto get to the directory path.Open a new window. Use the command prompt
md.Next, create a folder and name it
data\db.
1 2 | cd C:\some\absolute\path md ""\data\db"" |
Use Hyper Terminal to Make mongod Alias Shortcuts
Git Bash is the default shell application to use to access the Hyper Terminal.
- Make the directory “”home”” in Hyper Terminal. Enter
cd~to do that.
1 | cd ~ |
- Check if you see the
.bash_profile. If it isn’t there, create one with the commandtouch. That’s the same as using the Windows command prompt and the commandnew file.
1 | touch .bash_profile |
- The
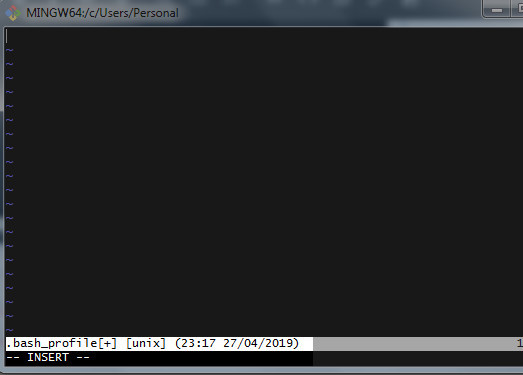
vimeditor is what you’ll use to open the.bash_profile.
1 | vim .bash_profile |
The .bash_profile will look similar to this as it is being edited using VIM Editor in Hyper Terminal.
>NOTE: The .bash_profile is a hidden file. You can tell by the period that is placed at the start of the file name. To see all of a directory’s hidden files in a terminal that’s UNIX-based, use the command prompt ls -A.
Go to the
C:\Program Filesand locate the\MongoDB\Serverdirectory. You should see the recently installed MongoDB version identified by its version number.Right-click the folder to see the full path. Select “Copy” to copy it.
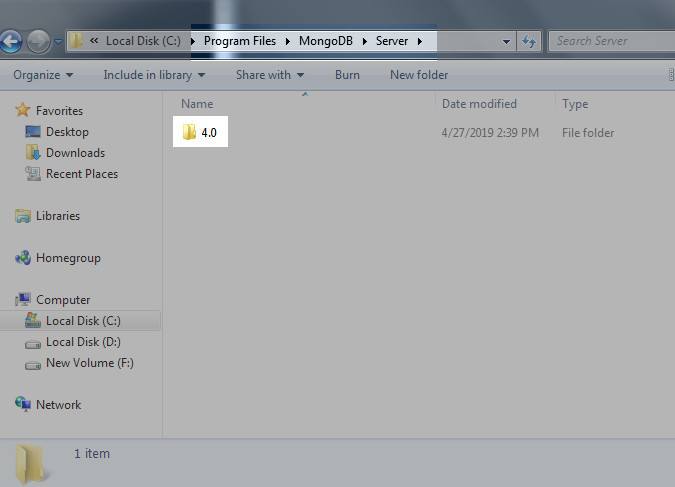
Go to the
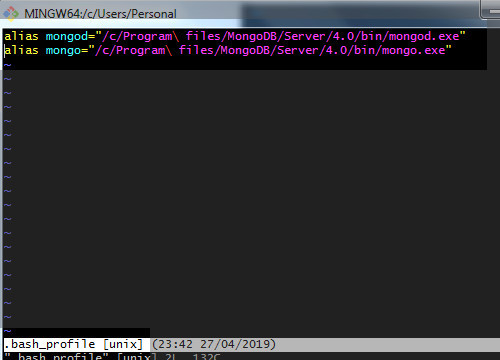
.bash_profileagain in the Hyper Terminal and right-click and select “Paste” or do a CTRL+P to paste the MongoDB installation’s entire path in an instance of the.bash_profile.Within the string path, you’ll notice some character spaces. To get out of those, simply use a backslash (
\) and a space. See below.
1 2 | alias mongod=""/c/Program\ files/MongoDB/Server/4.0/bin/mongod.exe"" alias mongo=""/c/Program\ Files/MongoDB/Server/4.0/bin/mongo.exe"" |
The finished process shows within the Hyper Terminal, the .bash_profile where the alias commands were pasted.
Time to Restart the MongoDB Service
You’ve successfully created the alias path, now it’s time to restart the service.
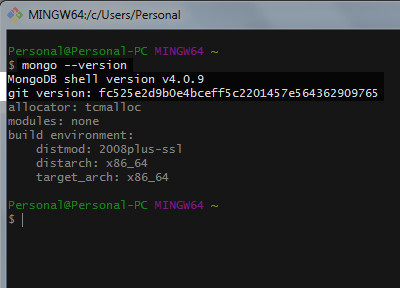
- You checked the version earlier, but let’s make sure it’s installed correctly on your OS. Go ahead and type
mongo --versionto restart Git Bash and check that everything went as planned.
1 | mongo --version |
MongoDB on Windows Git BASH Hyper Terminal shows the correct version installed on a local system.
Conclusion
In this tutorial, you learned about installing MongoDB Windows. You used the Git BASH Hyper Terminal to put MongoDB successfully on your Windows server. During the process, you set up alias shortcuts and verified the correct version of MongoDB on your system. It’s important to configure things the right way, otherwise, it won’t work, not even a little bit. That will defeat the purpose. In addition, if you try different ways to install MongoDB and you repeatedly experience error messages, you’ve lost productivity. It could equate to lost time and labor, essentially money in working hours. Instead of guessing at it, try the method outlined in this tutorial. Next, be prepared to take advantage of the indexing and querying capability of MongoDB. Others have.


Pilot the ObjectRocket Platform Free!
Try Fully-Managed CockroachDB, Elasticsearch, MongoDB, PostgreSQL (Beta) or Redis.
Get Started