How To Perform Aggregation in MongoDB Using Robo 3T
Introduction
If you’d prefer to use a visual interface when you perform MongoDB operations, Robo 3T may be a natural choice for you. Robo 3T, formerly known as Robomongo, is a free, open-source GUI for MongoDB that’s fast and efficient to use. Unlike other MongoDB user interfaces that simply emulate the Mongo shell, Robo 3T actually embeds the shell, offering users access to a command line interface as well as a user-friendly GUI. Although there are many tasks you can perform using Robo 3T, this tutorial will focus on aggregations. In this article, we’ll learn how to perform aggregation operations using the MongoDB Robo 3T GUI.
Prerequisites
Before we look at some examples of aggregations, let’s take a moment to discuss the system requirements needed for this task. There are a couple of important prerequisites:
You’ll need to make sure that MongoDB has been properly installed and is running in the background.
You’ll also need to ensure that Robo3T has been properly installed beforehand.
NOTE: If MongoDB has not yet been installed, you can refer to the following articles for instructions on how to install MongoDB on different operating systems:
Connecting Robo 3T to MongoDB Deployment
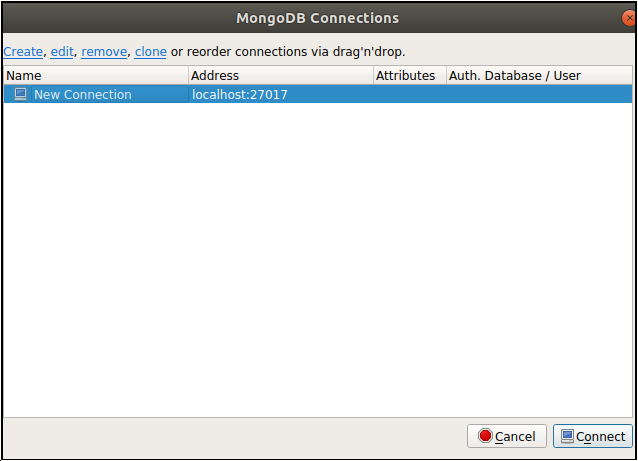
Once you’ve confirmed that all the prerequisites are in place, you’re ready to get started with Robo 3%. The first step will be to connect Robo 3T to a MongoDB deployment. To do this, open up the Robo 3T application and click the Connect button found at the lower right corner of the MongoDB Connections window:
MongoDB Sample Dataset
If you plan to follow along with the examples in this tutorial, it’s helpful to be using the same data. The sample dataset shown below will be used throughout this tutorial:
1 2 3 4 5 6 | { "_id" : ObjectId("5cee629f3fd48a38b2d163bd"), "name" : "Chang Kai-shek", "country" : "China", "rating" : 11 } { "_id" : ObjectId("5cee629f3fd48a38b2d163be"), "name" : "Sun Yat-sen", "country" : "China", "rating" : 8 } { "_id" : ObjectId("5cee629f3fd48a38b2d163bf"), "name" : "Muammar al-Gaddafi", "country" : "Libya", "rating" : 15 } { "_id" : ObjectId("5cee629f3fd48a38b2d163c0"), "name" : "Oda Nobunaga", "country" : "Japan", "rating" : 15 } { "_id" : ObjectId("5cee629f3fd48a38b2d163c1"), "name" : "Cao Cao", "country" : "China", "rating" : 19 } { "_id" : ObjectId("5cee629f3fd48a38b2d163c2"), "name" : "Sun Tzu", "country" : "China", "rating" : 10 } |
Performing Aggregation in a MongoDB Database using Robo 3T
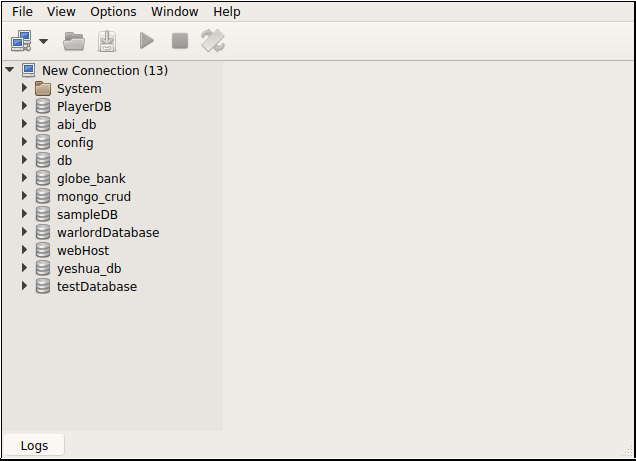
If Robo 3T successfully connected to a MongoDB deployment, it will list all the database(s) available within that connection. You can see an example of this in the screenshot shown below:
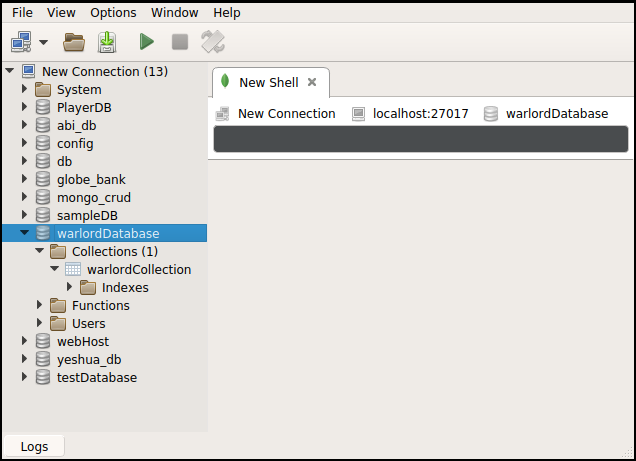
In this tutorial, we’ll be using the database warlordDatabase. To interact with that database, right-click on warlordDatabase, then select Open Shell in the menu. A “New Shell” window will appear in the right side pane of the window.
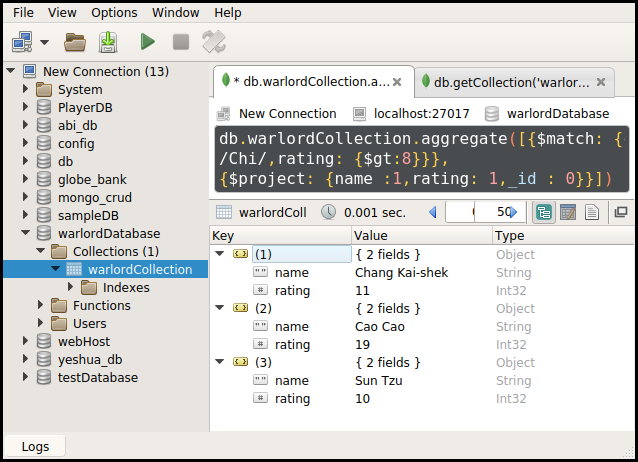
At this point, we’re ready to perform an aggregation operation. Use the following command in the query bar:
1 2 3 4 5 6 7 8 9 10 11 12 13 14 15 | db.warlordCollection.aggregate([ // $match operator acts like a filter, and will only allow // documents that matches the criteria to pass through {$match: {country:/Chi/, rating: {$gt:8} } }, { // $project operator filter the fields to be displayed $project: { name :1,rating: 1,_id : 0 } }]) |
The results you see should look like the following:
Conclusion
Aggregation is a simple but powerful way to group query results and understand your data better. In this article, we explained how to perform aggregation operations in the MongoDB Robo 3T GUI using the query bar. This method of performing aggregations offers all the benefits of a user-friendly GUI but also provides access to the command-line Mongo shell. With the instructions and examples provided in this tutorial, you’ll have no trouble performing aggregations in Robo 3T.


Pilot the ObjectRocket Platform Free!
Try Fully-Managed CockroachDB, Elasticsearch, MongoDB, PostgreSQL (Beta) or Redis.
Get Started