Build a Simple App with GraphQL, NodeJS, Express, React, and MongoDB - Part 3
Introduction
In the previous section of this tutorial, Part 2, we showed how to setup a basic GraphQL structure but it was pretty limited in functionality. An array of Strings was the most complex data type we used and this is not realistic so in this tutorial we’ll show how to define the more complex data types that you’ll need when developing a real web application.
Setting up the Blog Type
All of our code changes will be limited to only the app.js file. We’ll show the updated file and then we’ll dissect the changes afterward:
File: app.js
1 2 3 4 5 6 7 8 9 10 11 12 13 14 15 16 17 18 19 20 21 22 23 24 25 26 27 28 29 30 31 32 33 34 35 36 37 38 39 40 41 42 43 44 45 46 47 48 49 50 51 52 53 54 55 56 57 58 59 60 61 62 63 64 65 66 | const express = require('express') // import express const bodyParser = require('body-parser') // import body-parser const graphqlHttp = require('express-graphql') // import graphql to use as middleware const { buildSchema } = require('graphql') // import the function to build our schema const app = express() // create express server const blogs = []; // create an array of the Blogs we will store. This is temporary until we start using MongoDB. app.use(bodyParser.json()) // use body-parser middleware to parse incoming json app.use('/graphql', graphqlHttp({ // set up our graphql endpoint with the express-graphql middleware // build a graphql schema schema: buildSchema(` type Blog { _id: ID! title: String! text: String! description: String! date: String } input BlogInput { title: String! text: String! description: String! date: String } type blogQuery { blogs: [Blog!]! } type blogMutation { createBlog(blogInput: BlogInput): Blog } schema { query: blogQuery mutation: blogMutation } `), rootValue: { blogs: () => { return blogs // return blogs instead of hardcoded array }, createBlog: (args) => { // const blogText = args.text // return blogText const blog = { // create new blog object _id: "123456", // this is hardcoded temporarily title: args.blogInput.title, text: args.blogInput.text, description: args.blogInput.description, date: new Date().toISOString } blogs.push(blog) // push new blog object onto array return blog; } }, // an object with resolver functions graphiql: true // enable the graphiql interface to test our queries })) app.listen(5000) // setup server to run on port 5000 |
Let’s talk about what we did:
We added a lot of work in the buildSchema function. We established a new custom type Blog in GraphQL and it contains all the information we’ll need about a blog including a title, text, description, and date. There is not Date type in GraphQL so we’ll have to use Strings. We’ve been using the ! operator to indicate that the field is required and is not nullable. We also added an input blogInput which allowed us to define the input parameters our createBlog function will take. We then modified the queries and mutations to return a Blog type instead of just hardcoded string.
We created a global called blogs that will act temporarily as our database and we’ll add and store our blogs to this array.
In the rootValue where we hold the resolvers, we changed both resolvers.
When the createBlog is run we take the parameters given in blogInput and create a new blog object which we then push onto the blogs array and finally return the single blog.
* On a blogs query we return the array blogs.
Testing the Updated API
Now that we have our GraphQL Api more fleshed out similar to a real application we need to test that it is all working. We don’t have any blogs in the system yet so let’s first try to use the createBlog endpoint.
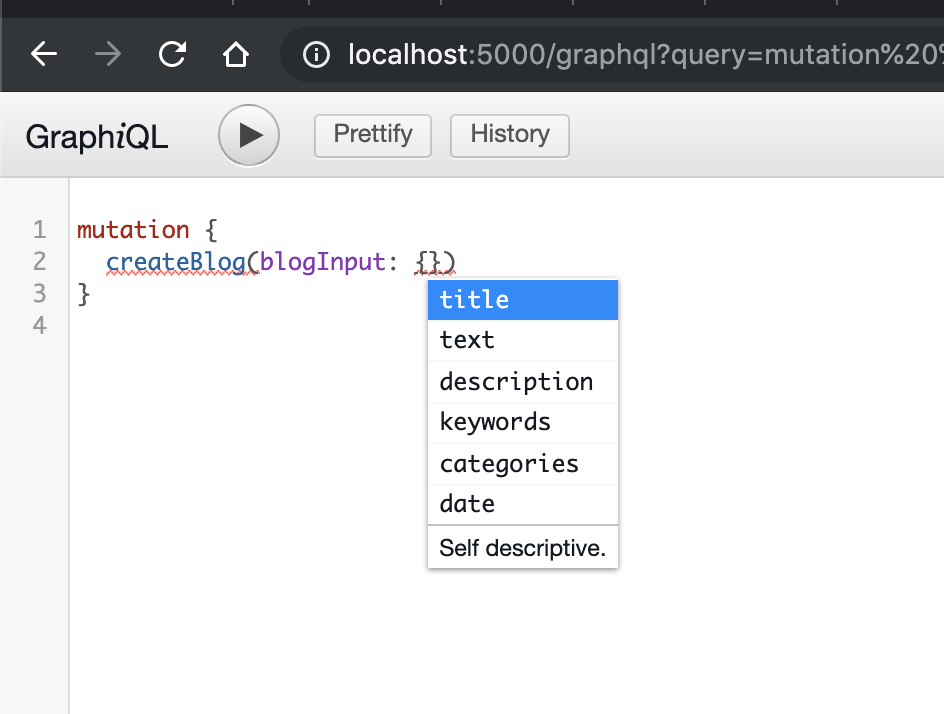
Note: When writing these queries in graphiql in a lot of instances you can hit Ctrl + Space and graphiql will autofill or make suggestions on what it expects next. This is extremely useful especially when you’re just getting to know GraphQL. Take a look here:
Now let’s try to hit the createBlog endpoint like so:
1 2 3 4 5 6 7 8 9 10 11 | mutation { createBlog(blogInput: { title: "Best Parks in Austin", text: "Zilker is the best park ...", description: "The best parks in ATX rated by yours truly!" date: "2019-06-11T15:53:43.964Z"}) { _id title } } |
Notice the bottom portion of this mutation:
1 2 3 4 | { _id title } |
Here’s where GraphQL takes action because we are specify that we only want the _id and title fields from the new Blog we created. In a typical REST API you would just get back ALL the blog data no matter if you needed it or not.
Here is the response we get:
1 2 3 4 5 6 7 8 | { "data": { "createBlog": { "_id": "123456", "title": "Best Parks in Austin" } } } |
Great it worked, and as you can see we only get back the _id and title that we asked for.
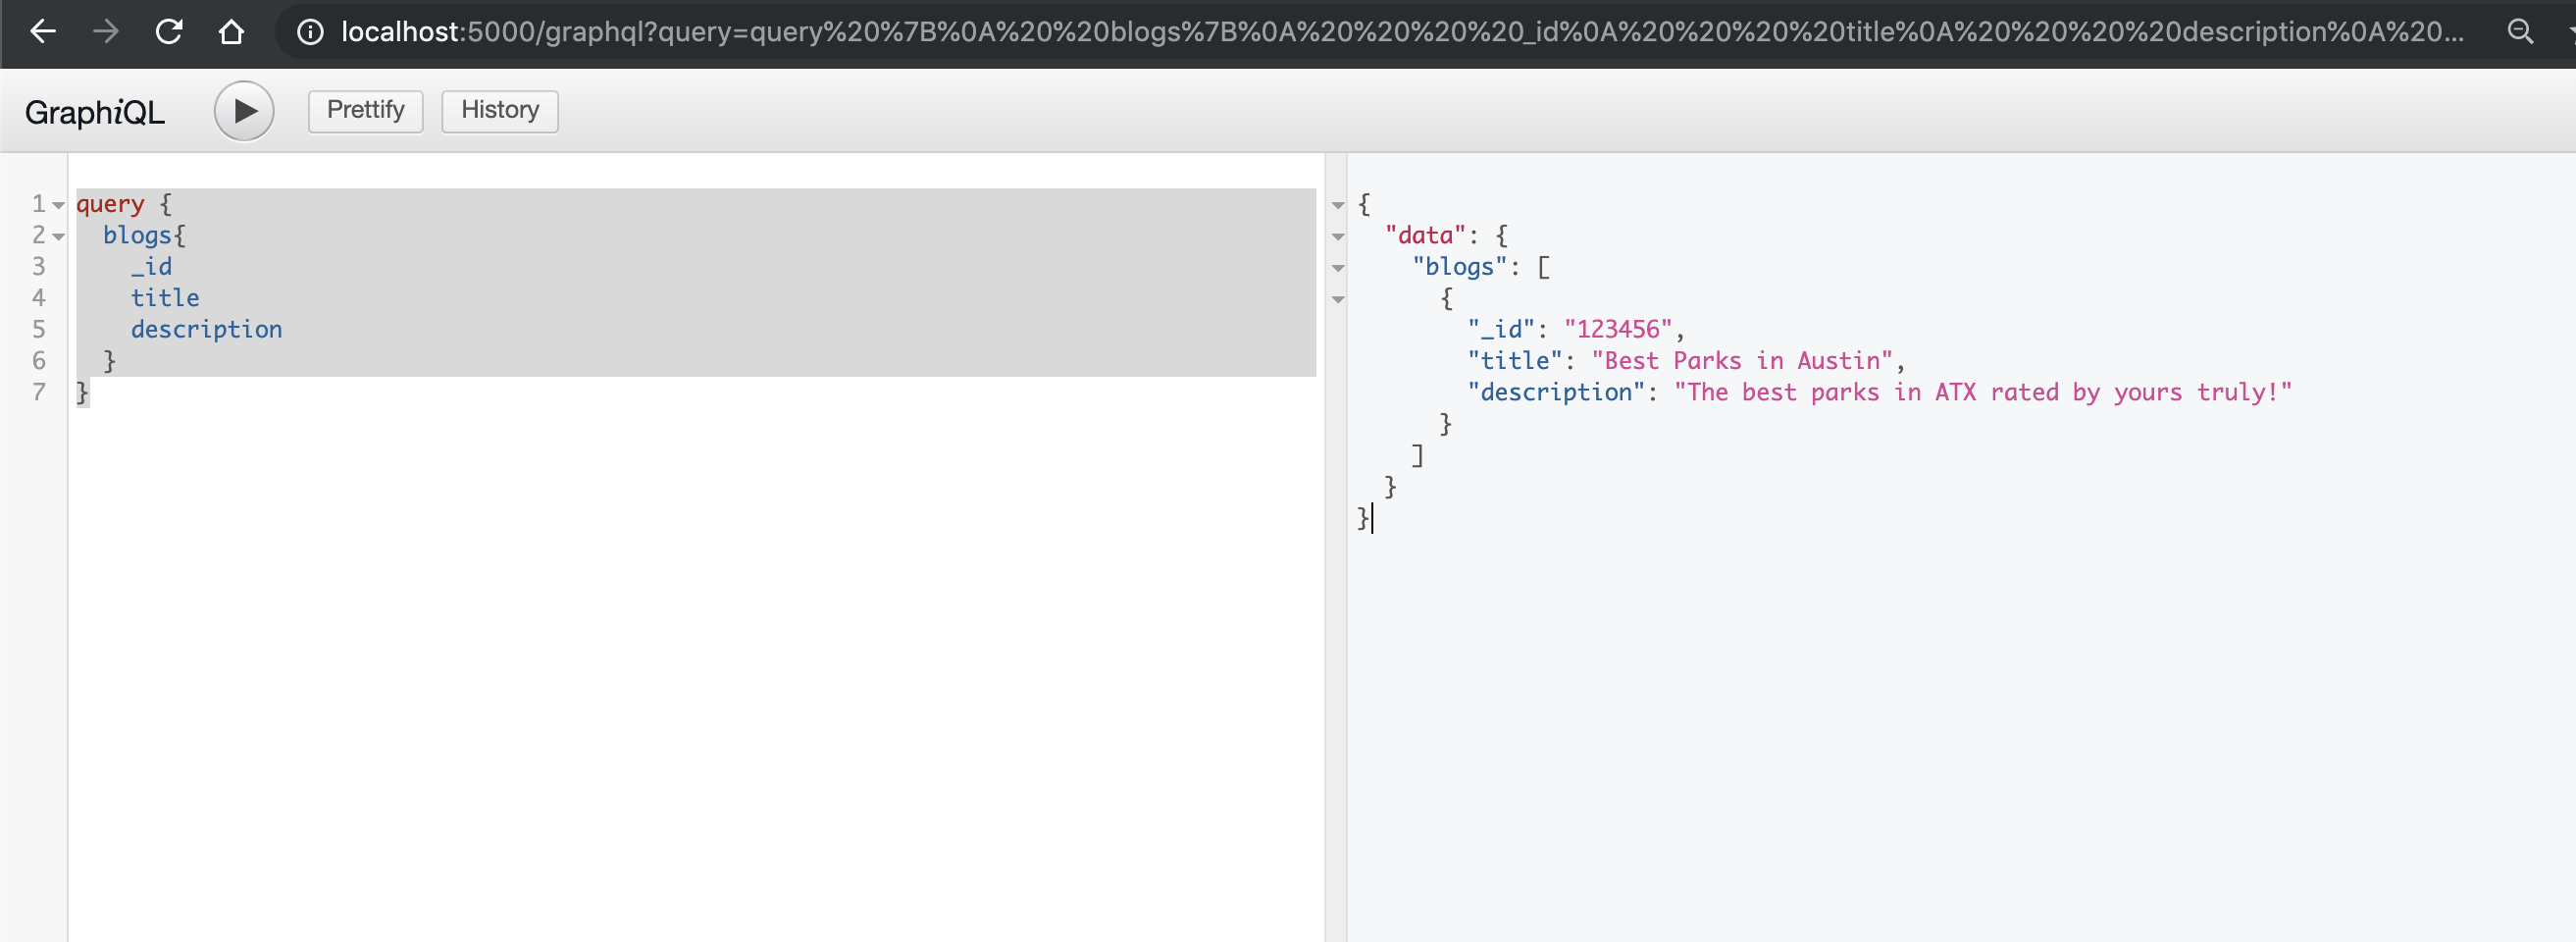
Now let’s check the query endpoint:
1 2 3 4 5 6 7 | query { blogs{ _id title description } } |
And here is the response:
1 2 3 4 5 6 7 8 9 10 11 | { "data": { "blogs": [ { "_id": "123456", "title": "Best Parks in Austin", "description": "The best parks in ATX rated by yours truly!" } ] } } |
Conclusion
Now we have a more realistic GraphQL API that uses a custom Blog type and stores and returns data using that type. We saw that we can easily specify the exact fields that we want to get back from the API. We also saw how helpful this GraphiQL interface can be and we encourage you to get familiar with it. Please stick with us as we continue to flesh out this application in Part 4 of the tutorial.
Build a Simple App with GraphQL, NodeJS, Express, React, and MongoDB – Part 1
Build a Simple App with GraphQL, NodeJS, Express, React, and MongoDB – Part 2
Build a Simple App with GraphQL, NodeJS, Express, React, and MongoDB – Part 3
Build a Simple App with GraphGL, NodeJS, Express, React, and MongoDB – Part 4
Pilot the ObjectRocket Platform Free!
Try Fully-Managed CockroachDB, Elasticsearch, MongoDB, PostgreSQL (Beta) or Redis.
Get Started


