Build a Simple App with GraphQL, NodeJS, Express, React, and MongoDB - Part 1
Introduction
GraphQL is a technology that we’ve been wanting to explore since Facebook released it in 2015. We’ve created this demonstration to show you how we setup a simple application using GraphQL, NodeJS, Express, and MongoDB to create a simple blog application that allows users to create posts. This is a multi-part tutorial where we’ll start from scratch and slowly build up the application and we hope you stick around if you want to learn about using GraphQL with MERN stack. In this Part 1 we’ll be setting up a basic NodeJS Express server which will pave the way for creating the rest of the application.
What is GraphQL?
If you’re not familiar with GraphQL It ushered in a new way to approach your API. Instead of hitting various endpoints for the different data you need instead you hit one endpoint and the body of your request specifies the exact data you want. For example in a typical REST API you might make a GET request for a specific user like https://yoursite.com/api/users/123 and get back 30 fields associated with that user. The problem with this is that you might only use two or three of these fields so you’ve wasted a lot of bandwidth transferring data that you never used. GraphQL eliminates this wasted resource and allows you to specify the exact fields you want and handles your api so it only returns that data. Also it’s very elegant hitting one endpoint to get all the data you need. This is great because your backend developers don’t have to constantly be creating new endpoints to keep up with the needs of the front-end developers. The coordination between front-end and back-end developers is greatly simplified in this way.
One last thing, Facebook made GraphQL open source so it’s an npm install away from being in your next app.
Let’s Get Started
Prerequisites
- You don’t need to be an expert in any of the technologies used but you should have a basic understanding of Javascript, NodeJS, Express, and MongoDB
This is a typical GraphQL query:
`js
{
query: { // operation type
2
3
4
email // requested field
company // requested field
}
}
}
`
Set up the NodeJS Express Server
We will first be setting up a NodeJS server and use the popular Express library to host our GraphQL Api.
First navigate to a folder where you want to store your project then create a new directory to store all the code:
1 2 | mkdir graphql-app-400 cd graphql-app-400/ |
We’ll be using npm to manage our dependencies so we’ll need to run the following command and hit enter to accept all the default settings:
1 | npm init |
You should see a response similar to the following:
1 2 3 4 5 6 7 8 9 10 11 12 13 14 15 16 17 18 19 20 21 22 23 24 25 26 27 28 29 30 31 32 33 34 35 36 37 | $ npm init This utility will walk you through creating a package.json file. It only covers the most common items, and tries to guess sensible defaults. See `npm help json` for definitive documentation on these fields and exactly what they do. Use `npm install <pkg>` afterwards to install a package and save it as a dependency in the package.json file. Press ^C at any time to quit. package name: (graphql-app-400) version: (1.0.0) description: entry point: (index.js) test command: git repository: keywords: author: license: (ISC) About to write to /Users/alexthompson/Documents/500Rockets/500Rockets GitRepos/ObjectRocketDemoRepos/kbobjectrocket/graphql-app-400/package.json: { "name": "graphql-app-400", "version": "1.0.0", "description": "", "main": "index.js", "scripts": { "test": "echo "Error: no test specified" && exit 1" }, "author": "", "license": "ISC" } Is this OK? (yes) $ |
That npm init should have created a package.json file in your project folder similar to below:
1 2 3 4 5 6 7 8 9 10 11 | { "name": "graphql-app-400", "version": "1.0.0", "description": "", "main": "index.js", "scripts": { "test": "echo "Error: no test specified" && exit 1" }, "author": "", "license": "ISC" } |
Install dependencies
Now we’ll install two of our dependencies Express and body-parser. Express is a framework that makes creating API’s simpler and body-parser is a package typically used with express that allows you to extract JSON from requests. You can install these two packages in one command like so:
1 | npm install --save express body-parser |
The --save flag is used to indicate that these are packages that we want to use in production. But now we want to install another dependency but one that is for development purposes only. We’ll be installing the package nodemon which will restart the NodeJS server whenever code changes are made. We’ll by changing code frequently and so we don’t want to have to restart the server manually every time. This is how you install nodemon with npm:
1 | $ npm install --save-dev nodemon |
Notice we used the --save-dev flag this time because this package is only used when working on a development environment and you won’t want this package on production.
Create the basic NodeJS Express Server
Now we’ll create the app.js file directly under our project directory and this file will be our server and where we’ll be doing most of our coding. You can create file through command line:
1 | touch app.js |
We’ll show the code here and then dissect if afterwards:
File: app.js
`js
const express = require(‘express’) // import express
const bodyParser = require(‘body-parser’) // import body-parser
const app = express() // create express server
app.use(bodyParser.json()) // use body-parser middleware to parse incoming json
app.get(‘/’, (request, response, next) => { // a test route to verify the app is running
})
app.listen(5000) // setup server to run on port 5000
`
What we’ve done: We’ve imported the dependencies that we just installed (express & body-parser) We’ve initialize it as an express route and set it to listen on port 5000 ( this can be another port if you’d like) We set body-parser as the middleware so our api accepts json data We created a test route so we can test if the route is working. The route just returns the text ‘Our app is alive!’
Verify the basic server is running
Now that we’ve setup the basic NodeJS Express server we will hit the test route we created to see if it’s working but of course first we need to start the server. To start the server we’ll use nodemon:
1 | nodemon app.js |
You should see something like the following:
`bash
$ nodemon app.js
[nodemon] 1.18.10
[nodemon] to restart at any time, enter rs
[nodemon] watching: .
[nodemon] starting node app.js
`
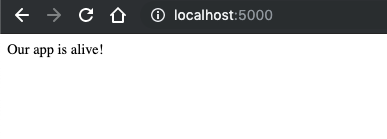
Now we can go to a web browser ( we’re using Chrome ) and hit our test route by going to http://localhost:5000/. You should see the ‘Our app is alive!’ message:
Conclusion
This was Part 1 of the tutorial on setting up a simple GraphQL, NodeJS, Express, MongoDB application from scratch. We covered how to setup a basic NodeJS Express server and were able to confirm that it was running. We also talked a little about what GraphQL does and we look forward to getting into our application in the next part of the tutorial. Please stay with us as we continue to Part 2 of this tutorial.
Build a Simple App with GraphQL, NodeJS, Express, React, and MongoDB – Part 1
Build a Simple App with GraphQL, NodeJS, Express, React, and MongoDB – Part 2
Build a Simple App with GraphQL, NodeJS, Express, React, and MongoDB – Part 3
Build a Simple App with GraphGL, NodeJS, Express, React, and MongoDB – Part 4

Pilot the ObjectRocket Platform Free!
Try Fully-Managed CockroachDB, Elasticsearch, MongoDB, PostgreSQL (Beta) or Redis.
Get Started