Redis Example with Python
Introduction
Redis, standing for REmote DIctionary Server, is a type of key-value NoSQL server. Redis is designed to support disk storage for persistence, retaining data after power is shut off, and stores data so it can be cached and accessed quickly. Redis supports multiple data types, including strings, hashes, lists and sets. This tutorial will provide an explanation on how to create and set up a Redis example in a Python virtual environment.
Prerequisites
While this tutorial will use a Python virtual environment for the Redis client, the Redis server must be properly installed and configured before beginning. If using macOS X, Homebrew can be used to install Redis with the
brew install rediscommand. Alternatively, a pre-compiled version of Redis can be used to run the server with Windows. In Ubuntu, install Redis (redis-serverpackage) with APT-GET.Python must be installed for the package manager to initialize the software packages that use the
pipcommand. Use the commandpython3 --version(orpython3 -V) in a UNIX terminal to confirm what version of Python is currently installed. For Windows machines, just open the Python application IDLE (GUI) to obtain the currently installed version.
Install packages on Ubuntu
If needed for Debian-based distro of Linux, such as Linux Mint or Ubuntu, execute the following command to install the PIP package manager for Python 3:
1 | sudo apt install python3-pip |
The following command will install the virtual environment for Python:
1 | sudo apt install virtualenv |
Start the Redis server
If using a version of Linux that uses the Systemd management system, execute the following systemctl command to start the Redis server:
1 | sudo systemctl start redis |
For macOS X, start the Homebrew Redis server with the following command:
1 | brew services start redis |
Redis Virtual Environment
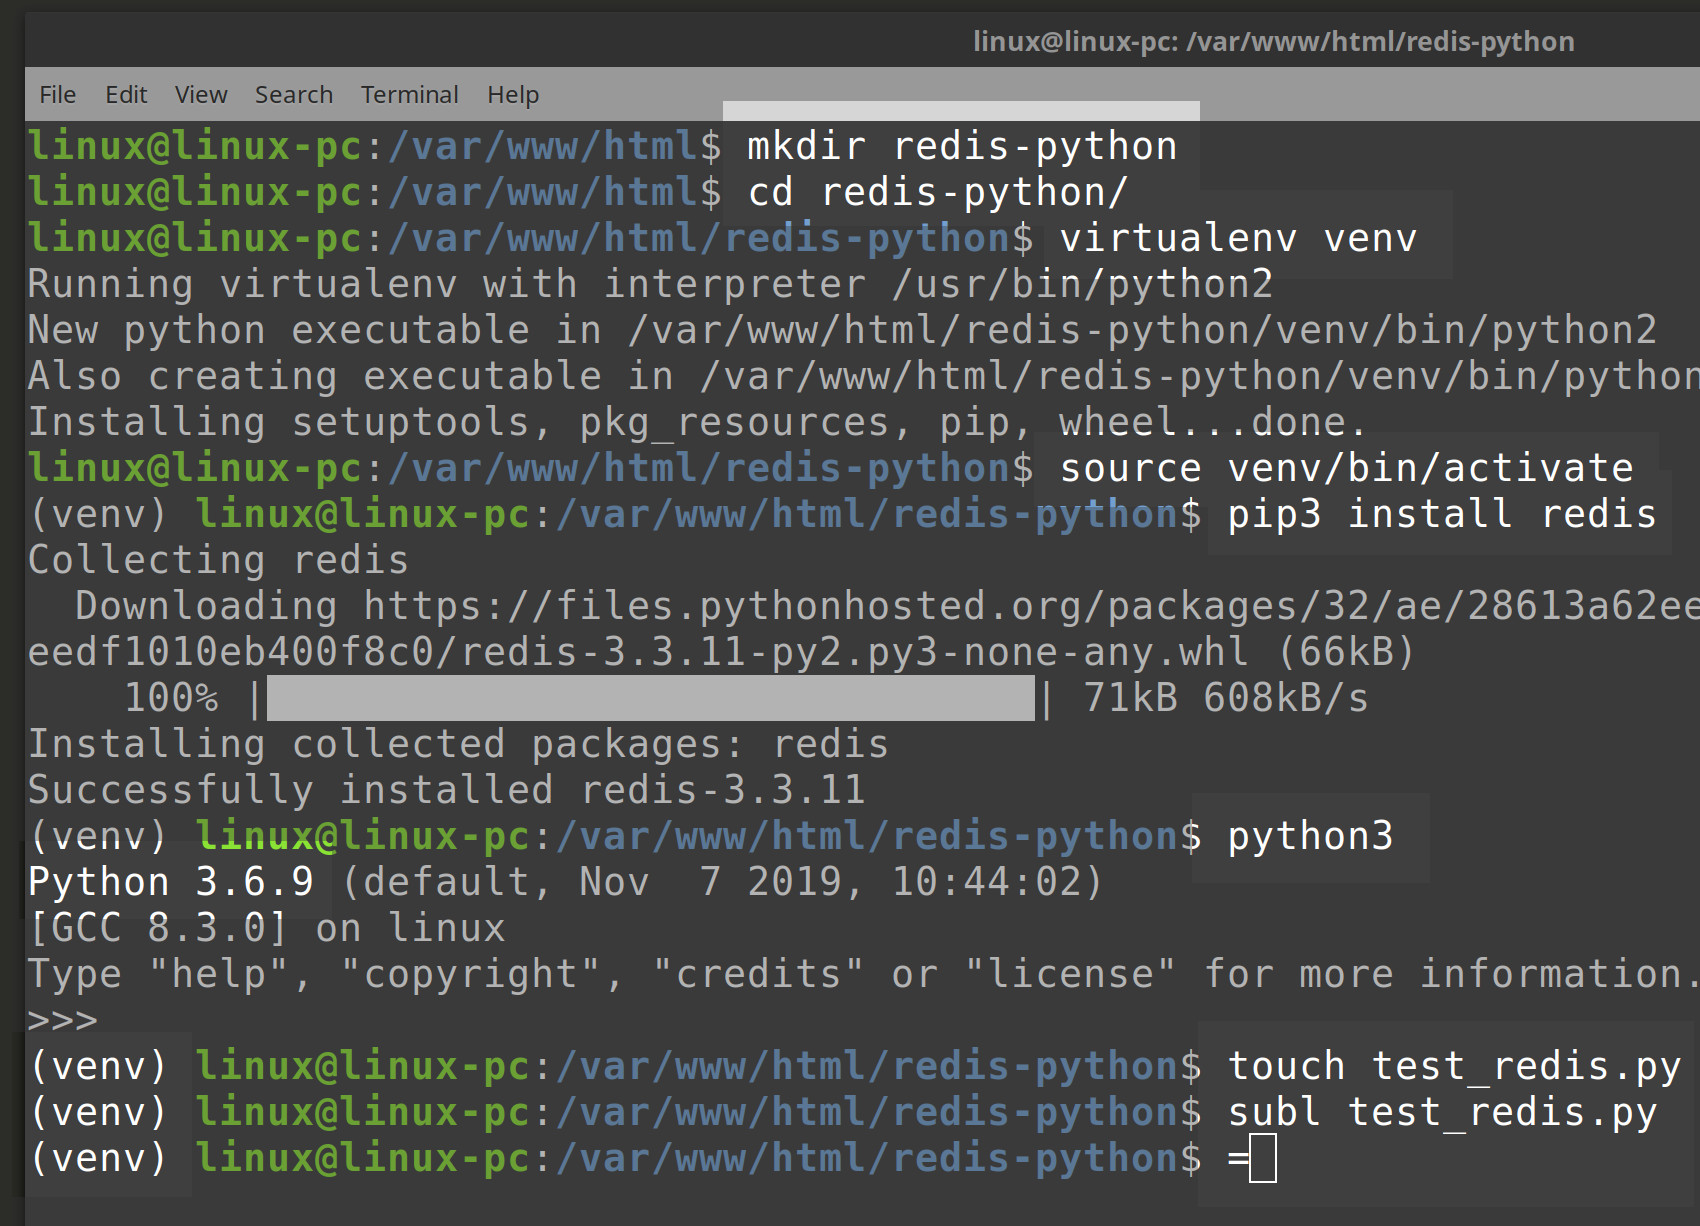
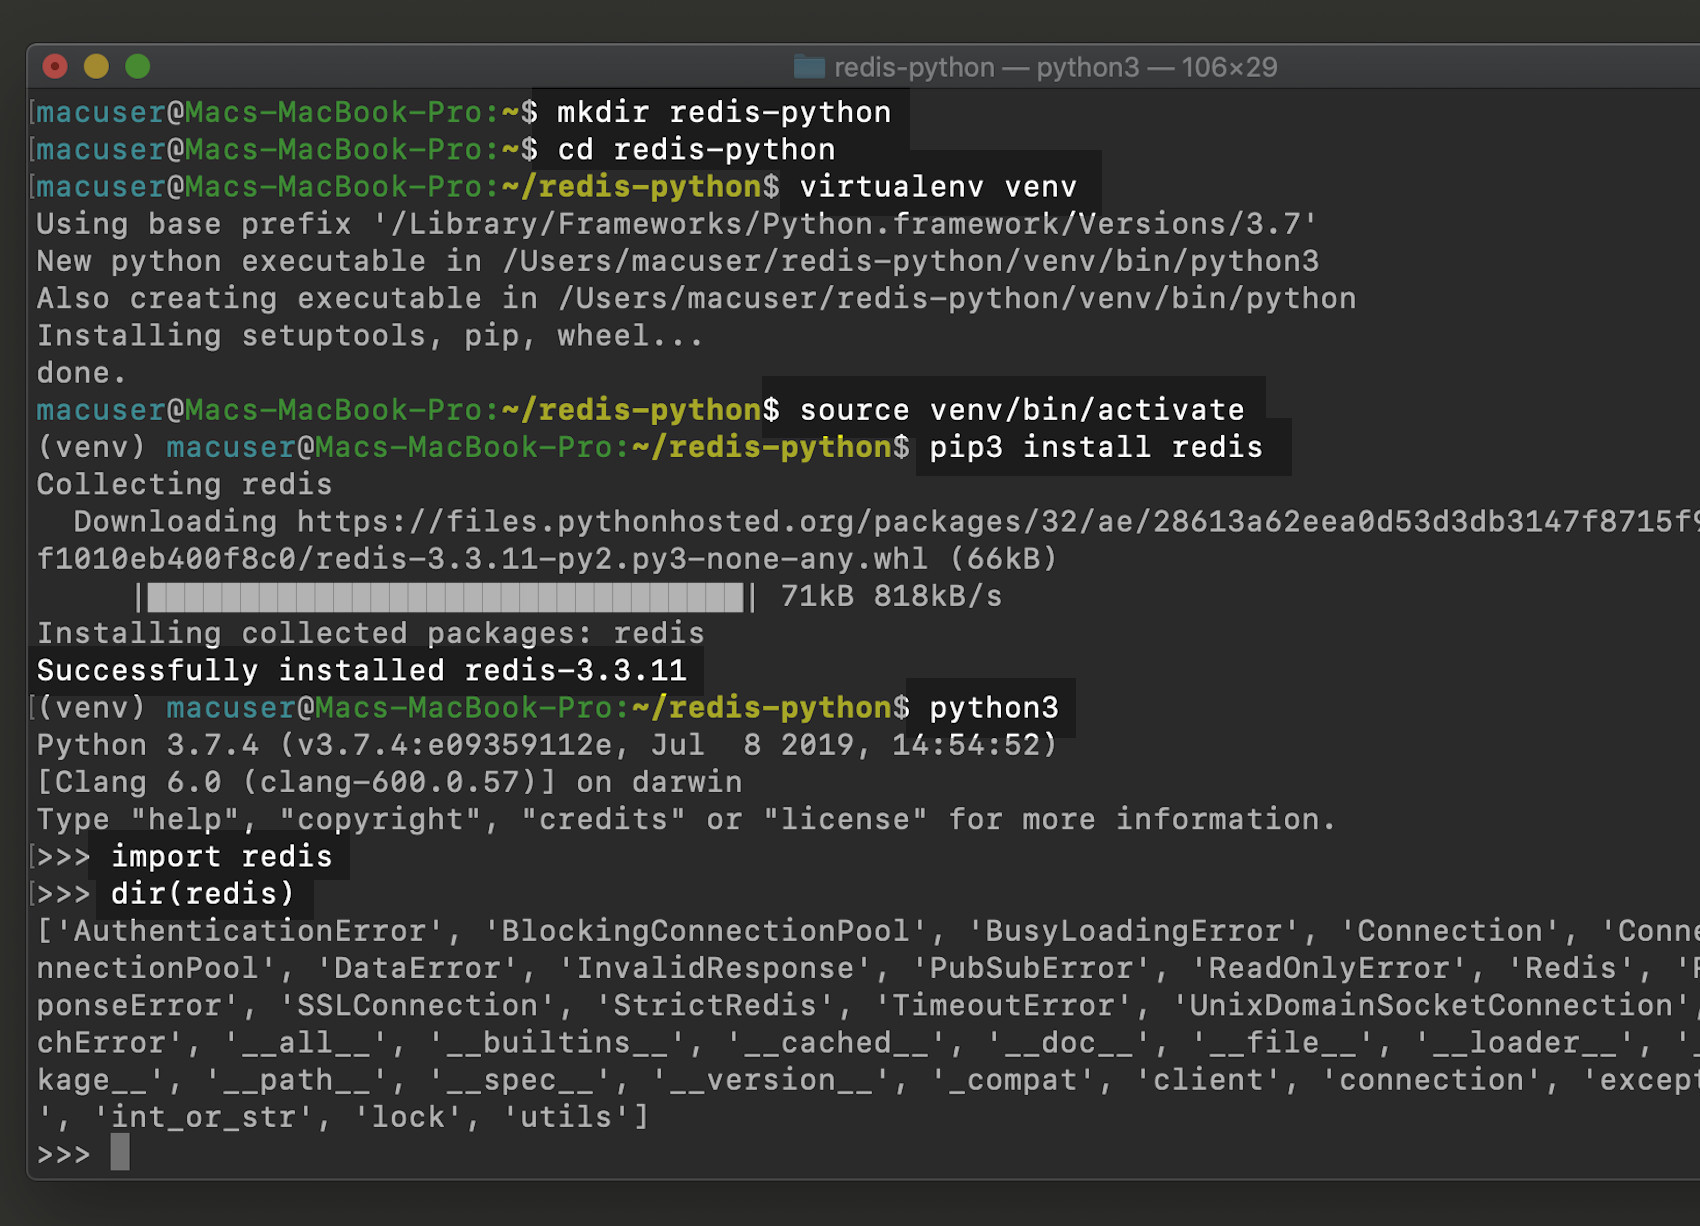
First, the virtual environment for executing commands inside of the Redis and Python project must be set up.
From the terminal, execute the following command to install the virtual environment using the pip package:
1 | sudo pip3 install virtualenv |
Now create a virtual environment folder inside of the project directory:
1 | virtualenv venv |
The above command should produce the following results:
1 2 3 4 5 | Using base prefix '/usr' New Python executable in /home/linux/venv/bin/Python3 Also creating executable in /home/linux/venv/bin/Python Installing setuptools, pip, wheel... done. |
Next, in a UNIX terminal, use the ls command to list all of the files in the directory, or dir in Windows command prompt. The /venv directory should now be displayed.
Now execute the following source command to activate and enter the virtual environment:
1 | source venv/bin/activate |
The(venv) prefix should now be attached to the command prompt, indicating entrance into the virtual environment was successful.
Specify the Python version for the virtual env
If multiple versions of Python 3 are installed, use the following which command in a UNIX terminal to obtain more information about the current version and installation location:
1 | which python3 |
The results should resemble the following:
1 | /usr/bin/python3 |
Now use the Python path, from above, to setup a virtual environment for that particular version of Python, as shown in the following example:
1 | virtualenv --python=/usr/bin/python3 venv/redis_example |
Install Redis for Python
Now install the redis-py client for the Redis key-values in Python using PIP with the following pip3 command:
1 | pip3 install redis |
Once installation is completed, access to the client in the Python interpreter should be granted.
Run Redis in a Python virtual environment
A Python executable command can be ran in the console to import Redis and create an example using the Redis data types. Execute the following command to run the Python command-line console:
1 | python3 |
Access to the Python interactive interpreter should now be granted. Here a sample program to run a virtual environment using Redis can be created.
NOTE: Press CTRL+D to exit out of the interactive Python interpreter.

NOTE: The above instructions for setting up the Python virtual environment for Redis will work for both macOS and Linux systems.
Use the Redis client inside of Python
Once access to the Redis client has been granted, execute the following command to return its version string inside of Python:
1 | redis.__version__ |
The results should resembles the following, indicating a version of Python 3, or greater, is installed:
1 | '3.3.11' |

Access Redis in virtual env
Check that a Redis server and cli is installed in the system by executing the redis-server --version command. This should confirm that the version is the same as the redis-cli –version.
Access the Redis server in Python
The Redis database must be imported into Python. Execute the following command to create a connection to import the Redis-py client package:
1 | import redis |
Redis example in Python
Next, execute the following command to create a connection for the Redis server configuration:
1 2 | redis_server = redis.Redis("localhost") redis_server.set("name", "orkb") |
The above set() line of code should return a response of TRUE.
Now execute the following command to get the set name for the Redis server:
1 | redis_server.get("name") |
The above command should return the server name in the form of a bytes string, as shown here:
1 | b'orkb' |
Conclusion
This tutorial explained how to create and set up a Redis example in a Python virtual environment. The article specifically explained how to install packages on Ubuntu, start the Redis server, set up the Redis virtual environment and specify the Python version for the virtual environment. The tutorial also covered how to install Redis for Python, run Redis in a Python virtual environment, use the Redis client inside of python and access Redis in a virtual environment. Remember that the interactive Python interpreter can easily be exited by just pressing the CTRL + D keys.
Pilot the ObjectRocket Platform Free!
Try Fully-Managed CockroachDB, Elasticsearch, MongoDB, PostgreSQL (Beta) or Redis.
Get Started


