Redis Command Basics - Part 2
Introduction
In this second installment of this multi-part article we’ll show you more Redis command basics so you continue to feel more and more comfortable working with Redis.
More Essential Redis Commands for Key-Value Pairs
In the first part of this tutorial we learned the basic SET, GET, DEL, EXISTS, INCR, and DECR commands. We’ll learn a couple more to our repertoire.
INCRBY
Similar to the INCR command which increases a value by one, we can also increase the value by a certain amount with the INCRBY command. Let’ see it in action. We’ll also show the SET and GET here as a refresher of what we covered in Part 1:
1 2 | 127.0.0.1:6379> SET var 99 OK |
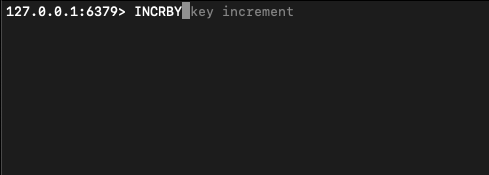
Now we haven’t told you the syntax of the command but notice that after you type the command INCRBY, the command line will let you know in grey what it’s expecting. In this case it’s expecting a key followed by an increment:
So let’s follow it’s lead and increase our var by 100 like so:
1 2 3 | 127.0.0.1:6379> INCRBY var 100 (integer) 199 127.0.0.1:6379> |
DECRBY
DECRBY works in the same fashion as INCRBY and would look like this:
1 2 3 | 127.0.0.1:6379> DECRBY var 100 (integer) 99 127.0.0.1:6379> |
MSET
If you’d like to set multiple key value pairs at the same time you’ll use the MSET command. Let’s see how we’d set two key-value pairs:
1 2 | 127.0.0.1:6379> MSET var1 apple var2 orange OK |
Let’s verify that it worked by GETting the values:
1 2 3 4 5 | 127.0.0.1:6379> GET var1 "apple" 127.0.0.1:6379> GET var2 "orange" 127.0.0.1:6379> |
Note: If you run this command on existing keys it will replace the values. If you don’t want to overwrite the value check out the next command MSETNX.
MSETNX
If you want to set multiple key values but want to make sure you don’t replace any existing keys, then MSETNX is the command to use. If any of the keys you provide already exists it will abort the command entirely.
We’ll FLUSHALL our data so we have a fresh start then look at an example.
1 2 | 127.0.0.1:6379> FLUSHALL OK |
Now let’s set a variable:
1 2 | 127.0.0.1:6379> SET var1 apple OK |
Now let’s use MSETNX and try to overwrite var1 as well as set some other key values:
1 2 3 4 5 6 | 127.0.0.1:6379> MSETNX var1 orange var2 pear (integer) 0 127.0.0.1:6379> GET var1 "apple" 127.0.0.1:6379> GET var2 (nil) |
As you can see MSETNX returned a 0 meaning it failed. We then check var1 to see that it was not changed and var2 was not set. This is because since var1 already existed the entire operation was aborted and no values were set.
MGET
If you want to get multiple key values at the same time you’ll use the command MGET. For this example we’ll use MSET to set multiple key values then use MGET to read them back:
1 2 3 4 5 6 | 127.0.0.1:6379> MSET var1 apple var2 orange OK 127.0.0.1:6379> MGET var1 var2 1) "apple" 2) "orange" 127.0.0.1:6379> |
APPEND
If you have a string value and want to append to a string onto it you can use the APPEND command. Let’s see an example:
1 2 3 4 5 6 7 | 127.0.0.1:6379> SET str1 hi OK 127.0.0.1:6379> APPEND str1 lltop (integer) 7 127.0.0.1:6379> GET str1 "hilltop" 127.0.0.1:6379> |
Note: If the key you provide does not exist then it will just use that string as the value ( so it works exactly like a SET in that case).
GETRANGE
If you want a substring of a value you’ll use GETRANGE and provide it with a key and a range.
1 2 3 4 | 127.0.0.1:6379> SET str 1234567890 OK 127.0.0.1:6379> GETRANGE str 0 5 "123456" |
Note It does also accept negative offsets if you want to start from the end of the string.
RENAME
If you want to rename a key use the RENAME command. The value will of course stay unchanged.
1 2 3 4 5 6 | 127.0.0.1:6379> SET cost 9.99 OK 127.0.0.1:6379> RENAME cost price OK 127.0.0.1:6379> GET price "9.99" |
RENAMENX
Like the other NX commands, this one performs a RENAME but only if the new key name doesn’t already exist. If the new key already exists it performs no action.
1 2 3 4 5 6 7 | 127.0.0.1:6379> SET var1 99 OK 127.0.0.1:6379> SET var2 100 OK 127.0.0.1:6379> RENAMENX var1 var2 (integer) 0 127.0.0.1:6379> |
It returns a 0 so we know the action failed.
Conclusion
We’ve covered a lot more commands and demos to show you exactly how they work but there is still more ground to cover so we hope you’ll join us in Part 3 of this tutorial on some of the essential Redis commands.
Pilot the ObjectRocket Platform Free!
Try Fully-Managed CockroachDB, Elasticsearch, MongoDB, PostgreSQL (Beta) or Redis.
Get Started


