NodeJs with Redis Web App Part 3
Introduction
Welcome to “NodeJs with Redis Web App Part 3,” the multiple-series. In Part 2, you learned how to configure functionally for a specific part of the search feature for your application. When an exception is raised, an error message will display on the browser. Today, in Part 3, it continues with the search feature lesson for NodeJs Redis Web App.
If you already know how to configure the search feature, and want to bypass these steps, go to The Code.
Prerequisites
- Complete the lessons for Parts 1 and 2 of the multiple-series tutorial, “NodeJs with Redis Web App.”
Retrieve a Redis Document via ID using NodeJs
In Part 2 of the NodeJs Redis Web App tutorial, you did frontend work on the application. When a user tries to retrieve data and an error occurs, the browser displays it. On the backend, the RETRIEVE function was being used.
Here in Part 3, you’ll learn how to view the records when the user receives an error.
Navigate to the directory called views.
Next, make a handlebars new file with the name details.
Use the format below to structure your HTML file. Doing this will allow the results from a user’s encountered error to show.
Search User
Creating a Sample Dataset
Construct a dataset to use as a sample you to use with this tutorial.
In the terminal, open
redis-cli.Make a few records using the Redis
HMSETcommand.
1 2 3 | HMSET usr101 firstname "yeshua" lastname "galisanao" age 9 gender "male" HMSET usr102 firstname "abi" lastname "galisanao" age 3 gender "female" |
Note: When you add a record, you’ll receive an
OKnotice after each one. This indicates the addition was a success.
Execute your application with the
nodemon app.jscommand:Next, go to the browser
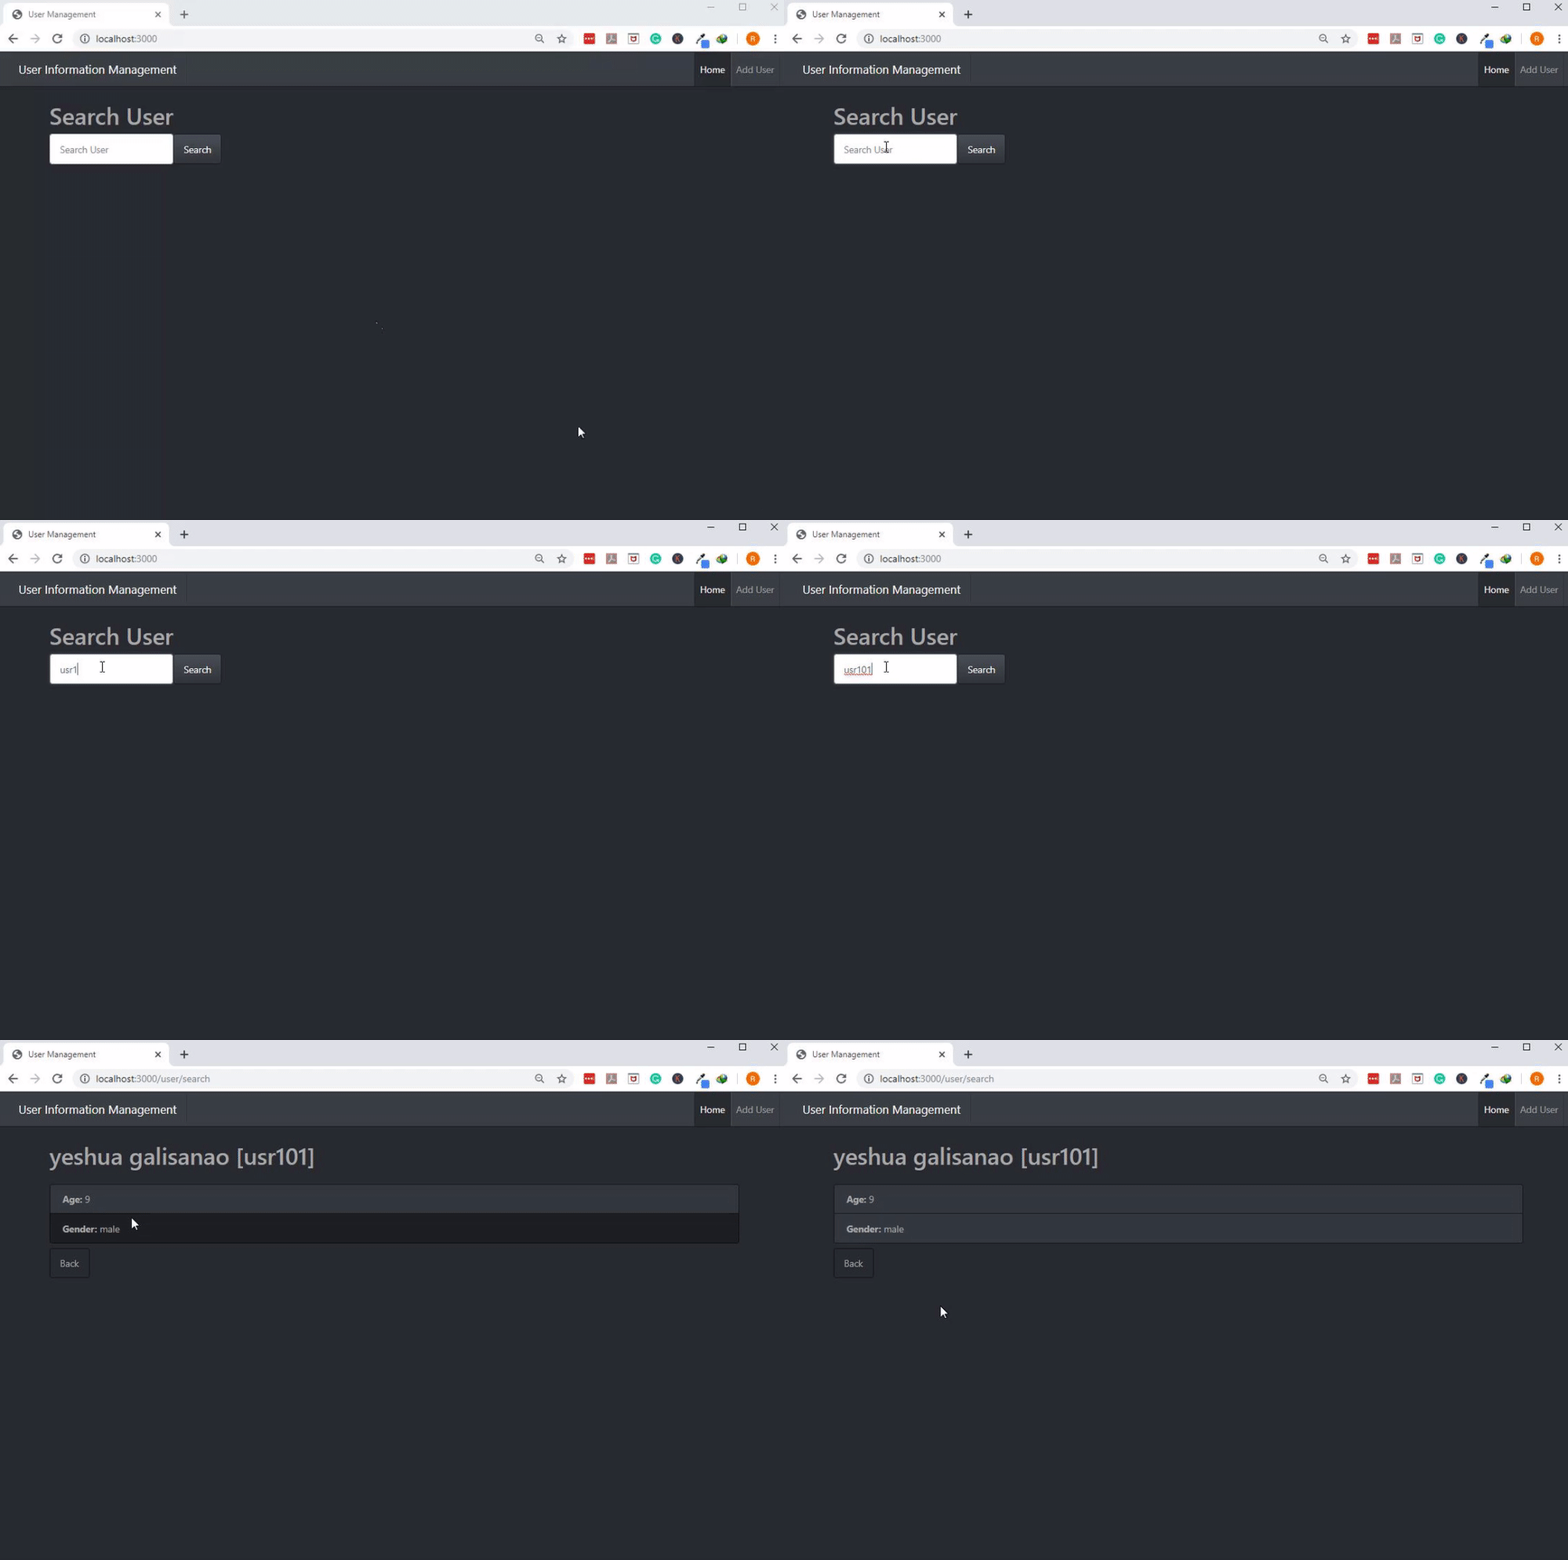
localhost:3000URL.Try a basic search to test your NodeJs Redis Web app. Input
usr101as the ID. If you want to, you could opt to tryusr102.

Adding a Redis Document using NodeJs
The Redis server successfully retrieved the documents. You can also use your application to add a record as opposed to using the command line as you did earlier.
Creating the Frontend for Adding user
Construct a new view in the folder views and save it as
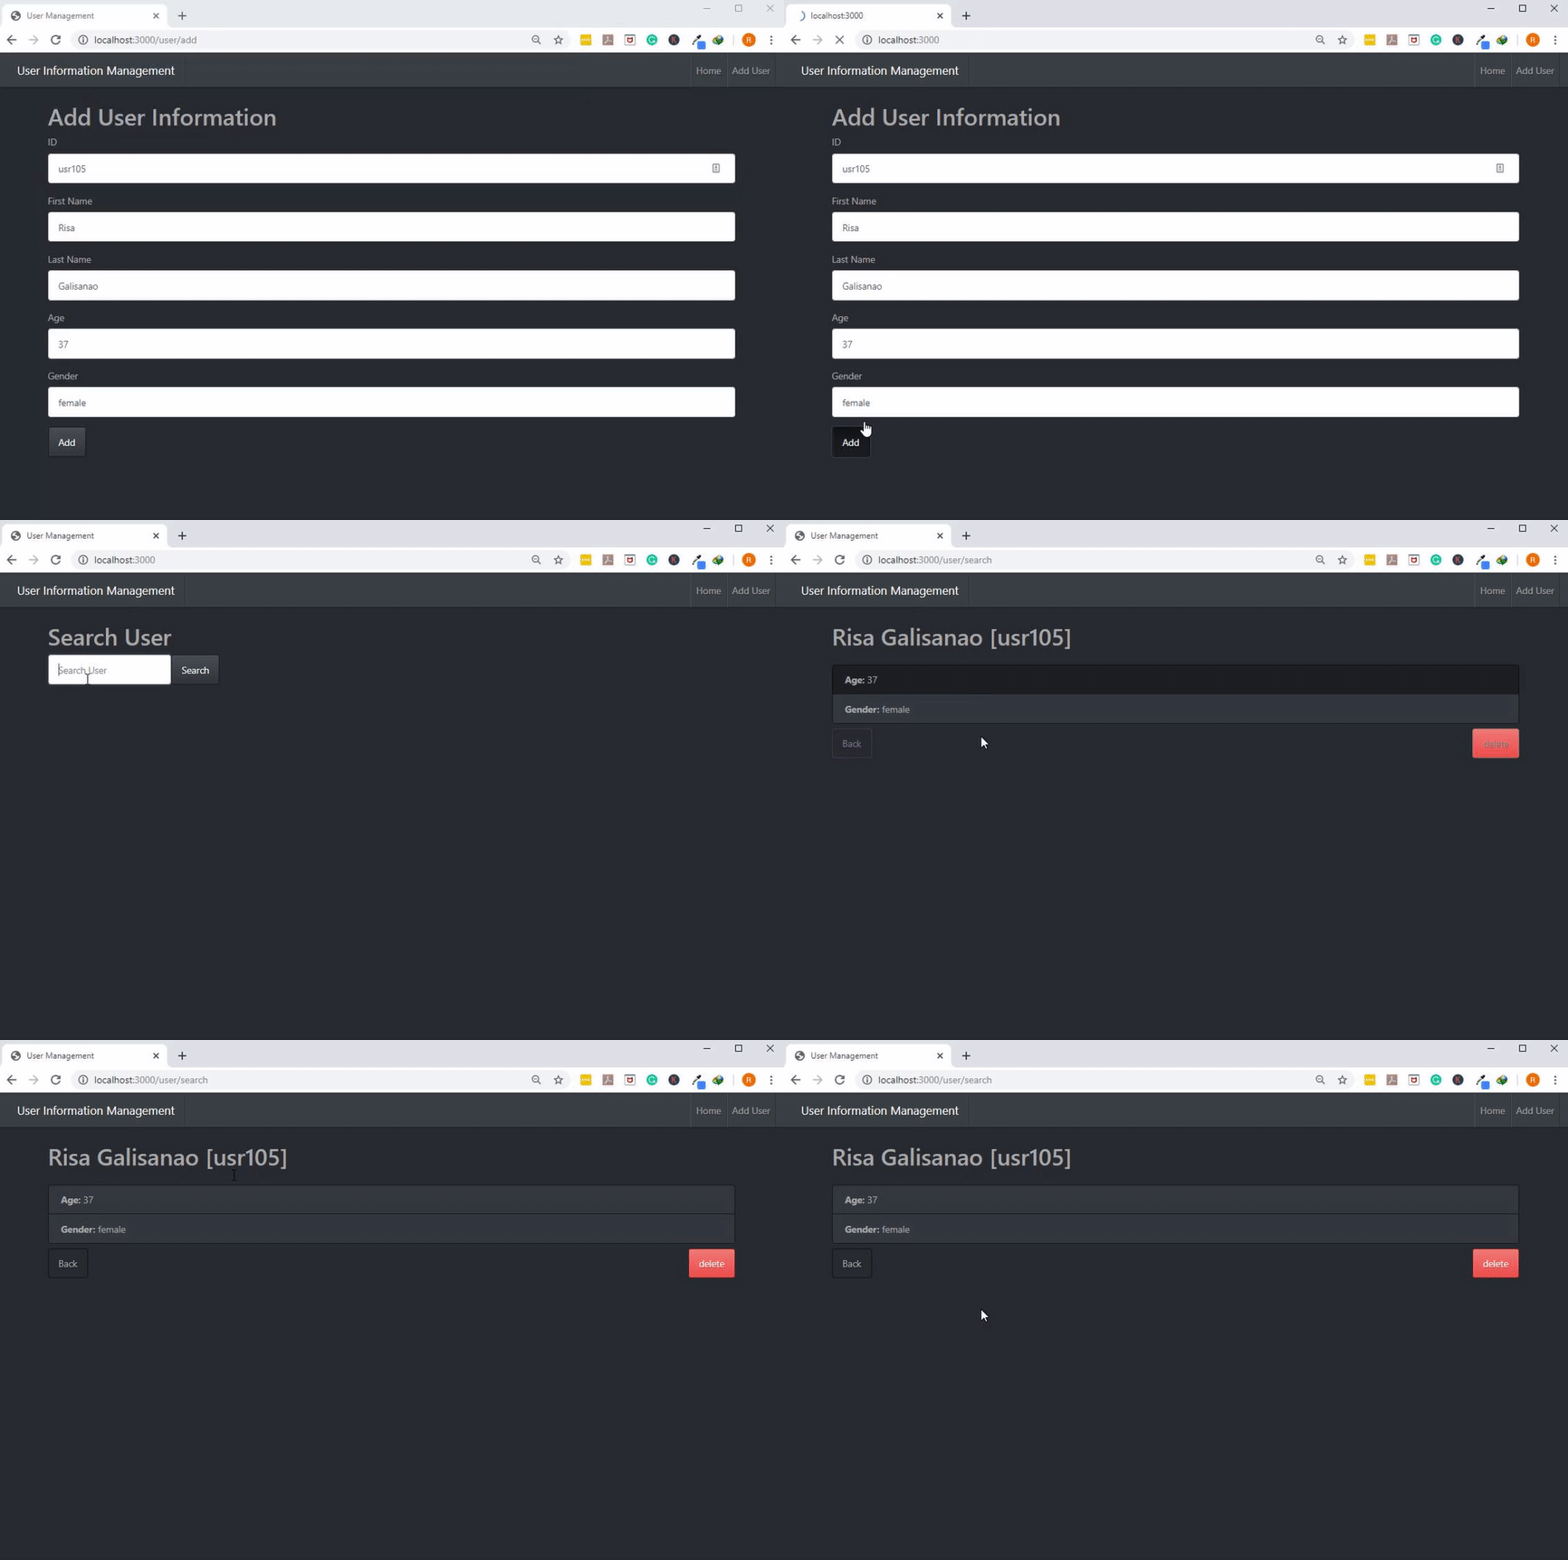
add.handlebarsfor its name.Make the structure HTML to show the page for the add user.
NOTE: The route
user/addwill show the data for the form.
Coding the Insert Operation to Redis
Configure the application to fill in the form’s values for your NodeJs Redis Web App. When finished, the result should look similar to this:
1 2 3 4 5 6 7 8 9 10 11 12 13 14 15 16 17 18 19 20 21 22 23 24 25 26 27 28 | app.post("/user/add", function(request, response, next) { let id = request.body.id; let firstname = request.body.firstname; let lastname = request.body.lastname; let age = request.body.age; let gender = request.body.gender; rclient.hmset( id, [ "firstname", firstname, "lastname", lastname, "age", age, "gender", gender ], function(error, reply) { if (error) { console.log(error); } console.log(reply); response.redirect("/"); } ); }); |
As shown above, the code illustrates that the function
request.bodyapplies the form’s variables.Next, the actions are executed with the function
.hmset().Errors are logged now with the extra function. A redirection to the Search User page will happen.

When you finished making the data additions, you could successfully query it.
Conclusion
This concludes Part 3 of the multiple-series tutorial about NodeJs Redis Web. In this lesson, you learned more about how to use the search feature and create a search user page for your NodeJs Redis app. You configured the search feature to save error logs and redirect to the page Search User. For testing the examples given, you also created sample datasets. Refer to this lesson as a reference in your NodeJs Redis projects.
The Code
Here’s the code for the steps to NodeJs Redis Web App.
app.js
- The code snippet of adding a user
1 2 3 4 5 6 7 8 9 10 11 12 13 14 15 16 17 18 19 20 21 22 23 24 25 26 27 28 | app.post("/user/add", function(request, response, next) { let id = request.body.id; let firstname = request.body.firstname; let lastname = request.body.lastname; let age = request.body.age; let gender = request.body.gender; rclient.hmset( id, [ "firstname", firstname, "lastname", lastname, "age", age, "gender", gender ], function(error, reply) { if (error) { console.log(error); } console.log(reply); response.redirect("/"); } ); }); |
Pilot the ObjectRocket Platform Free!
Try Fully-Managed CockroachDB, Elasticsearch, MongoDB, PostgreSQL (Beta) or Redis.
Get Started


