How to Use Redisson a Redis Java Client Library on Java
Introduction
Redis is an open source, data-structure store that can be used as a caching layer, database or messaging agent. Redis can resolve complex programming issues and reduce latency and coding time. Java is a programming language typically used to create application modules for web pages. This tutorial will cover how to use the Redis Java Redisson Java client library for Java with Maven in Eclipse.
Prerequisites for using the Redis Java Redisson Java Client Library
- Redis must be properly installed and configured. Check the Redis installation with the
redis-cli --versioncommand. The result should resemble the following:
1 | redis-cli 4.0.9 |
Both Java and Eclipse must be properly installed and configured.
- Eclipse IDE
About Redisson
Redisson is a Redis Java client with in-memory data grid features that provides an easier way to work with Redis. Redisson objects provide for separation of concern, allowing for increased focus on data modeling and application logic operations. More information can be found at this link: Github – Redisson
How to Create a New Maven Project in Eclipse
The following demo shows how to create a Maven project:
 Here are the steps in order:
Open the Eclipse IDE.
Click “File” then select “New” or use the corresponding shortcut of the Alt+Shift+N keys.
Click on “Project,” then select “Maven Project” and then click the “Next” button. Here is an example:
Now check the “Create a Simple Project” box in the “New Maven Project” window.
Skipping the archetype selection, click the “Next” button.
Set the
Group Id,Artifact Idand theSNAPSHOTversion that are set to 1.0 and then click “Finish” to create the Maven project.
The results should resemble the following:
How to Declare Jedis in the Maven Dependencies
Add the following xml code in the pom.xml of the Maven project to declare the Maven dependencies:
1 2 3 4 5 6 7 8 | <dependencies> <dependency> <groupid>org.redisson</groupid> <artifactid>redisson</artifactid> <version>3.11.1</version> </dependency> </dependencies> |
The above xml code can be obtained from this link on the Maven Official Website . Look for the “Redisson latest version” and copy and paste the code into the pom.xml and then click “Save.” The results should resemble the following:
Eclipse has now successfully imported the needed Maven dependency as specified in the pom.xml file.
How to Connect Java to Redis Server
With the Maven dependency properly configured, connect the Java application to Redis a server.
Execute the following command to start the Redis server: redis-server:
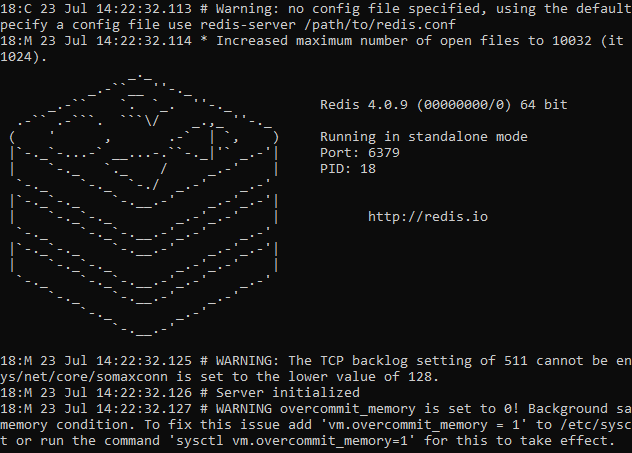 The result should resemble the above image.
How to create a new Java Class
With the server running, create the first Java Class and configure it to connect to the Redis server as shown here:
With the connection established, select “File” and then “New” and then find the “Class”. Provide a name for the class; in this case it’s “MyAPp”. Now check the “Public Static Void Main(String[]Args())” box and then click the “Finish” button to create the Java Class.
How to configure Redisson
Configure Redisson to connect to Redis. The Redisson-supported Redis configurations follow:
- Single node
- Master with slave nodes
- Sentinel nodes
- Clustered nodes
- Replicated nodes
NOTE: Redisson also supports AWS (Amazon Web Service), the ElastiCache Cluster and the Azure Redis Cache for clustered and replicated nodes.
The Java code using Redisson
This section will explain how to connect to a single node instance of Redis.
NOTE: The code will be broken down into multiple parts for easier understanding.
This instance will run locally on the default port, 6379, shown here:
1 2 3 | Config config = new Config(); config.useSingleServer().setAddress("redis://127.0.0.1:6379"); RedissonClient rdson = Redisson.create(config); |
The above code instructs Redisson to connect to a single node instance of Redis. Here the Config object’s useSingleServer method is used and will return a reference to a SingleServerConfig object.
Using the setAddress method will configure the address setting that will be set to localhost and is also the address of the node being connected to. Other settings, like retryAttempts, connectionTimeout and clientName, can also be obtained and these settings are configured using the corresponding setter methods.
How to perform the basic operation
Execute the following script to perfrom the basic Java operation:
1 2 3 4 5 6 7 8 9 | RBucket<string> bucket = redisson.getBucket("stringObject"); bucket.set("Rommel is the object value"); RMap<string, string="String"> map = redisson.getMap("theMap"); map.put("mapKey", "Risa is map value"); String objValue = bucket.get(); System.out.println("The object value is: " + objValue); String mapValue = map.get("mapKey"); System.out.println("The map value is: " + mapValue); redisson.shutdown(); |
Below is a breakdown of the above script:
RBucketobject for Java is a universal holder for any type of object, in this case it will pass a “stringObject” and set a value using the.set()method.RMapobject allows binding an object per key. Pass these in a key-value pair that are “mapKey” and “Risa is map value”.Now assign the value of the
bucketto the string “objValue” and then do the same with map to the “mapValue” via.get()method.Print those values out using Java
System.out.printlnand shutdown redisson.
When executed correctly, the results should resemble the following:
1 2 | The object value is: Rommel is the object value The map value is: Risa is map value |
Conclusion
This tutorial covered how to use the Redis Java Redisson Java client library for Java with Maven in Eclipse. The article explained how to properly set up a Maven project, how to configure Redisson, obtain the needed dependencies. The tutorial also explained how to connect Java to the Redis server and how to create a new Java Class. Remember that Redisson also supports Amazon Web Service, the ElastiCache Cluster and the Azure Redis Cache for clustered and replicated nodes.
The Full Java Code
MyApp.java
1 2 3 4 5 6 7 8 9 10 11 12 13 14 15 16 17 18 19 20 21 22 23 24 25 26 | import org.redisson.Redisson; import org.redisson.api.RBucket; import org.redisson.api.RMap; import org.redisson.api.RedissonClient; import org.redisson.config.Config; public class MyApp { public static void main(String[] args) { Config config = new Config(); // use single Redis server config.useSingleServer().setAddress("redis://127.0.0.1:6379"); RedissonClient redisson = Redisson.create(config); // perform operations RBucket<string> bucket = redisson.getBucket("stringObject"); bucket.set("Rommel is the object value"); RMap<string, string="String"> map = redisson.getMap("theMap"); map.put("mapKey", "Risa is map value"); String objValue = bucket.get(); System.out.println("The object value is: " + objValue); String mapValue = map.get("mapKey"); System.out.println("The map value is: " + mapValue); redisson.shutdown(); } } |


Pilot the ObjectRocket Platform Free!
Try Fully-Managed CockroachDB, Elasticsearch, MongoDB, PostgreSQL (Beta) or Redis.
Get Started