How to Set-up Persistence in Redis
Introduction
This tutorial will explain how to perform Redis set-up persistence and how to set up the append-only file. The Redis database backup, or RDB, are backup snapshots taken at predetermined intervals to prevent data loss in the event of an outage. Redis persistence uses an append-only file as a mode of data persistence that allows for establishing custom backup policies. Redis is able to automatically rewrite the append-only file when it become too large.
Prerequisites for Performing Redis Set-Up Persistence
Redis must be correctly installed and configured before beginning.
Execute the
redis-cli --versioncommand to confirm that Redis is installed. The result should resemble the following:
1 | redis-cli 4.0.9 |
The Redis Database Backup
The Redis Database Backup, or RDB, files are snapshots that are taken at a predetermined frequencies to be used as a backup in a point-in-time recovery in the event of a data storage failure.
How to Set Up the Redis Database Backup
The Redis database backup setting for the Redis database automatic backup requires locating the Redis installation directory on the system and calling up the redis.conf file. Execute the following command to locate the Redis installation directory:
1 | whereis redis |
The above command will return the directory for the Redis installation and should look something like the following:
1 | redis: /etc/redis |
Next, open the file using the built-in nano text editor. Execute the following sudo command to avoid permission issues:
1 | sudo nano /etc/redis/redis.conf |
Now look for the “SNAPSHOTTING” section of the file. It should resemble the below screen shot:
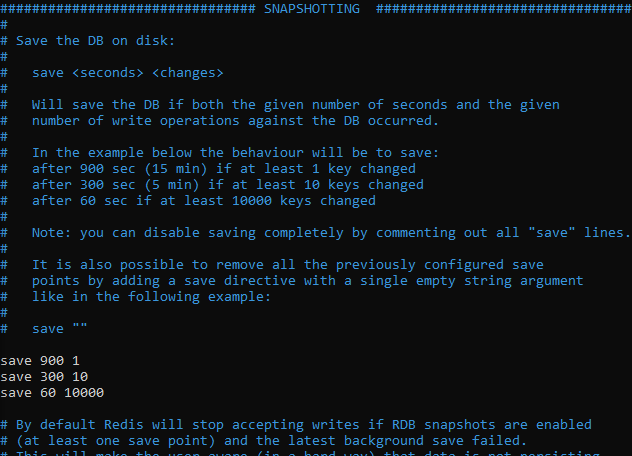
The above image shows that Redis provided default values, but custom configuration can be added as needed as shown in the following script:
1 | save 10 100000 |
The above code instructs the databases to perform a snapshot for every 100,000 keys changed in under 10 seconds. This type of setting is the most prudent for large databases.
The Append-Only File
The append-only file, or AOF, is a mode of data persistence where Redis persist the dataset by taking a snapshot and then appending the snapshot with changes as those changes take place.
How to Set Up the Append-Only File
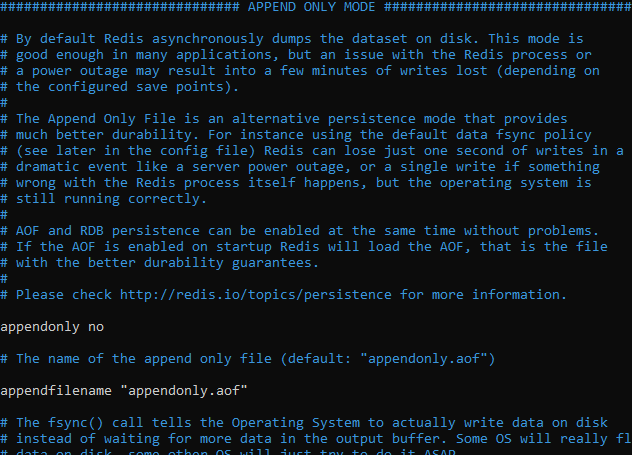
Setting up the append-only file in the redis.conf file is executed by finding the “appendonly no” line in the file and setting it to “yes”. Refer to the below “Append Only Mode” screenshot:
After executing the above process the server with the configuration file will need to be restarted. When the server is restarted it will require reentering the path to the configuration file. Be sure to make note of the path before restarting the server.
Execute the below command in sequence in the terminal:
NOTE: If the Redis server is still running, shut it down using the Ctrl+C command before proceeding.
1 | redis-server /etc/redis/redis.conf |
The above command employs the redis-server command to start the server. It must then be appended with the location of the redis.conf file.
To verify that the append-only file was properly enabled via the configuration file, navigate to the Redis directory to view the “appendonly.aof” file generated by Redis server.
Conclusion
This tutorial covered how to perform Redis set-up persistence and set up the append-only file for performing database backup snapshots. The article explained the importance of the Redis database backup and how to set up the Redis database backup. The tutorial also covered the how the append-only file works and how to set up the file to make backup snapshots at predetermined instances. Remember that after setting up the append-only file that the Redis server must be shut down and restarted. Be sure to make note of the path of the configuration file before restarting the server as the path must be reentered after restating the server. It is also important to verify that the append-only file was properly enabled by the configuration file by navigating to the Redis directory and viewing the “appendonly.aof” file generated by Redis server.


Pilot the ObjectRocket Platform Free!
Try Fully-Managed CockroachDB, Elasticsearch, MongoDB, PostgreSQL (Beta) or Redis.
Get Started