How to Connect Redis on Java using Jedis
Introduction
This tutorial will demonstrate how to connect Redis to Java with the Jedis client library for Java using Maven in Eclipse. Redis is an open-source data store that is used as a cache and database with builtin replication that supports data structures such as bitmaps, indexes, lists, sets, sorted sets and strings. Java is a general-purpose, open-source programming language designed with minimal implementation dependencies. Jedis is a client library written in Java for Redis.
Prerequisites
- Redis must be properly installed and configured.
- Confirm the Redis installation with the
redis-cli --versioncommand. The results should resemble the following:
1 | redis-cli 4.0.9 |
Java and Eclipse must be properly installed and configured.
- Eclipse IDE
Jedis Overview
Jedis is a client library written in Java for Redis. It is small and considerably faster that the other Java clients and has the largest community.
How to Create a New Maven Project in Eclipse
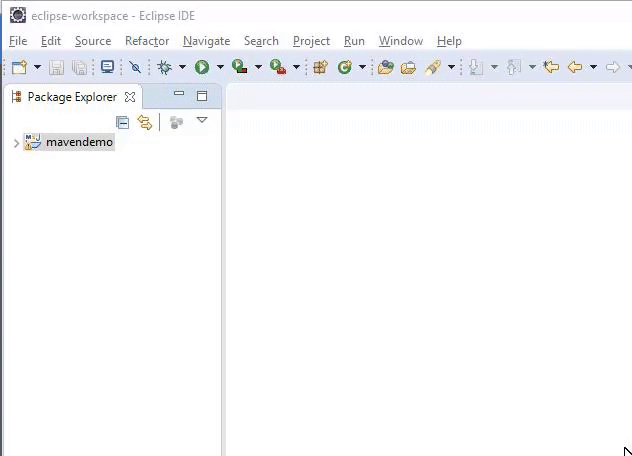
Create a Maven project as shown here:
- Open Eclipse IDE
- Click file then select “New” or it’s corresponding shortcut Alt+Shift+N,
- Click on “Project” and then select “Maven Project” and finally click the “Next” button to proceed to the next step.
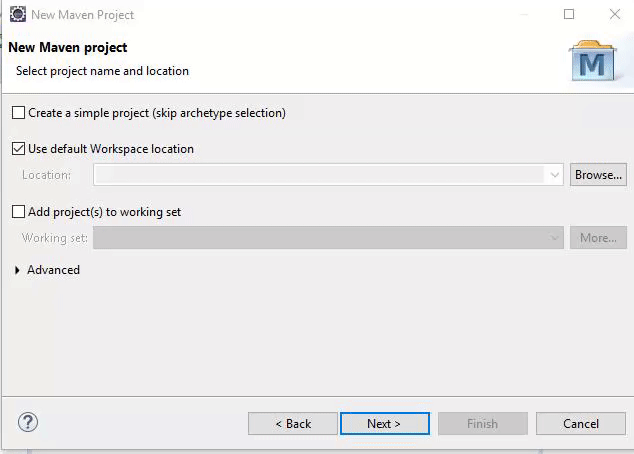
- In the “New Maven project” window, check the box “Create a simple project (skip archetype selection)” and then click the “Next” button to proceed.
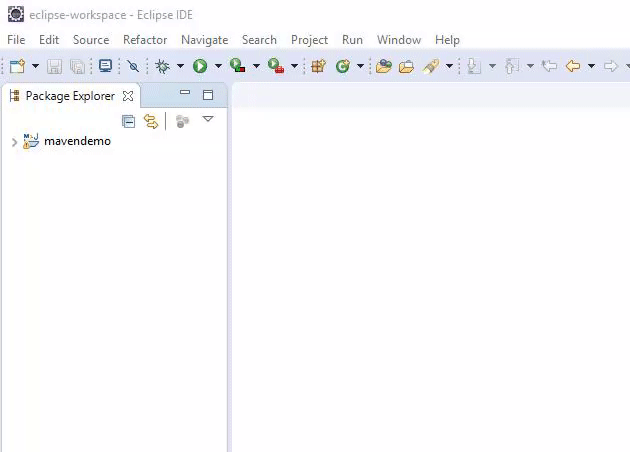
- In the next window set the Group ID, Artifact ID and the SNAPSHOT version and then click “Finish” to create the Maven project.
The results should resemble the following:
How to Declare Jedis in the Maven Dependencies
Declare dependencies in Maven with the following xml code in the pom.xml of the Maven project with the following script”
1 2 3 4 5 6 7 8 | <dependencies> <dependency> <groupid>redis.clients</groupid> <artifactid>jedis</artifactid> <version>2.9.0</version> </dependency> </dependencies> |
Copy this piece of xml code in the maven online repository. Look for the latest version of Jedis and copy and paste it into the “pom.xml” and then click “Save.”
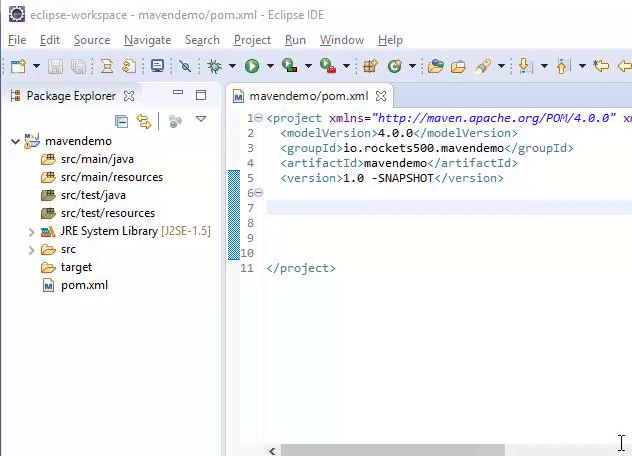
Eclipse has now successfully imported the needed Maven dependency as specified in the pom.xml file.
How to Connect Java to the Redis Server
Now that the Maven dependency is properly configured, connect the Java application to the Redis server.
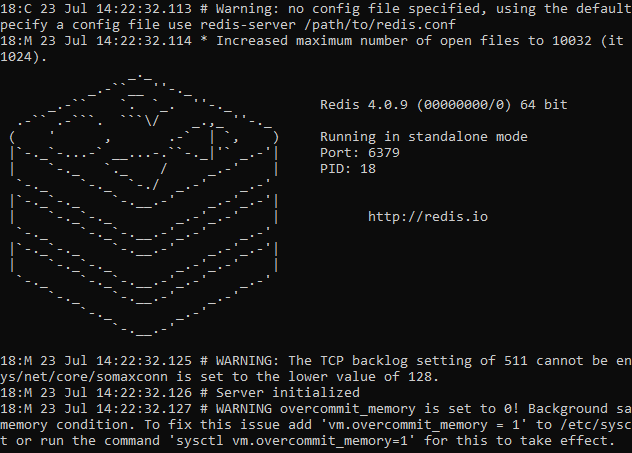
How to Start the Redis Server
Start the Redis server by executing the command redis-server; the result should resemble the following:
How to Create a New Java Class
With the Redis server running, create the first Java Class and configure the class to connect to the Redis server by performing the following sequence of actions:
- Select “File”
- Select “New”
- Select “Class”4. Give the new class a name, in this case “MyApp”.
- Check the box “public static void main(String[]Args())”6 and then click the “Finish” button to create the class.
The Java Code
Open the newly created file for the Java program and add the following code:
1 2 3 4 5 6 7 8 9 10 11 12 13 | try { Jedis jedis = new Jedis("localhost"); // prints out "Connection Successful" if Java successfully connects to Redis server. System.out.println("Connection Successful"); System.out.println("The server is running " + jedis.ping()); jedis.set("company-name", "500Rockets.io"); System.out.println("Stored string in redis:: "+ jedis.get("company-name")); }catch(Exception e) { System.out.println(e); } |
Here is a breakdown of the above code:
Jedis jedis = new Jedis("localhost");This connects our Java to Redis server running on our local host.System.out.println("The server is running " + jedis.ping());this will return an output of “The server is running Pong”.jedis.set("company-name", "500Rockets.io");This is trying to crate a record within Redis via key-value pair using the.set()method.System.out.println("Stored string in redis: "+ jedis.get("company-name"));This will obtain the data stored inside Redis by using the.get()method.
The result of the above code should resemble the following:
1 2 3 |
Conclusion
This tutorial explained how to properly set up a Maven project to obtain the needed dependencies to connect Redis to Java with Jedis client library for Java. The tutorial specifically explained how to start the Redis server, how to declare Jedis in the Maven dependencies, how to create a new Maven project in Eclipse and how to connect Java to the Redis server. Remember that Redis, Java and Eclipse must all be installed on the same machine in order to execute the the examples in this tutorial.
The Java Code.
MyApp.java
1 2 3 4 5 6 7 8 9 10 11 12 13 14 15 16 17 18 19 20 21 22 23 | package mavendemo; import redis.clients.jedis.Jedis; public class MyApp { public static void main(String[] args) throws Exception{ try { Jedis jedis = new Jedis("localhost"); System.out.println("Connection Successful"); System.out.println("The server is running " + jedis.ping()); jedis.set("company-name", "500Rockets.io"); System.out.println("Stored string in redis: "+ jedis.get("company-name")); }catch(Exception e) { System.out.println(e); } } } |


Pilot the ObjectRocket Platform Free!
Try Fully-Managed CockroachDB, Elasticsearch, MongoDB, PostgreSQL (Beta) or Redis.
Get Started