Install And Setup PostgreSQL
Introduction
PostgreSQL, the open-source database system, integrates well with popular operating systems. To take advantage of all PostgreSQL has to offer, administrators must be able to quickly set up user permissions to access the database. During the setup process, they may encounter errors. Learn how to address these types of situations and install setup a PostgreSQL database.
Prerequisites
- Download, install and configure PostgreSQL for your OS.
Add PostgreSQL and the APT repository for Debian Linux
- If you’re using Debian Linux, run a PostgreSQL installation and APT repository update:
1 | sudo apt update |
Install the Apache and PostgreSQL dependency packages
- Add the Ubuntu dependency packages for PostgreSQL and Apache to continue to install setup Postgresql database connect Python:
1 2 | sudo apt install wget ca-certificates sudo apt-get install libpq-dev python-dev |
- Install Apache libraries for the server if you’re using Apache:
1 | sudo apt install libgmp3-dev libpq-dev libapache2-mod-wsgi-py3 |
- Get the PostgreSQL media key with the command
wget:
1 | wget --quiet -O - https://www.postgresql.org/media/keys/ACCC4CF8.asc | sudo apt-key add - |
Use the sudo command to access privileges and the flag
-cinterpreter for the shell to get the filesources.list.After that, install the packages for PostgreSQL as shown here:
1 | sudo sh -c 'echo "deb http://apt.postgresql.org/pub/repos/apt/ `lsb_release -cs`-pgdg main" >> /etc/apt/sources.list.d/pgdg.list' |
- Now, run another APT repository update:
1 | sudo apt update |
Get the library package for PostgreSQL 11
- If you want to skip the complete APT repository install, and perform a reduced one, add only the
postgresql-11library directly from the APT repository:
1 | sudo apt install postgresql-11 |
- Another alternative is to select only the generic stable version of PostgreSQL and install it. Be sure to choose the latest
postgresqloption.
1 | sudo apt install postgresql postgresql-contrib -y |
Run a PostgreSQL reload on a Debian Linux distro
- Use the following service command to reload PostgreSQL on a Debian Linux distro.
1 | service postgresql reload |
Use Homebrew to get PostgreSQL on macOS
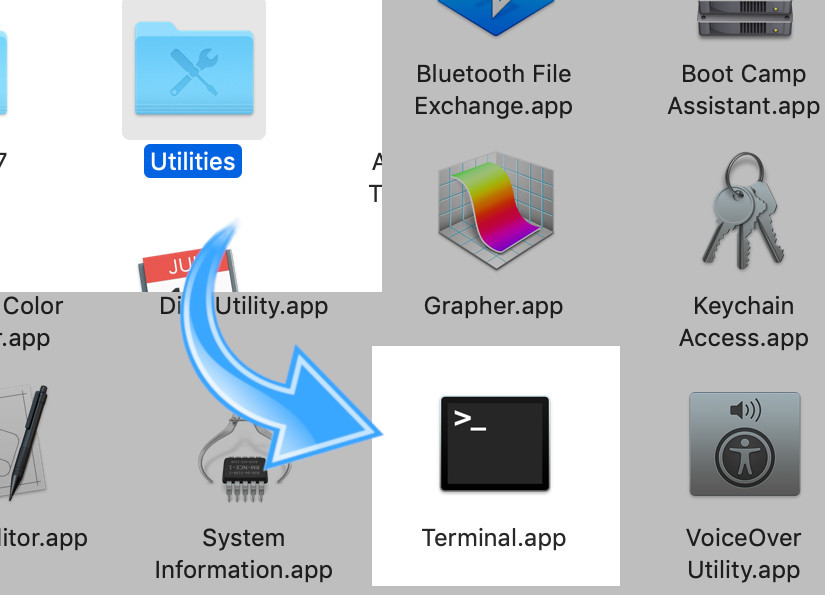
In Finder, open Utilities.
Open the application, Terminal.
- Enter the following command to install the Homebrew application:
1 | /usr/bin/ruby -e "$(curl -fsSL https://raw.githubusercontent.com/Homebrew/install/master/install)" |
- Now, update the Homebrew repositories:
1 | brew update |
- Use the command
brewto install PostgreSQL:
1 | brew install postgresql |
- Start the PostgreSQL service:
1 | brew services start postgresql |
Confirm the PostgreSQL installation
- Check that PostgreSQL is installed correctly and working with the command
psqlfor your PostgreSQL database:
1 | psql -V |
- You should see something similar to this as a response:
1 | psql (PostgreSQL) 11 |
- Here’s how to get the Homebrew version of PostgreSQL on your macOS:
1 | postgres --version |
Obtain sudo privileges as a user on a UNIX system
- It’s common for Ubuntu and macOS to disable
sudo. But if you don’t have privileges to access the system, use the command-sualong with your username. If you’re uncertain, enterwhoamias your username.
1 | su - {USER_NAME} |
- Here’s a different way to gain admin user elevated privileges:
1 | sudo -i -u {USER_NAME} |
The command psql allows you to make a PostgreSQL connection
- Open a terminal window and enter the command
psqlto make a PostgreSQL connection to install and setup a PostgreSQL database. If you’re using Linux, type thesudocommand along withpostgres, the superuser default.
1 | sudo -u postgres psql |
- See this example below. It illustrates how to use
some_useras the username to make a table and host connection with PostgeSQL.
Here’s an example of how to use psql to connect to a host and table with the username some_user:
1 | psql some_user -h 127.0.0.1 -d some_database |
NOTE: The address of the IP or domain host goes directly after the option
-h, and the name of the database follows-d.
Setup a new user for PostgreSQL
- At the prompt in the terminal, enter this command to create a username for the user for PostgreSQL:
1 | sudo -iu postgres createuser some_user |
- Use sudo and enter the interface
psql:
1 | sudo -u some_user psql |
- If you don’t have sudo privileges, the command should look similar to this:
1 | psql -U some_user |
NOTE: Special characters are not permitted in PostgreSQL usernames you create. Also, your username has to begin with a letter.
Addressing PostgreSQL user access errors
You might receive an unable to initialize policy plugin error or one that states Peer authentication failed for user "some_user". If you do, this means your username has permission errors associated with it.
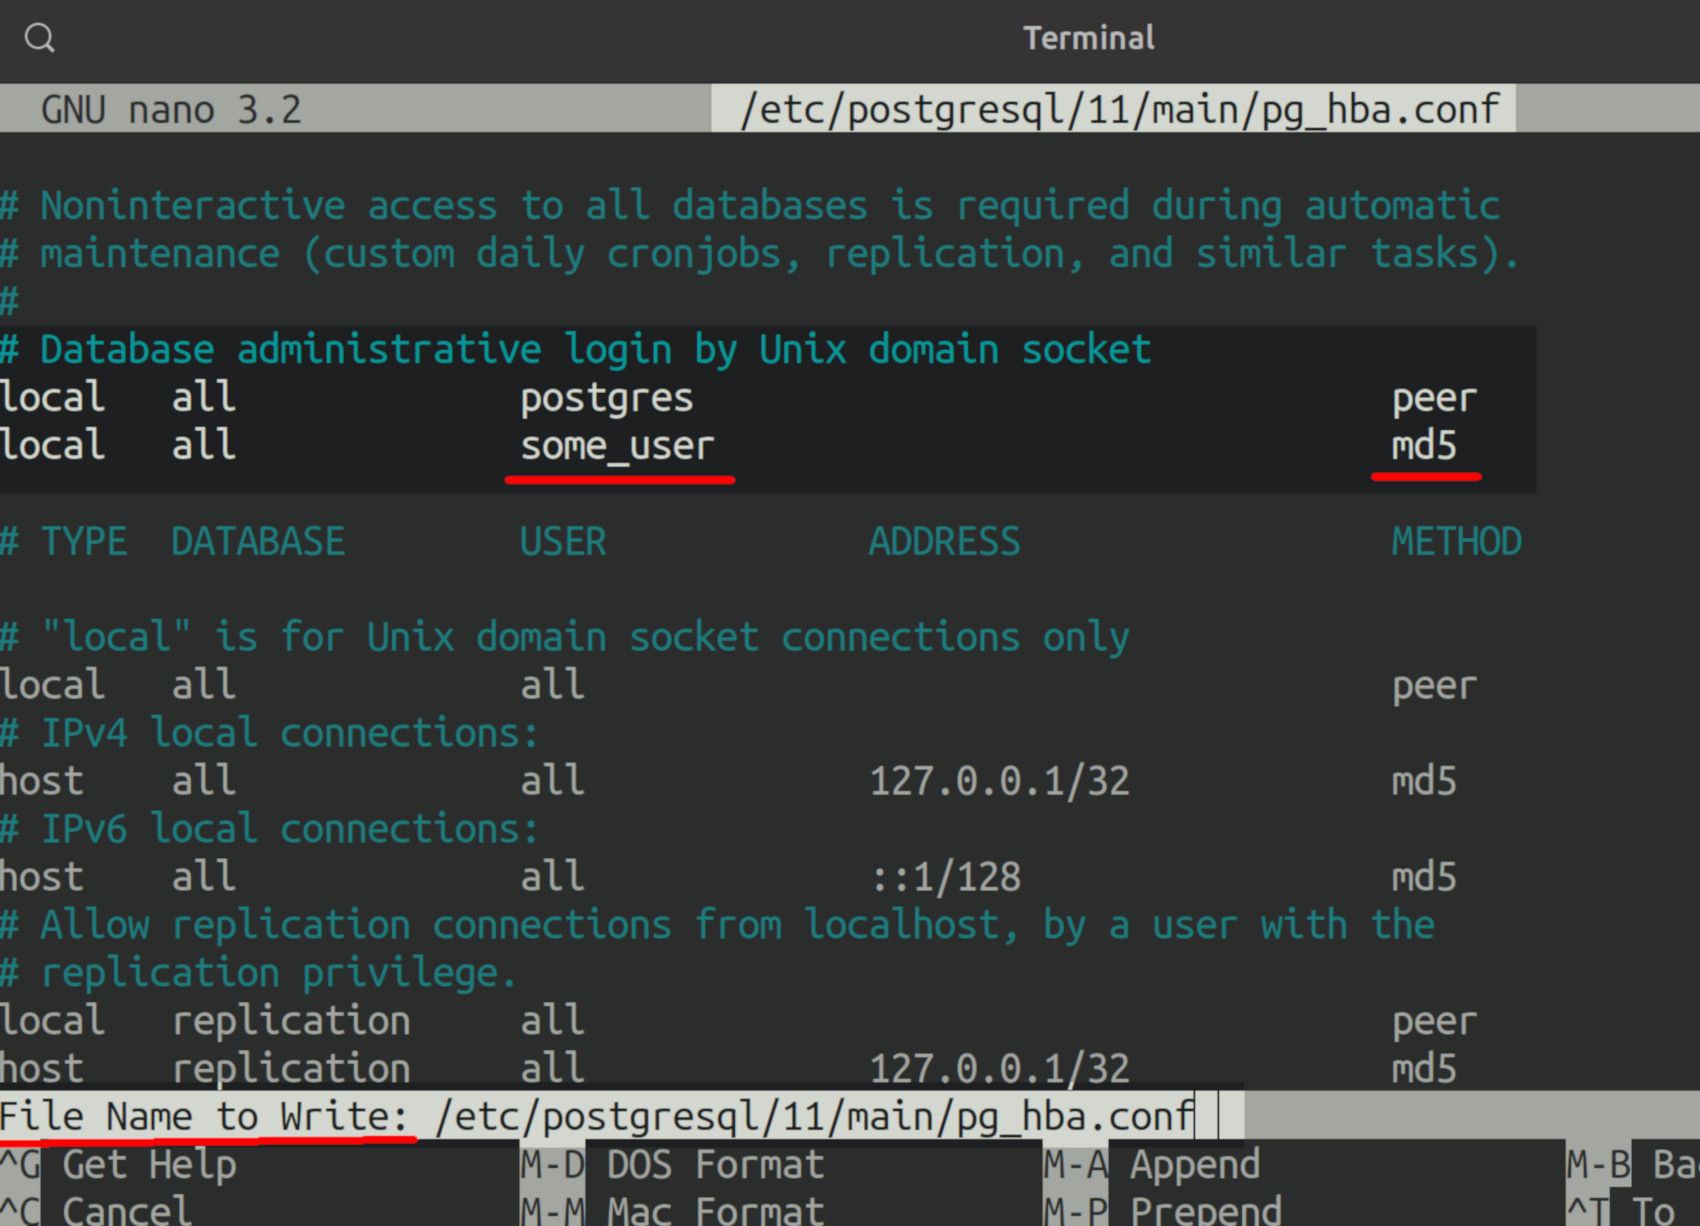
- Overcome user access errors by finding the file containing the usernames for the PostgreSQL configuration:
1 | locate pg_hba.conf |
- Next, use a text editor such as nano to change the file. Put the username in the file and add authentication
md5privileges:
1 | sudo nano /etc/postgresql/11/main/pg_hba.conf |
Remove a PostgreSQL username
- When you want to remove a PostgreSQL user, use the command
dropuserlike this:
1 | sudo -iu postgres dropuser some_user |
Access the interface for PostgreSQL
- Enter the PostgreSQL
psqlinterface with the new username you just created:
1 | sudo -i -u postgres |
How Windows users can enter the interface for PostgreSQL
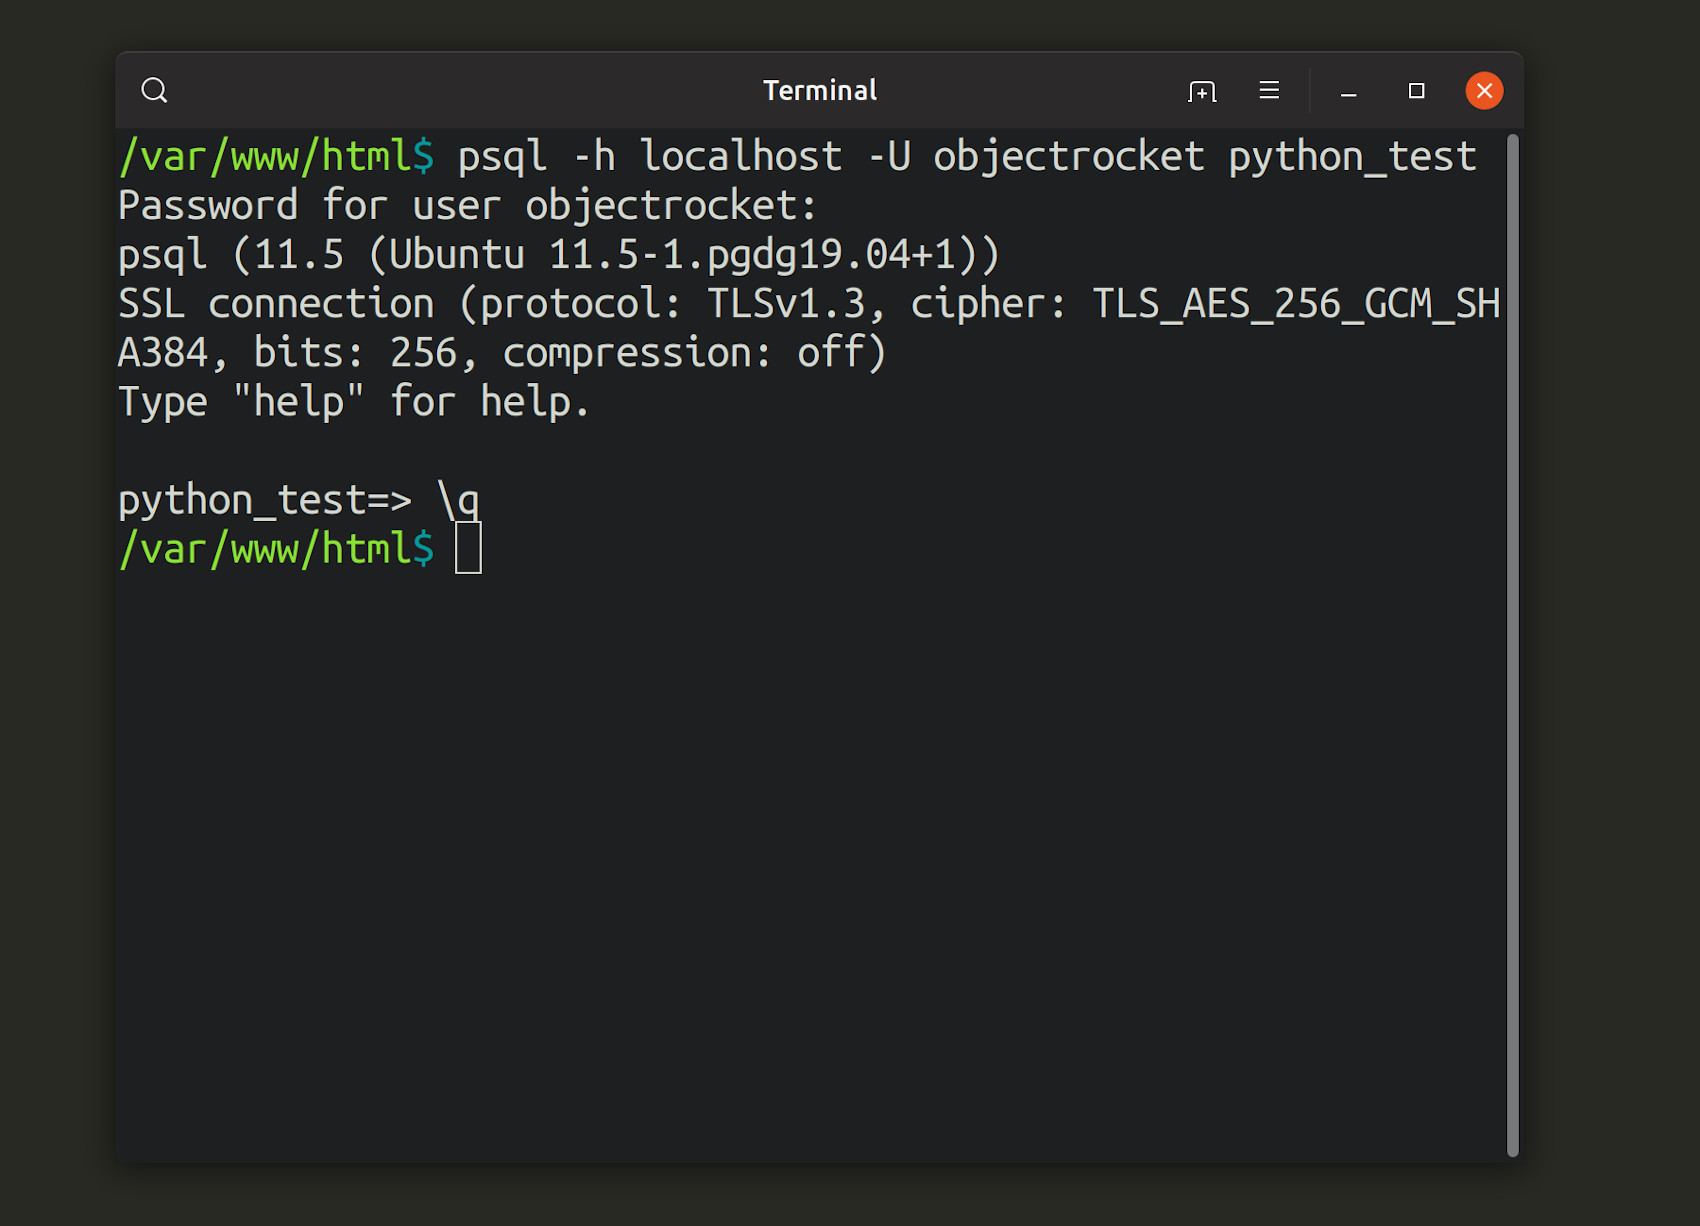
- Go to a terminal prompt and input the following command but be sure to enter your username for
-Uand your local host or IP address for-has explained earlier in this tutorial:
1 | psql -U objectrocket -h localhost |
NOTE: As long as you use the
psqlcommand, you should be able to enter PostgreSQL.

- Make a PostgreSQL connection with the command below that shows the database name after the
-Uusername. Before that, you have the-hlocal host or IP address. See the order example here:
1 | psql -h localhost -U objectrocket some_database |
Construct a database during your active PostgreSQL connection
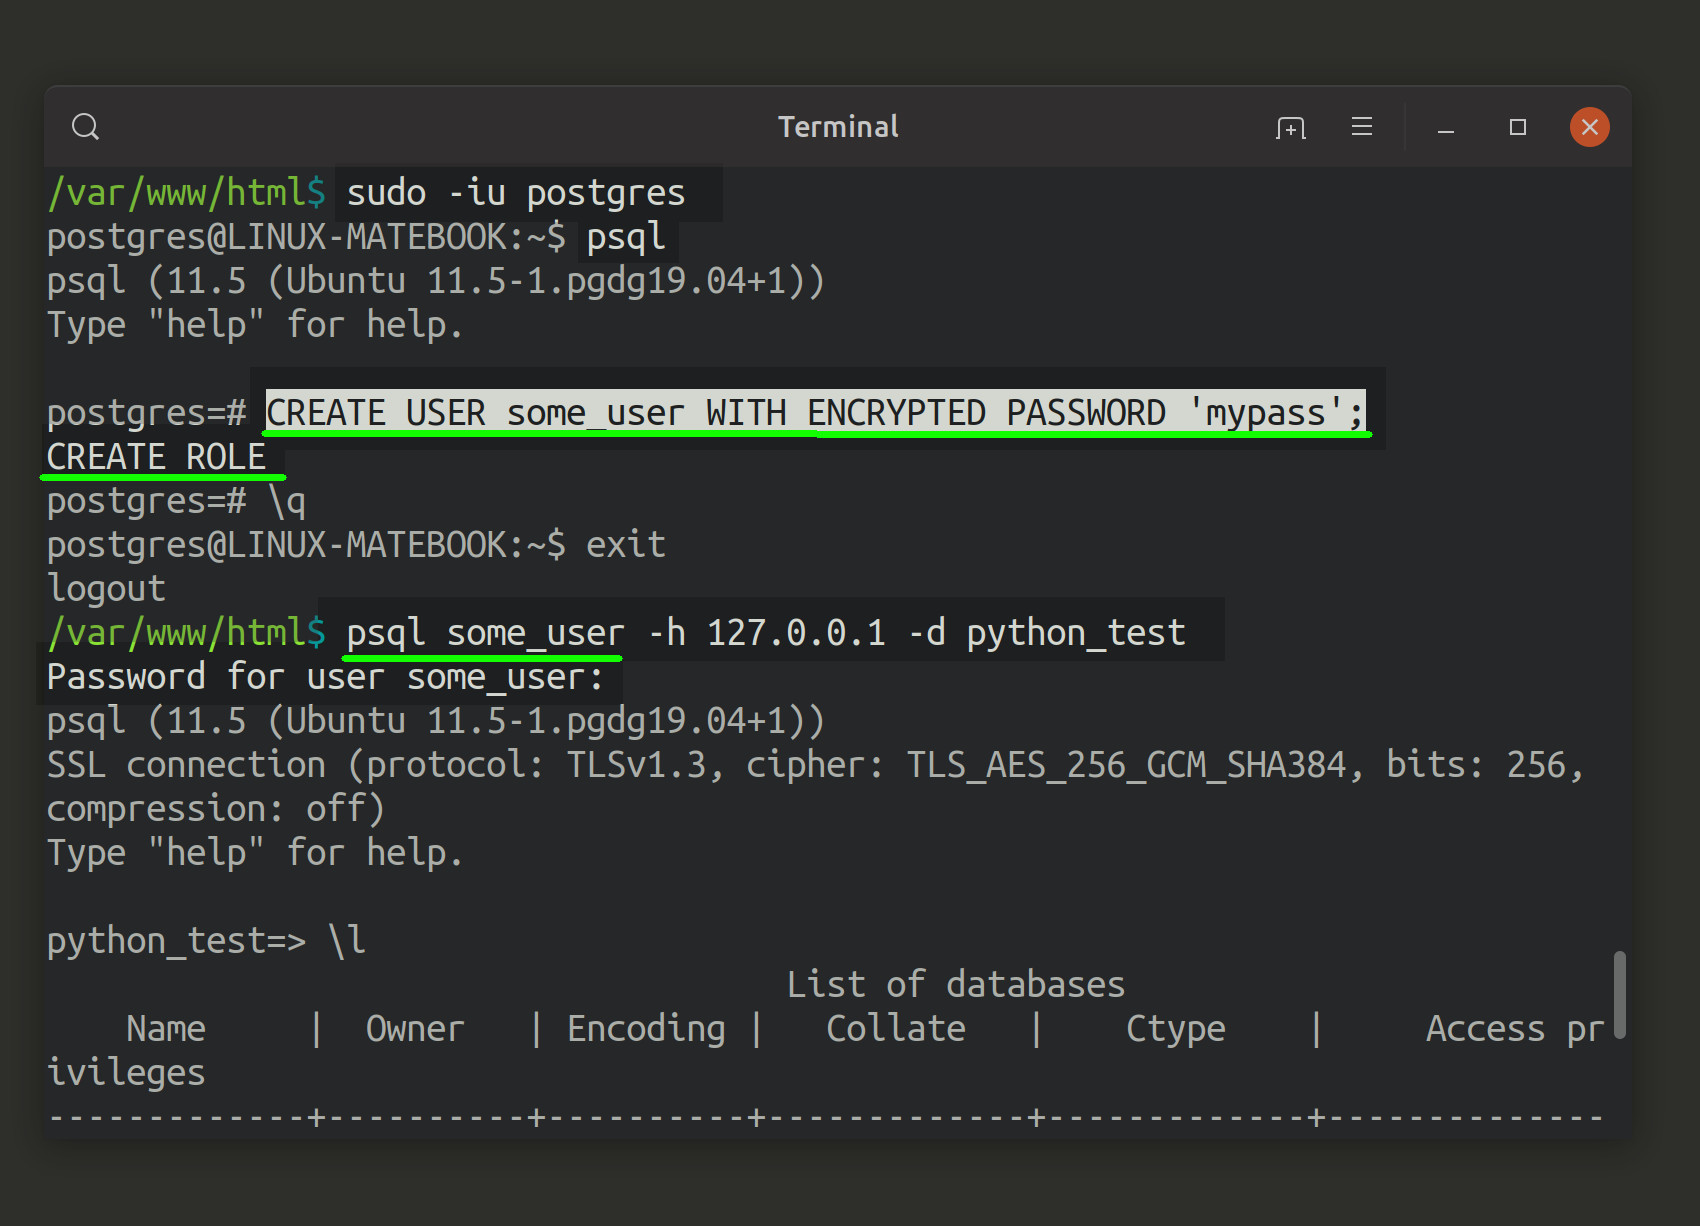
- Attempt to use the
postgresdefault username to get intopsql:
1 | sudo -u postgres psql |
- Optionally, try this:
1 2 | sudo -iu postgres psql |
- After you’ve gained access, create a test database and call it
some_databaseor something else:
1 | CREATE DATABASE some_database; |
- Next, give database access privileges to a new user that you create. A password is also required to go along with that new user:
1 2 | CREATE USER some_user WITH ENCRYPTED PASSWORD 'mypass'; GRANT ALL PRIVILEGES ON DATABASE some_database TO some_user; |
When you’re finished inputting the above command, a CREATE ROLE response should appear.
Exit out by entering
\q.Log in with the new user’s credentials, the one you just created.
1 | psql some_user -h 127.0.0.1 -d some_database |
The standard for PostgreSQL naming conventions is that the words should be separated with an underscore (_) for clarity in reading and all letters should be lowercase.
1 2 | database_name table_name |
However, if you decide you want to use names without the underscore to separate them, you can use a space as a separator. You should capitalize the first letter of each word and surround them with quotes (") like this:
1 | "Database Name" |
NOTE: Realize that the above method of naming databases using spaces between words is not the favored technique.
Get an entire database listing for PostgreSQL
- In the interface of
psql, enter/1to get a listing of each database that PostgreSQL has on the server:
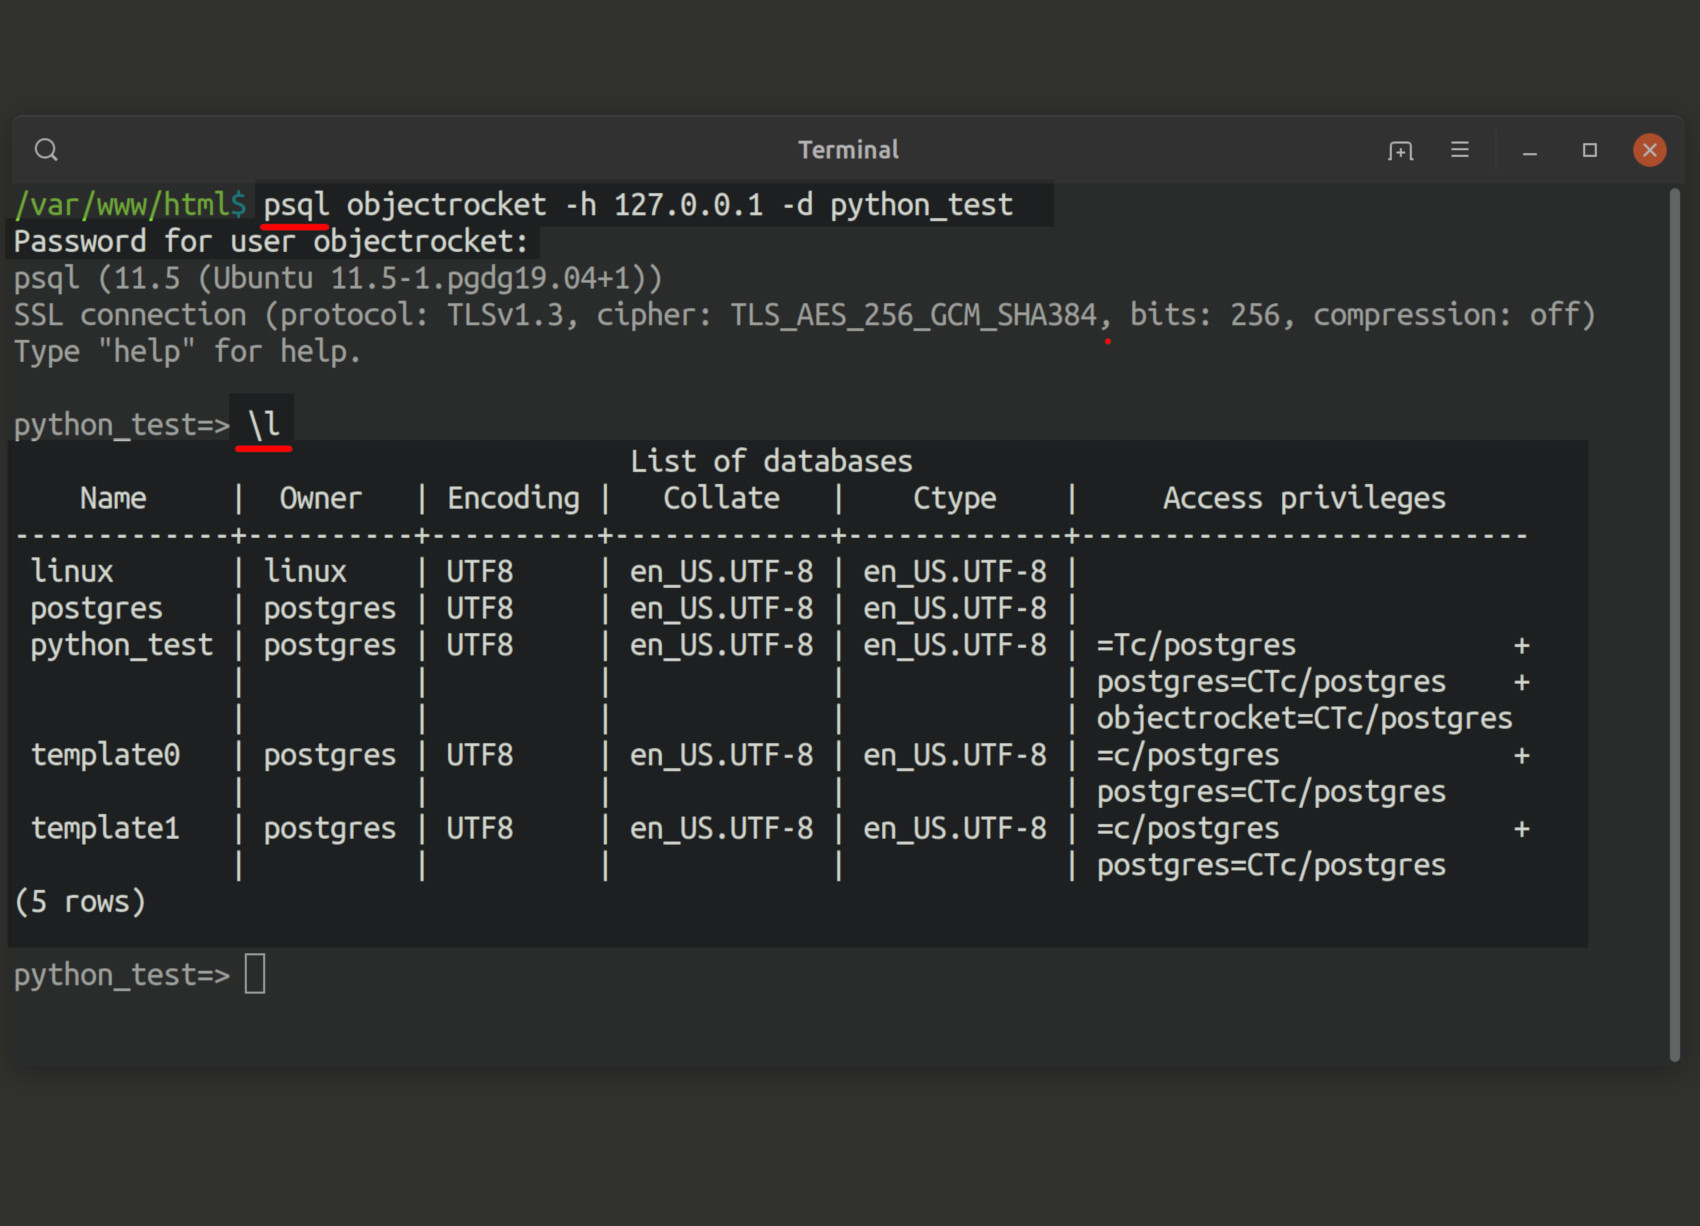
NOTE: Be sure to check that your string has quotes that are single (
'), not double. In addition, check that every command line ofpsqlline has a semi-colon (;)at the end.
Conclusion
This tutorial explained how administrators can install setup a PostgreSQL server and database. It showed you different ways to install PostgreSQL on macOS, Linux, and Windows environments. The tutorial also addressed how to correctly set up user names and passwords. In addition, it illustrated what steps to take to fix user permission errors when they occur. Increase your productivity and lower downtime using the techniques outlined in the tutorial today.

Pilot the ObjectRocket Platform Free!
Try Fully-Managed CockroachDB, Elasticsearch, MongoDB, PostgreSQL (Beta) or Redis.
Get Started