Update MongoDB Document using Laravel 1169
Introduction
If you’re using Laravel for your web projects, you may want your apps to be able to interact with MongoDB. It’s easy to use Laravel to perform a variety of database operations with MongoDB, such as inserts, deletes and updates. In this article, we’ll show you how to update a MongoDB document using Laravel and provide code examples that you can use as a guide.
Prerequisite
Before we dive into the code, let’s take a moment to review a few prerequisites that are essential for this project:
- First, you’ll need to download and install Composer. This tool will be used to install Laravel and to create Laravel projects.
- Next, you’ll also need to download and install XAMMP and run it as a service.
- You may use any text editor of your choice. In this tutorial, we’ll be using Visual Studio Code as our text editor.
- Before proceeding with the tutorial, be sure to download the compatible
php_mongodb.dllfor the installed PHP version on your system. - Make sure that MongoDB is properly installed and configured. For the purposes of this tutorial, we’ll be using the following version of MongoDB:
1 | db version v4.2.1 |
- The PHP version used in this tutorial is:
1 | php 7.3.11 |
- Finally, make sure to install the application Postman.
NOTE: We’ll be using a Windows environment for the examples shown in this article.
How to Configure MongoDB Database in Windows
Our first task will be to configure the MongoDB database. We’ll need to download the MongoDB DLL file, then we’ll extract the file in the PHP extension directory, which is found within the XAMPP directory (C:\xampp\php\ext).
After that, we’ll enable this extension in the php.ini file by appending the following text in the ‘extensions’ section: extension=php_mongodb.dll.
Create Laravel Project
In this section, we’ll show you how to create a Laravel project. First, let’s navigate to our project directory and execute the command shown below:
1 | composer create-project --prefer-dist laravel/laravel updatehmongo |
This command will create the updatemongo directory within ‘htdocs’.
To verify that our Laravel project was successfully created, we can use the following URL in the browser: http://localhost/updatemongo/public/.
We’ll see output that looks something like this:
Setting Up Laravel Virtual Host
You may have noticed that we’re using a fairly lengthy URL for our app. We can customize this URL to be shorter, like this: updatemongo.net.
To do this, we’ll be modifying two files:
httpd-vhosts.conf– This file can be found in the file pathC:\xampp\apache\conf\extra. We’ll add the following text to it:
1 2 3 4 5 6 7 8 | <VirtualHost *:80> DocumentRoot "C:/xampp/htdocs" ServerName localhost </VirtualHost> <VirtualHost *:80> DocumentRoot "C:/xampp/htdocs/updatemongo/public" ServerName fetchmongo.net </VirtualHost> |
hosts– This system file can be found in the file pathC:\Windows\System32\drivers\etc. We’ll need to append the text shown below:
1 2 | 127.0.0.1 localhost 127.0.0.1 updatemongo.test |
After making your modifications, save the file and restart Apache using the Control Panel.
Now let’s try using the new URL updatemongo.net that we configured earlier.
The output should look something like this:
This confirms that our application is using the customized URL.
Configure MongoDB Database in Laravel
Next, let’s discuss how to configure a MongoDB database to work properly with Laravel. We’ll need to update the .env file with the details shown below:
1 2 3 4 5 6 | DB_CONNECTION=mongodb DB_HOST=127.0.0.1 DB_PORT=27017 DB_DATABASE=StudentInfo DB_USERNAME= DB_PASSWORD= |
We’ll also need to edit the database.php file and add the following PHP scripts:
1 2 3 4 5 6 7 8 9 | 'mongodb' => [ 'driver' => 'mongodb', 'host' => env('MONGO_DB_HOST', 'localhost'), 'port' => env('MONGO_DB_PORT', 27017), 'database' => env('MONGO_DB_DATABASE','StudentDb'), 'username' => env('MONGO_DB_USERNAME'), 'password' => env('MONGO_DB_PASSWORD'), 'options' => [] ], |
NOTE: You’ll need to change 'default' => env('DB_CONNECTION', 'mysql') to this 'default' => env('DB_CONNECTION', 'mongodb').
Installing MongoDB Package in Laravel
Our next task will be to install the MongoDB package in our Laravel project. To accomplish this, we’ll use the following command:
1 | composer require jenssegers/mongodb |
Registering the MongoDB Provider
We’ll also need to register MongodbServiceProvider as our service provider, so we’ll add the PHP script shown below in our app.php file:
1 2 3 | 'providers' => [ Jenssegers\Mongodb\MongodbServiceProvider::class, ] |
Create a Laravel Model
In this section, we’ll be creating the model of our basic application using the following command.
1 | php artisan make:model Students |
This code creates a new PHP file named Students.php.
1 2 3 4 5 6 7 8 9 10 11 12 13 14 | namespace App; use Illuminate\Database\Eloquent\Model; use Jenssegers\Mongodb\Eloquent\ Model as Eloquent; class Students extends Eloquent { protected $connection = 'mongodb'; protected $collection = 'student'; protected $fillable = [ 'id','name', 'age','course','email' ]; } |
Creating a MongoDB database and Collection
Next, let’s create a sample MongoDb database that we can use in our code examples:
1 2 3 4 5 6 7 8 9 10 11 12 13 14 15 16 17 18 19 20 21 22 23 24 25 | > use StudentDb switched to db StudentDb > db.student.insertMany( ... [{ ... "name":"risa", ... "age" : 16, ... "course" : "Computer Science", ... "email" : "risa@example.com" ... ... }, ... { ... "name":"rommel", ... "age" : 16, ... "course" : "Information Technology", ... "email" : "rommel@example.com" ... ... }]); { "acknowledged" : true, "insertedIds" : [ ObjectId("5df982e7b267f596367b0957"), ObjectId("5df982e7b267f596367b0958") ] } > |
We can verify whether our database operation was successful:
1 2 3 4 5 6 7 8 9 10 11 12 13 14 15 16 | > db.student.find().pretty() { "_id" : ObjectId("5df982e7b267f596367b0957"), "name" : "risa", "age" : 16, "course" : "Computer Science", "email" : "risa@example.com" } { "_id" : ObjectId("5df982e7b267f596367b0958"), "name" : "rommel", "age" : 16, "course" : "Information Technology", "email" : "rommel@example.com" } > |
Creating the Controller and Route
Next, we’ll look at how to create the controller and the route for updating a MongoDb document using Laravel.
Let’s navigate to our project directory via command line; then, we’ll use the following command:
1 | php artisan make:controller StudentController |
The code shown above will create a new PHP file named ‘StudentController’. Let’s open that file and append the following code to it:
1 2 3 4 5 6 7 8 9 10 11 12 13 14 15 16 17 18 19 20 21 22 23 24 25 26 27 28 29 30 | <?php namespace App\Http\Controllers; use Illuminate\Http\Request; use App\Students; class StudentController extends Controller { public function index() { $student = Students::all(); return view('home')->with('students', $student); } public function update(Request $request){ $students = array( 'id' => $request->id, 'name' => $request->name, 'age' => $request->age, 'course' => $request->course, 'email' => $request->name, ); Students::findOrFail($request->input('id'))->update($students); return redirect('home'); } } |
The first part of the code will fetch all available MongoDb documents. The second part will update the MongoDB document using the id as the reference.
The lines of code shown below are routes that will handle the user requests for both fetching all the documents for the homepage and updating a MongoDB document:
1 2 | Route::get('/home', 'StudentController@index'); Route::post('update',['as' => 'student.update', 'uses' => 'StudentController@update'] ); |
Create the View
We’re now ready to create the view that will be used for our update operation. We will be using a modal form to update a selected MongoDB document.
Create a Layout File
In order to display the MongoDB document, we’ll need a layout. Here’s how we’ll create our layout file:
- First, we’ll create a new folder under ‘resources’ and name it layouts. Then we’ll create a new file and name it app.blade.php. We’re going to add the following code to it:
1 2 3 4 5 6 7 8 9 10 11 12 13 14 15 16 17 18 19 20 21 22 23 24 25 26 27 28 29 30 31 32 33 34 35 36 37 38 39 40 41 42 43 44 45 46 47 48 49 50 51 | <!doctype html> <html lang="{{ str_replace('_', '-', app()->getLocale()) }}"> <head> <meta charset="utf-8"> <meta name="viewport" content="width=device-width, initial-scale=1"> <!-- CSRF Token --> <meta name="csrf-token" content="{{ csrf_token() }}"> <title>{{ config('app.name', 'Laravel') }}</title> <!-- Scripts --> <script src="{{asset('/js/app.js')}}" defer></script> <!-- Fonts --> <link rel="dns-prefetch" href="//fonts.gstatic.com"> <link href="https://fonts.googleapis.com/css?family=Nunito" rel="stylesheet"> <link href="https://stackpath.bootstrapcdn.com/bootstrap/4.3.1/css/bootstrap.min.css" rel="stylesheet" integrity="sha384-ggOyR0iXCbMQv3Xipma34MD+dH/1fQ784/j6cY/iJTQUOhcWr7x9JvoRxT2MZw1T" crossorigin="anonymous"> <link href="{{ asset('css/app.css') }}" rel="stylesheet"> </head> <body> <div id="app"> <div class="container"> <main class="py-4"> @yield('content') </main> </div> </div> <!-- this will populate the modal form with the MongoDb field that we want to update --> <script> $('#editModal').on('show.bs.modal', function (event) { var button = $(event.relatedTarget) // Button that triggered the modal var id = button.data('id') var name = button.data('name') var age = button.data('age') var course = button.data('course') var email = button.data('email') var modal = $(this) modal.find('.modal-body #id').val(id) modal.find('.modal-body #name').val(name) modal.find('.modal-body #age').val(age) modal.find('.modal-body #course').val(course) modal.find('.modal-body #email').val(email) }) </script> </body> </html> |
Then we create our page that will display all the MongoDb document and will let us select and edit a MongoDb document.
To do this we need create a new file under the views directory and name it home.blade.php.
1 2 3 4 5 6 7 8 9 10 11 12 13 14 15 16 17 18 19 20 21 22 23 24 25 26 27 28 29 30 31 32 33 34 35 36 37 38 39 40 41 42 43 44 45 46 47 48 49 50 51 52 53 54 55 56 57 58 59 60 61 62 63 64 65 66 67 68 69 70 71 72 73 74 75 76 77 78 79 80 81 82 83 84 85 86 87 88 89 90 91 92 93 94 95 96 97 | @extends('layouts.app') @section('content') <div class="container"> <div class="row justify-content-center"> <div class="col-md-12"> <div class="card"> <div class="card-header bg-info text-white">Students</div> <div class="card-body container"> <h2> List of Students </h2> <table class="table table-striped table-dark table-condensed" id="table-programs"> <thead> <tr> <th scope="col">#</th> <th scope="col">Name</th> <th scope="col">Age</th> <th scope="col">Course</th> <th scope="col">Email</th> </tr> </thead> <tbody> @foreach($students as $student) <tr> <th scope="row"> {{$student->id}}</th> <td> {{$student->name}}</td> <td> {{$student->age}}</td> <td> {{$student->course}}</td> <td> {{$student->email}}</td> <td> <button type="button" data-id="{{$student->id}}" data-name="{{$student->name}}" data-age="{{$student->age}}" data-course="{{$student->course}}" data-email="{{$student->email}}" data-toggle="modal" data-target="#editModal" class="btn btn-primary" name="button" ><span class="fa fa-edit" ></span>Edit</button> </tr> @endforeach </tbody> </table> </div> </div> </div> </div> </div> // the modal section <div class="modal fade bg-warning text-dark" tabindex="-1" role="dialog" id="editModal"> <div class="modal-dialog" role="document"> <div class="modal-content"> <div class="modal-header"> <h5 class="modal-title">Edit Student Details</h5> <button type="button" class="close" data-dismiss="modal" aria-label="Close"> <span aria-hidden="true">×</span> </button> </div> <div class="modal-body"> <form class="" action="{{route('student.update','$student->id')}}" method="post"> {{csrf_field()}} <div class="form-group"> <label for="">Student Name</label> <input type="text" class="form-control" name="name" id="name"> </div> <div class="form-group"> <label for="">Age</label> <textarea type="text" class="form-control" name="age" id="age"></textarea> <input type="hidden" name="id" id="id" value="{{$student->id}}"> </div> <div class="form-group"> <label for="">Course</label> <textarea type="text" class="form-control" name="course" id="course"></textarea> </div> <div class="form-group"> <label for="">Email</label> <textarea type="text" class="form-control" name="email" id="email"></textarea> </div> <input type="submit" name="submit" value="Submit Changes" class="btn btn-success"> </form> </div> </div> </div> </div> <script src="https://code.jquery.com/jquery-3.3.1.min.js" crossorigin="anonymous"></script> <script src="https://stackpath.bootstrapcdn.com/bootstrap/4.3.1/js/bootstrap.min.js" crossorigin="anonymous"></script> @endsection |
At this point, we can test our application using the following URL in our browser: http://updatehmongo.net/home.
We should see something like this:
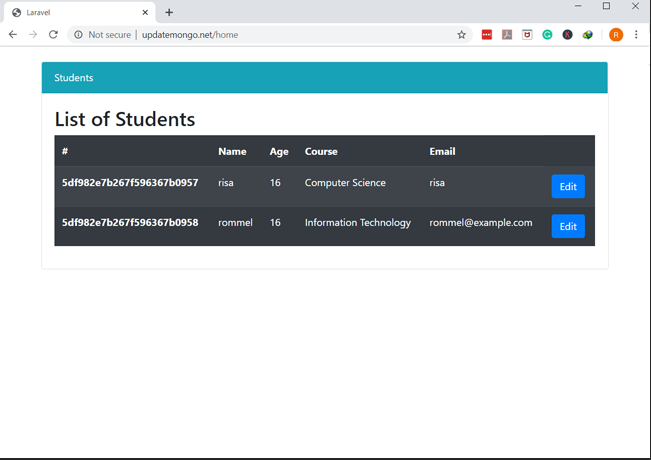
The application is working properly, and we can now perform our update operation.

Conclusion
When you’re using Laravel to build web apps, you’ll probably want your code to interact with a MongoDB database. In this article, we showed you how to update a MongoDB document using Laravel. With the instructions and code examples provided in this tutorial, you’ll be prepared to add MongoDB update operations to your own Laravel apps.


Pilot the ObjectRocket Platform Free!
Try Fully-Managed CockroachDB, Elasticsearch, MongoDB, PostgreSQL (Beta) or Redis.
Get Started