Simple Chat App using NodeJS and MongoDB Atlas Part 2
Introduction
The power of NodeJS and MongoDB can be harnessed to build a variety of applications. This multi-part tutorial explains how to create a simple chat app using NodeJS and MongoDB Atlas. In our last article, we began our project by creating two files named server.js and index.html, and we were able to serve the static file to the browser using server.js with the help of express.js. This second part of this series will show how we can interact with a MongoDB database using MongoDB Atlas.
Prerequisites
Before we continue working on our chat app using NodeJS and MongoDB Atlas, let’s review the prerequisites that are necessary for this project:
- Be sure you completed the first part of this tutorial before tackling the steps described in this article.
- You’ll need to create an account on MongoDB Atlas. You can do this on their website.
How to Setup a MongoDB Atlas – Free Tier .
In order to move forward with our simple chat application, we’ll need to set up our MongoDB database using a free hosting solution called MongoDB Atlas.
After creating an account with MongoDB Atlas, we’ll proceed to create a cluster. To do this, we’ll perform the following steps:
Creating a Cluster in MongoDB Atlas
- First, click the Build a Cluster button:
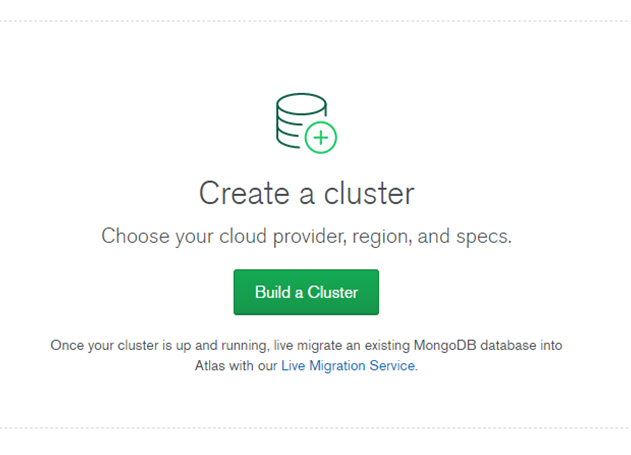
Click the Create a Cluster button under the Starter Cluster plan to select the free tier.
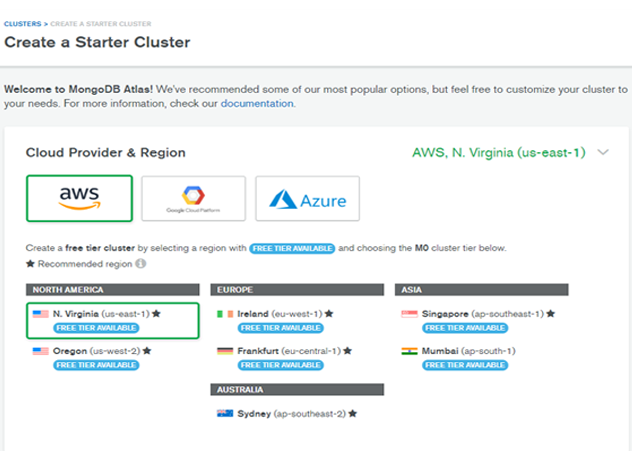
In the Cloud Provider & Region section, select AWS and North America as shown in the below image:
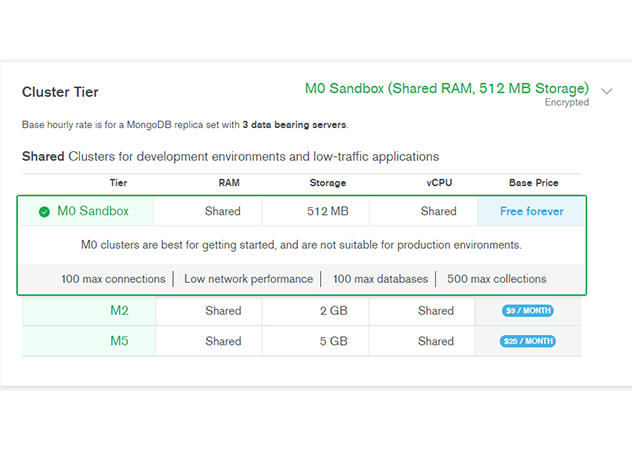
- In the Cluster Tier section, select M0 Sandbox.
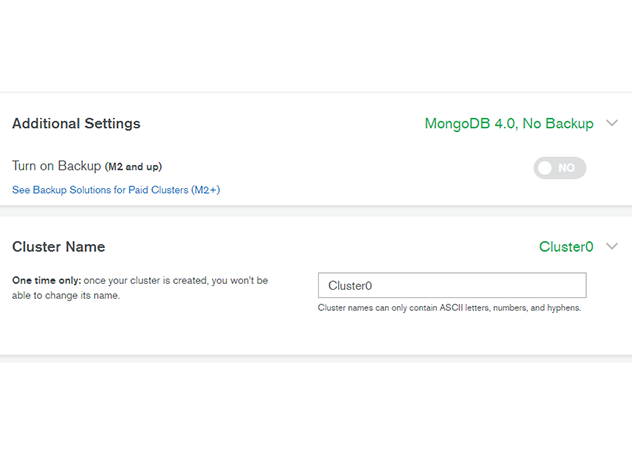
Finally, click Create Cluster at the bottom of the page.
NOTE: We’ll keep the other default settings, such as cluster name and backup settings.
Creating a Database User in MongoDB Atlas
Now that we’ve successfully created a cluster in MongoDB Atlas, we’ll proceed to create a user that we’ll use in our cluster. We’ll perform the following steps:
- First, click the Database Access option on the left panel of the interface.
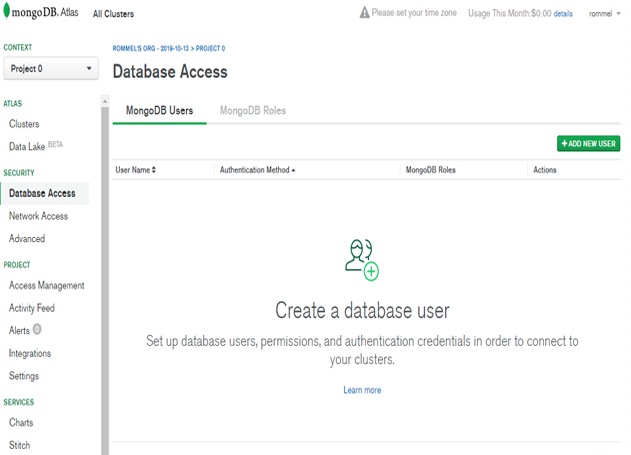
- Click the Add New User button to bring up the Add New User window.
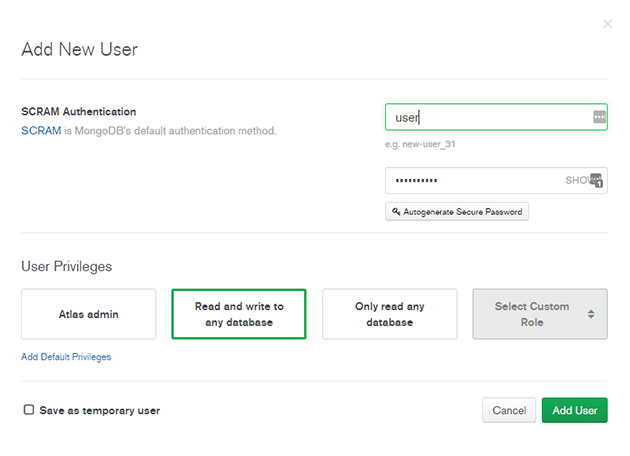
In the top right corner, you can set the user’s name and password.
In the User Privileges section, select the Read and Write to Any Database option for the new user.
Finally, click Add User to create the user that was defined in the previous steps.
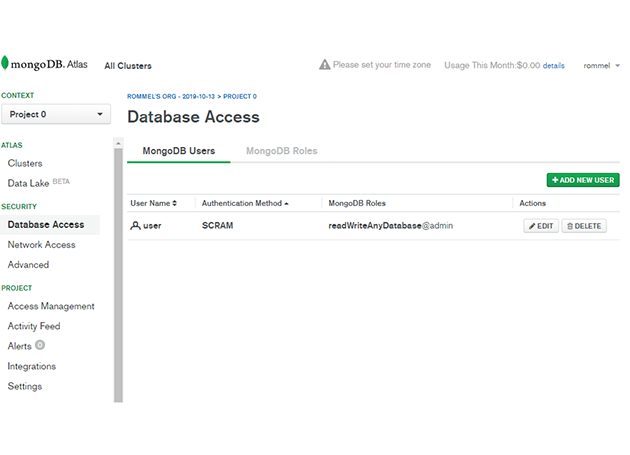
The following image shows that we have successfully created a new user named “user”:
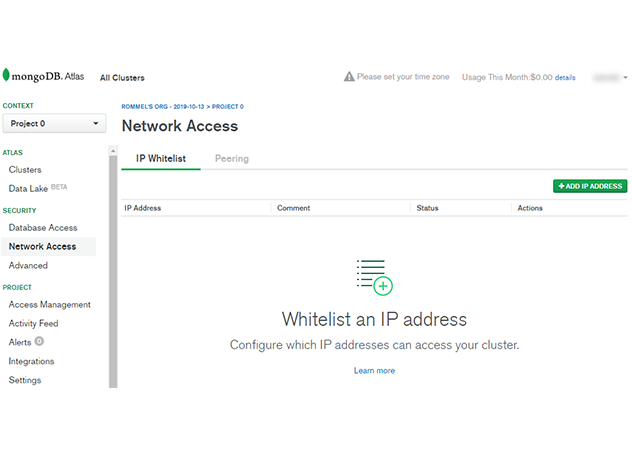
Configure Network Access in MongoDB Atlas
In this section, we’ll add our IP address to a whitelist of trusted IP addresses in MongoDB Atlas. To do this, we’ll click Network Access on the side panel, then we’ll click the Add IP Address button.
We’ll add our current IP address by clicking the Add Current IP Address button or manually typing it in the box.
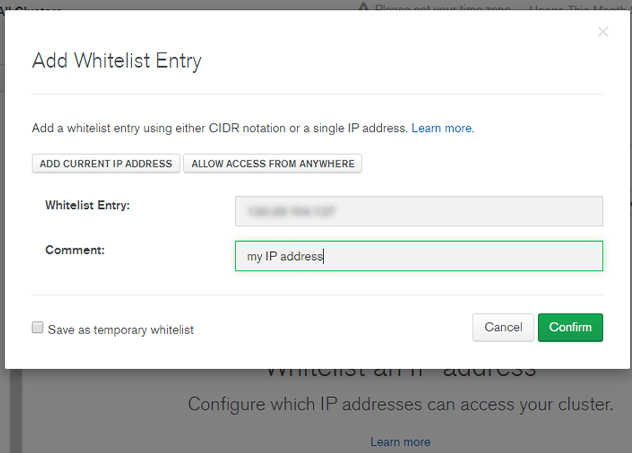
Finally, we’ll click the Confirm button to add the IP address.
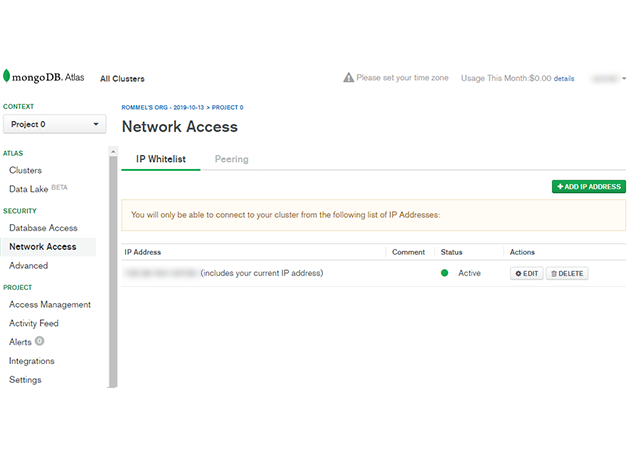
After completing this process, you’ll see something like this:
Connecting MongoDB Atlas Database via Mongoose
So far, we created our cluster with a corresponding user, and we also set up our network access by whitelisting our IP address. Now we’ll connect to our database using mongoose.
To do this, we need to install Mongoose with npm using the following command:
1 | npm install -s mongoose |
Then we’ll use the following code in our server.js file to use mongoose.
1 | var mongoose = require("mongoose"); |
We then connect to our MongoDB Atlas database using a connection string. We’ll be using the connection string provided by MongoDB Atlas; we can go back to the MongoDB Atlas website to get that information.
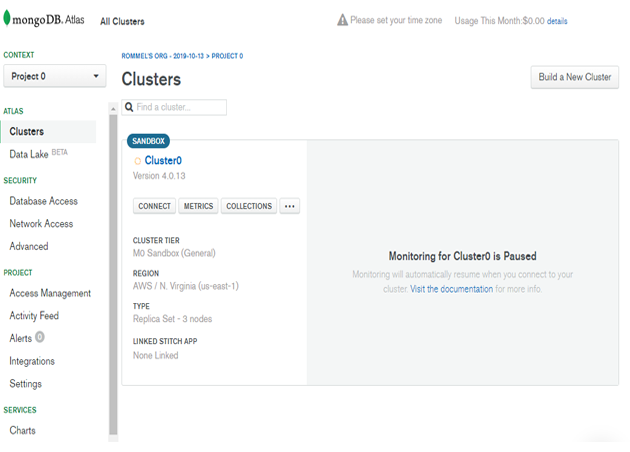
In the All Clusters section, click on the Connect button under “SANDBOX” to open up “Connect to Cluster0”. Then click the Connect Your Application button.

Finally, we click Copy to copy the connection string.
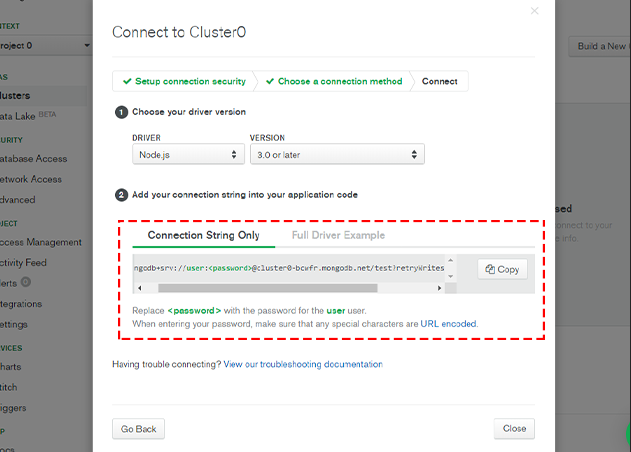
After we get the connection string from the website, we’ll head back to our code and add the following:
1 2 3 4 5 6 7 8 9 10 11 12 13 | // we set the connection string to a variable dbUrl var dbUrl = "mongodb+srv://user:qsa1718690@cluster0-bcwfr.mongodb.net/test?retryWrites=true&w=majority"; //connect to mongoose // to avoid deprecation warning, provide a second argument {useNewUrlParser: true, useUnifiedTopology: true} mongoose.connect( dbUrl, { useNewUrlParser: true, useUnifiedTopology: true }, err => { console.log("mongo db connection", err); } ); |
We can test our application by running the command “nodemon server.js” in our terminal.
The output of this command will look like the following:

We can see that we are successfully connected, and we have a null error.
Conclusion
We’re not quite done building our chat app using NodeJS and MongoDB, but we made a lot of progress in this tutorial. We showed how to set up a free tier in MongoDB Atlas, and we explained how to configure and connect to our cluster using Mongoose. If you’ve followed along with the steps outlined in this article, feel free to head over to the next installment where we’ll dive even further into our project.


Pilot the ObjectRocket Platform Free!
Try Fully-Managed CockroachDB, Elasticsearch, MongoDB, PostgreSQL (Beta) or Redis.
Get Started