Retrieve MongoDB Document using Kotlin
Introduction
MongoDB is a powerful, popular and sometimes challenging database that can be used with various programming languages. Kotlin is a multipurpose programming language that can be used to create applications for both android and iOS systems and offers additional features not found in JavaScript. This tutorial will explain how to retrieve a MongoDB document with Kotlinx000D and install the Kotlin plugin on the ECLIPSE application.
Prerequisites
- The MongoDB server must be properly installed and configured to retrieve a MongoDB document with Kotlinx000D.
- The ECLIPSE application must also be properly installed and configured.
Installing Kotlin in Eclipse
This section will explain how to install the Kotlin plugin on the ECLIPSE application.
First, start the ECLIPSE IDE by double-clicking the icon or right-clicking on the ECLIPSE icon.
Select the Opentab.
Locate and click on the Help button on the menu bar and then select Eclipse Marketplace in the sub-menu. The system should display a screen the resembles the following:
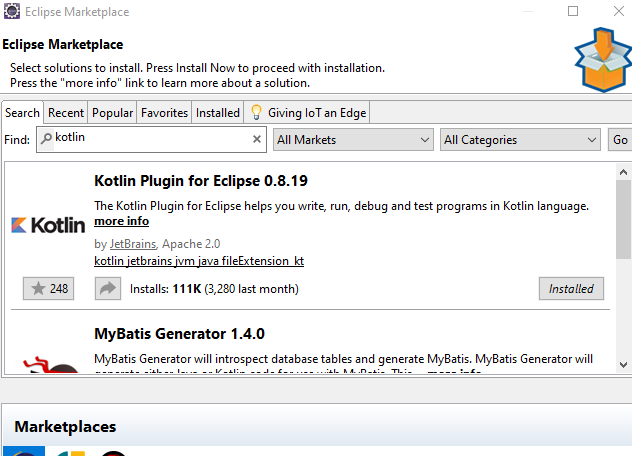
Using the search bar, type Kotlin and then press Enter on the keyboard.
Now select the ‘Kotlin Plugin for Eclipse 0.8.19’.
Click on the Install Now - button to begin the Kotlin plugin installation.
Downloading MongoDB Java Driver
A driver that will bridge Kotlin to MongoDB server is required to perform the CRUD operations; this will be the RETRIEVE operation in this case. – The MongoDB Java driver can be download at this link
The linked page should resemble the following:
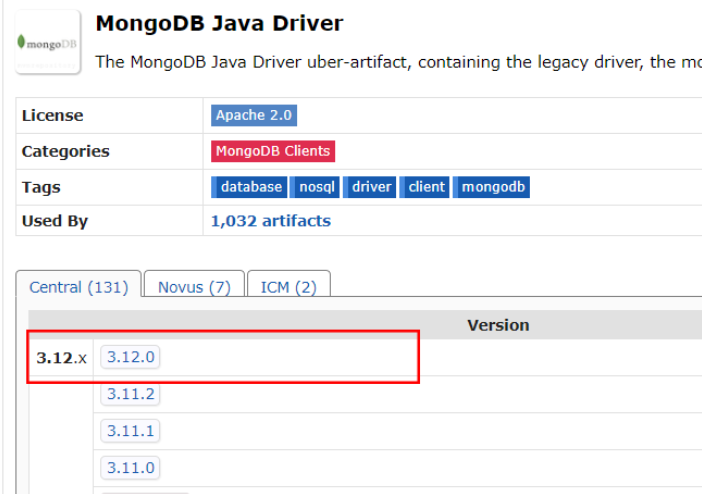
- Click on version number 3.12.0
- This should load the following page. Click on the jar text, as shown below, to download the file:
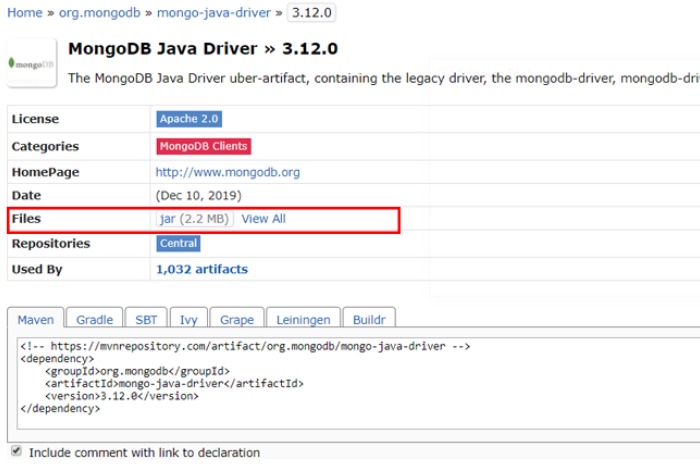
NOTE: The most recent version of the MongoDB Java driver is 3.12.
Adding JAR file to ECLIPSE build path
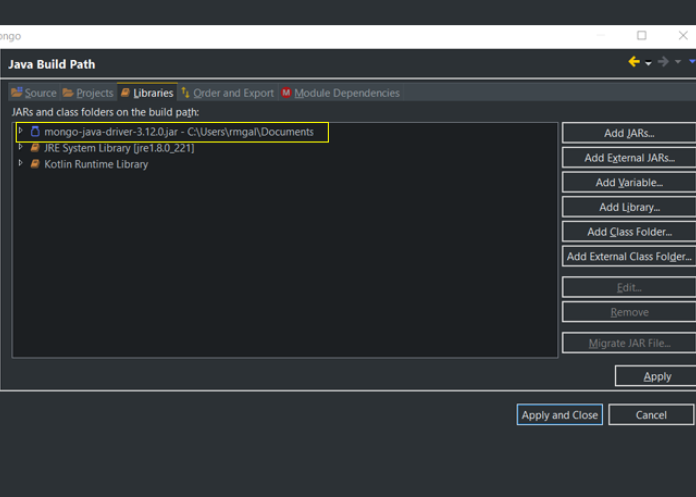
Add the downloaded MongoDB Java driver to the ECLIPSE application by executing the following steps in sequence:
- Locate the ‘Project’ tab in the menu bar.
- Select the Propertiesbutton.
- Now click on the Java Build Path tab.
- Click on the Libraries tab.
- On the right side panel, locate the Add External JAR... button and click on it.
- Find the JAR file that was downloaded in the previous section.
- To finish, click the Apply and Close button to add the JAR file to ECLIPSE application.
With the above steps properly completed, the JAR files should be listed on the left, as shown here:
Create a MongoDB sample dataset
This section will cover how to create a simple MongoDB dataset that will be used in this tutorial.
Execute the following command in the MongoDB shell:
1 2 3 4 5 6 7 8 9 10 11 12 13 14 15 16 17 18 19 20 21 22 23 24 25 | > db.product.insert([{sku: "1234567", name:"Motor Ally", description:"THe future of Mobile"},{sku: "7654321", name:"samyong", description:"The fastest Mobile"}]) BulkWriteResult({ "writeErrors" : [ ], "writeConcernErrors" : [ ], "nInserted" : 2, "nUpserted" : 0, "nMatched" : 0, "nModified" : 0, "nRemoved" : 0, "upserted" : [ ] }) > db.product.find().pretty() { "_id" : ObjectId("5e0a0e9cc20248e0ea73866c"), "sku" : "1234567", "name" : "Motor Ally", "description" : "THe future of Mobile" } { "_id" : ObjectId("5e0a0e9cc20248e0ea73866d"), "sku" : "7654321", "name" : "samyong", "description" : "The fastest Mobile" } > |
Creating a Kotlin Project
This section will explain how to create a Kotlin project.
Execute the following steps in order to create a Kotlin project:
- Click on the File tab in the menu bar.
- Click on the New tab in the menu bar.
- Now select the Kotlin Project button.
- In the Project Name text box, give the project a meaningful name. For this tutorial the project will be named kotlinmongo.
Creating a Kotlin Object File
With the Kotlin project set up, perform the following steps in order to create a Kotlin object file that will be used to execute the RETRIEVE operation:
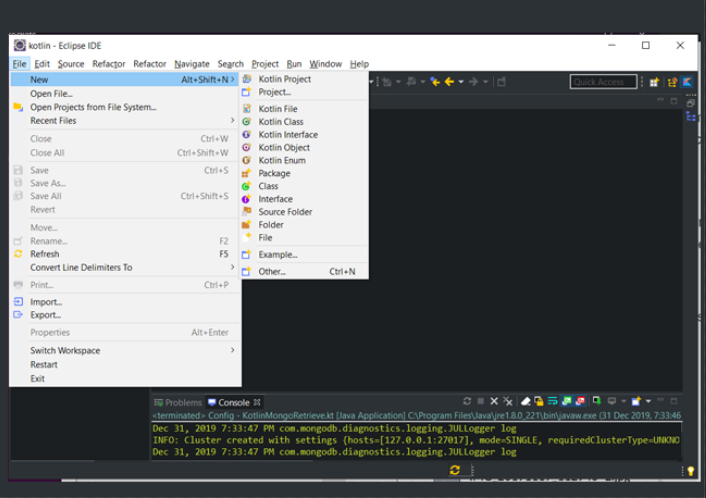
- Right-click on the Kotlin project (kotlinmongo) and then select New.
- Then select New again.
- Now select the Kotlin Object tab in the menu.
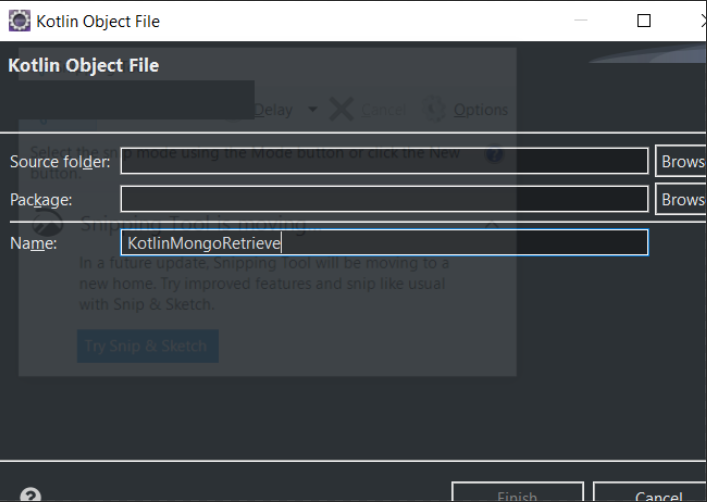
The results should resemble the following screenshot:
- Now provide the project a meaningful name. As shown here, KotlinMongoRetrieve is used for this example:
Coding the Kotlin MongoDB Retrieve Operation
Open the KotlinMongoRetrieve.kt file and append it as follows:
1 2 3 4 5 6 7 8 9 10 11 12 13 14 15 16 17 18 19 20 21 22 23 24 25 26 27 28 29 30 31 32 33 34 35 | import com.mongodb.BasicDBObject import com.mongodb.MongoClient import com.mongodb.MongoException object KotlinMongoRetrieve { @JvmStatic fun main(args: Array<String>){ var mongoClient: MongoClient? = null try { // mongodb connection mongoClient = MongoClient("127.0.0.1", 27017) var db = mongoClient.getDatabase("EcommerceDb") var tbl = db.getCollection("product") // the parameter for searching a document to be deleted val searchQry = BasicDBObject(); searchQry.put("sku","1234567"); // performs a the find method using the variable searchQry var cursor = tbl.find(searchQry); var it = cursor.iterator() while (it.hasNext()) { System.out.println(it.next()); } } catch (e: MongoException) { e.printStackTrace() } finally { mongoClient!!.close() } } data class User(val name: String, val lastname: String) } |
When testing the application, the results should resemble the following:
1 | Document{{_id=5e0a0e9cc20248e0ea73866c, sku=1234567, name=Motor Ally, description=THe future of Mobile}} |
Now verify the operation as follows in the MongoDB shell:
1 2 3 4 5 6 7 8 9 10 11 12 13 14 15 16 17 18 | > use EcommerceDb switched to db EcommerceDb > show collections product > db.product.find().pretty() { "_id" : ObjectId("5e0a0e9cc20248e0ea73866c"), "sku" : "1234567", "name" : "Motor Ally", "description" : "THe future of Mobile" } { "_id" : ObjectId("5e0a0e9cc20248e0ea73866d"), "sku" : "7654321", "name" : "samyong", "description" : "The fastest Mobile" } > |
Conclusion
This tutorial explained how to retrieve a MongoDB document with Kotlinx000D. The article specifically explained how to install Kotlin in Eclipse, download the MongoDB java driver, how to add the JAR file to ECLIPSE, create a MongoDB sample dataset, create the Kotlin project and the Kotlin object files. The tutorial also covered how to code the Kotlin MongoDB retrieve operation and verify the operation with the MongoDB shell. Remember that in order to perform the CRUD operations a compatible driver is required to bridge Kotlin to the MongoDB server.
The Code
Following is the full Kotlin code used in this tutorial to retrieve a MongoDB document with Kotlinx000D:
The KotlinMongoRetrieve.kt
1 2 3 4 5 6 7 8 9 10 11 12 13 14 15 16 17 18 19 20 21 22 23 24 25 26 27 28 29 30 31 32 33 34 | import com.mongodb.BasicDBObject import com.mongodb.MongoClient import com.mongodb.MongoException object KotlinMongoRetrieve { @JvmStatic fun main(args: Array<String>){ var mongoClient: MongoClient? = null try { // mongodb connection mongoClient = MongoClient("127.0.0.1", 27017) var db = mongoClient.getDatabase("EcommerceDb") var tbl = db.getCollection("product") // the parameter for searching a document to be retrieved val searchQry = BasicDBObject(); searchQry.put("sku","1234567"); var cursor = tbl.find(searchQry); var it = cursor.iterator() while (it.hasNext()) { System.out.println(it.next()); } } catch (e: MongoException) { e.printStackTrace() } finally { mongoClient!!.close() } } data class User(val name: String, val lastname: String) } |

Pilot the ObjectRocket Platform Free!
Try Fully-Managed CockroachDB, Elasticsearch, MongoDB, PostgreSQL (Beta) or Redis.
Get Started