How to Use Mongoose Validators
Introduction
When working with mongoose, one of the very first steps is to define the schema. The schema defines the structure of documents and default values of the fields. But this is not enough. We need to define validations too. Without validations, any type of data can be inserted in the database and this is a bad practice. Mongoose provides in-built options for data validation. Moreover, we can also create custom validations. In this article, we will discuss how to use in-built data validation in mongoose.
Defining schema without validations
We have a details collection and this is the schema defined for it.
1 2 3 4 5 6 7 8 9 10 11 | let details = new Schema({ name: { type: String }, age: { type: Number }, location: { type: String } }); |
There are three fields – name, age, and location. As of now, there are no validations. This means, while inserting documents in this collection, we can skip any of these fields, or even we can skip all of them. Let’s try to insert an empty document using the mongo shell.
1 2 3 | > db.details.insert({}) WriteResult({ "nInserted" : 1 }) > |
Here we passed an empty object and it is inserted in the collection. But is this right? What is the point of this document? This is why we have validations to encounter such situations. So let’s discuss some of the most useful built-in validators.
required
As the name suggests, the required validators define that the specific field is required. That field cannot be skipped in the document while inserting it into the collection. Let’s make the name field required.
1 2 3 4 5 6 7 8 9 10 11 12 | let details = new Schema({ name: { type: String, required: true }, age: { type: Number }, location: { type: String } }); |
Let’s try to add an empty document through mongoose using the postman tool.
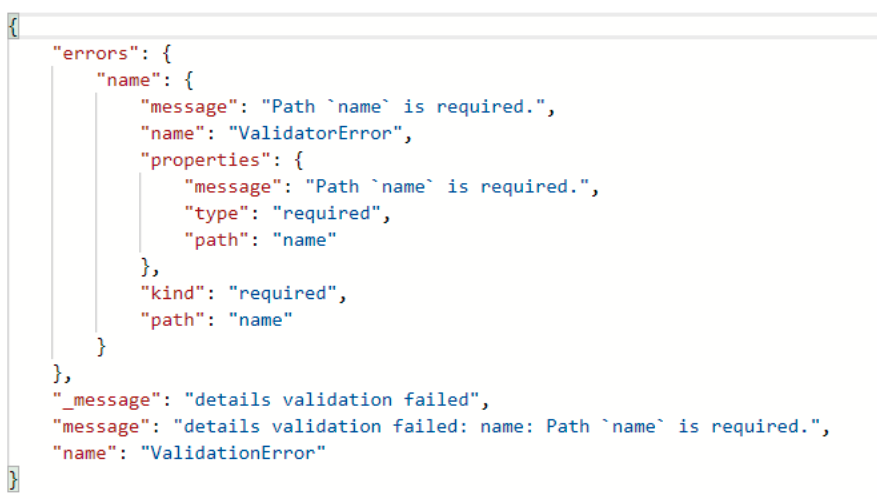
It will throw an error. The message says “Path name is required.”. This is because we made the name field mandatory.
minlength and maxlength
Above, we made the name field mandatory is every document that will be inserted into the details collection. We can also specify the minimum and maximum lengths of the string using the minlength and maxlength validators respectively.
1 2 3 4 5 6 7 8 9 10 11 12 13 14 | let details = new Schema({ name: { type: String, required: true, minlength: 4, maxlength: 16 }, age: { type: Number }, location: { type: String } }); |
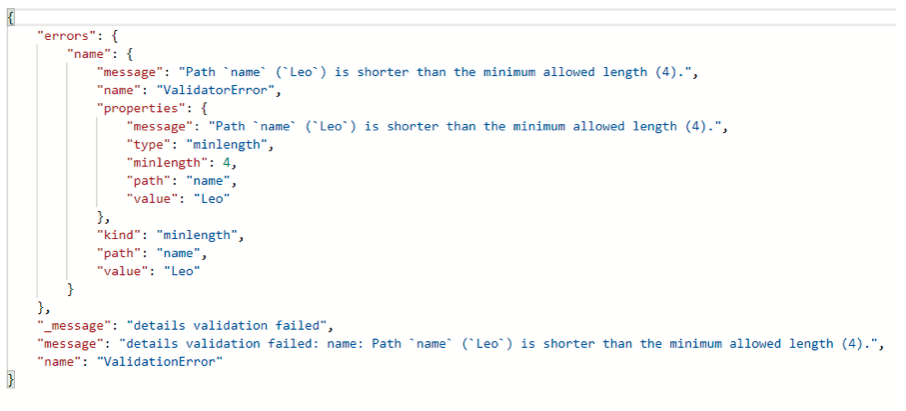
The values of both these validators should be a positive integer. Here, the length of the string should be four or more than four characters. The maximum length could be sixteen, not more than it.
If we try to violate these conditions, the following error will appear.
min and max
Similarly, we have min and max validators for numbers. Let’s add these two validators to the age field.
1 2 3 4 5 6 7 8 9 10 11 12 13 14 15 16 | let details = new Schema({ name: { type: String, required: true, minlength: 4, maxlength: 16 }, age: { type: Number, min: 18, max: 60 }, location: { type: String } }); |
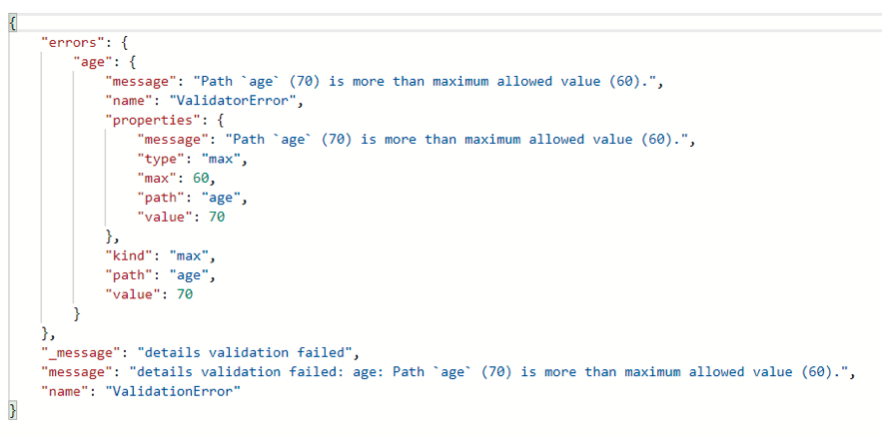
Now, the minimum value of age can be 18 and the maximum can be 60.
If we try to violate these conditions, the following error will appear.
Conclusion
Validation is an important part of the mongoose schema. Mongoose provides a few very useful built-in validators. These validators are very easy to use and configure. It is always recommended to use validators while defining a schema.


Pilot the ObjectRocket Platform Free!
Try Fully-Managed CockroachDB, Elasticsearch, MongoDB, PostgreSQL (Beta) or Redis.
Get Started