How to setup React, Node and MongoDB based project - Part 3
Introduction
In Parts 1 and 2 we have setup our Node.Js / Express server, React Router, and we are ready to move onto setting up the database.
How To
Installing MongoDB
In the meanwhile, we set up the Node.js / Express server. So we are ready to go for setting up the database. Let’s install MongoDB.
If you working with Mongo for the first time then for Mac users, you need to run this command through your terminal.
$ brew install mongodb
For Windows or Linux users, follow the instructions from MongoDB’s official website. Here is the link: https://docs.mongodb.com/manual/administration/install-community/.
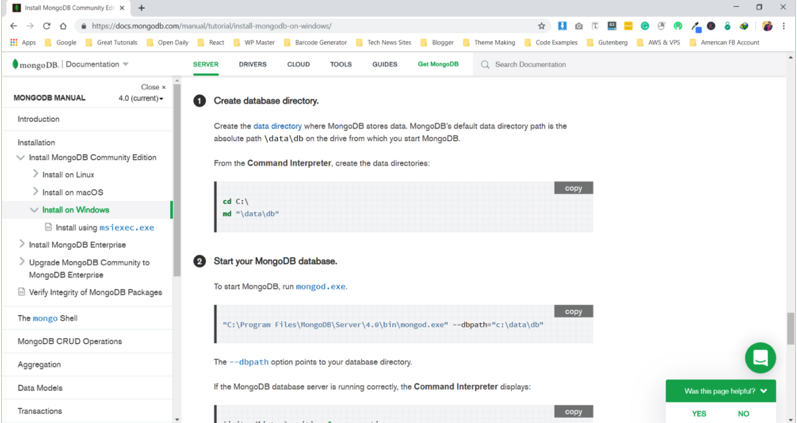
If you have installed MongoDB. MongoDB stores data in data directory so you need to create a data directory. Use the command below to make a directory:
C:\>md "\data\db"
Firstly, you need to start the mongo server.
Start your MongoDB database
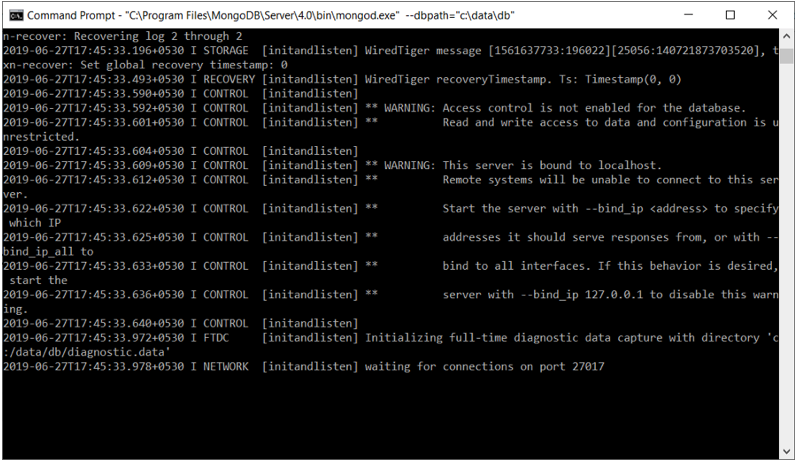
Then after running the command below in windows:
1 | “C:\Program Files\MongoDB\Server\4.0\bin\mongod.exe” — dbpath=”c:\data\db” |
You will see a response which will show you that your database server is running on port 27017.
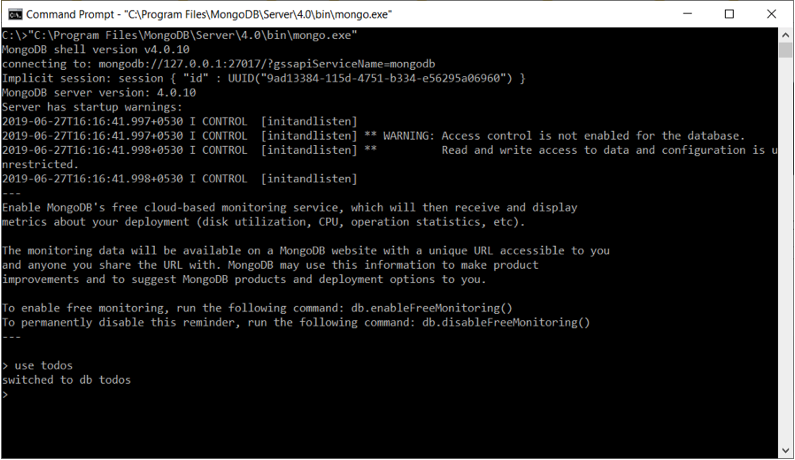
In windows, we need to set up an environment path variable for MongoDB. I’m not going to do this right now, so let’s run mongoDB directly through command line using the command below:
1 | C:\Program Files\MongoDB\Server\4.0\bin\mongo.exe |
Let’s create a database after running the command below:
use todos
You will see a window as shown below:
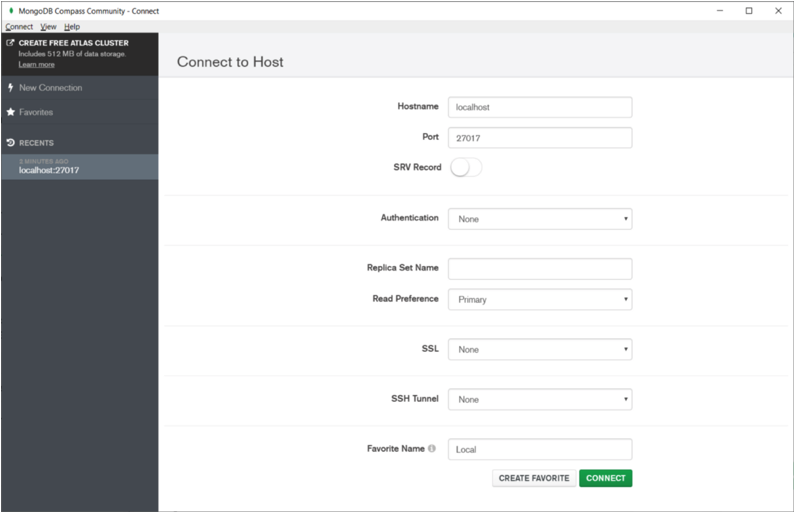
After setting up MongoDB, we have also created a database. Now the time is to connect it with the backend server.
Let’s Connect MongoDB with Node using Mongoose
I hope you remember the file we have created to run our server, server.js. Now, we are going to connect our node/express with the database server. One thing that you need to keep mind start your database server and keep it running until your application. Let’s connect MongoDB using Mongoose, yet another framework js application to interact with MongoDB.
Update server.js code snippets with the code provided below:
`
const express = require(‘express’);
const app = express();
const bodyParser = require(‘body-parser’);
const cors = require(‘cors’);
const mongoose = require(‘mongoose’);
const PORT = 4000;
app.use(cors());
app.use(bodyParser.json());
mongoose.connect(‘mongodb://127.0.0.1:27017/todos’, { useNewUrlParser: true });
const connection = mongoose.connection;
connection.once(‘open’, function() {
}) app.listen(PORT, function() {
});
`
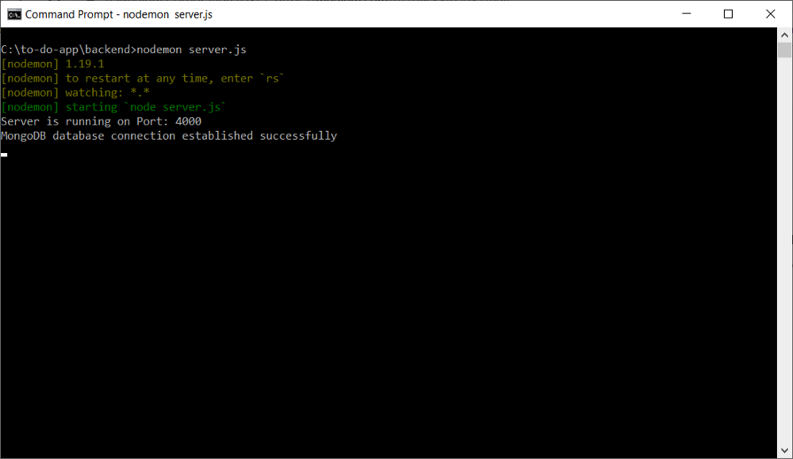
Once you add this code, go inside the backend and run your server file. When you run that you will see a message,” MongoDB database connection established successfully in addition”.
Create a Mongoose Schema
Mongoose facilitates with Object Oriented approach in database. So we need to create a model for our database entity.
Let’s create a schema file todo.model.js and add the provided code below:
`
const mongoose = require(‘mongoose’);
const Schema = mongoose.Schema;
let Todo = new Schema({
2
3
4
5
6
7
8
9
10
11
12
type: String
},
todo_responsible: {
type: String
},
todo_priority: {
type: String
},
todo_completed: {
type: Boolean
}
});
module.exports = mongoose.model(‘Todo’, Todo);
`
Defining Server Endpoints to Access Database through API Calls
This is going to our final step for setting up the server and database. In this step, we are going to define endpoints so that we can access our database using fetch or axios API call library into our real application.
Firstly, we have to create an instance of the Express Router. Add the code below into the server.js file.
const todoRoutes = express.Router();
It works as a middleware. It will take care of api requests and paths.
`
app.use(‘/todos’, todoRoutes);
First of all, we need to add an endpoint which shows the all available todos items:
todoRoutes.route(‘/’).get(function(req, res) {
2
3
4
5
6
7
if (err) {
console.log(err);
} else {
res.json(todos);
}
});
});
`
In the above code, we are using get method to send an HTTP request and access all the To-Do data using find function. We are going to talk about this later in this tutorial. I have added comments in the code, so you can which code snippet is doing what.
Here is the complete code that you need to update or replace in server.js.
`
const express = require(‘express’);
const app = express();
const bodyParser = require(‘body-parser’);
const cors = require(‘cors’);
const mongoose = require(‘mongoose’);
const todoRoutes = express.Router();
const PORT = 4000;
let Todo = require(‘./todo.model’);
/ All the above is used to import these libraries & framework in our file. /
app.use(cors());
app.use(bodyParser.json());
/ used to tell the systme that we want to JSON/
mongoose.connect(‘mongodb://127.0.0.1:27017/todos’, { useNewUrlParser: true });
const connection = mongoose.connection;
connection.once(‘open’, function() {
}) / Here we creating a connection between our database and node/express server / todoRoutes.route(‘/’).get(function(req, res) {
2
3
4
5
6
7
if (err) {
console.log(err);
} else {
res.json(todos);
}
});
}); / Code above is used to access the todo list data in json format/ todoRoutes.route(‘/:id’).get(function(req, res) {
2
3
4
Todo.findById(id, function(err, todo) {
res.json(todo);
});
}); / URL parameter id which can be accessed via req.params.id. This id is passed into the call of Tood.findById to retrieve an issue item based on it’s ID. / todoRoutes.route(‘/update/:id’).post(function(req, res) {
2
3
4
5
6
7
8
if (!todo)
res.status(404).send("data is not found");
else
todo.todo_description = req.body.todo_description;
todo.todo_responsible = req.body.todo_responsible;
todo.todo_priority = req.body.todo_priority;
todo.todo_completed = req.body.todo_completed;
todo.save().then(todo => {
2
3
4
5
6
})
.catch(err => {
res.status(400).send("Update not possible");
});
});
}); / Code above is used to update the using if there is any present data/ todoRoutes.route(‘/add’).post(function(req, res) {
2
3
4
5
6
7
8
todo.save()
.then(todo => {
res.status(200).json({'todo': 'todo added successfully'});
})
.catch(err => {
res.status(400).send('adding new todo failed');
});
}); / with this post request using the above, you will be able to add a new item in your todo list / app.use(‘/todos’, todoRoutes); app.listen(PORT, function() {
});
`
You can do one more thing if you want to before implementing it into your frontend. You can test the APIs using POSTMAN. This is article is already becomes too long so I’m not going to do that here.
Connecting The Backend with frontend
1 | C:\to-do-app>npm install axios |
Now, import axios in the create.js file and also extend the onSubmit button method.
import axios from 'axios';
Here is the code that you need to update:
1 2 3 4 5 6 7 8 9 10 11 12 13 14 15 16 17 18 19 20 21 22 23 24 25 | onSubmit(e) { e.preventDefault(); console.log(`Form submitted:`); console.log(`Todo Description: ${this.state.todo_description}`); console.log(`Todo Responsible: ${this.state.todo_responsible}`); console.log(`Todo Priority: ${this.state.todo_priority}`); const newTodo = { todo_description: this.state.todo_description, todo_responsible: this.state.todo_responsible, todo_priority: this.state.todo_priority, todo_completed: this.state.todo_completed }; axios.post('http://localhost:4000/todos/add', newTodo) .then(res => console.log(res.data)); this.setState({ todo_description: '', todo_responsible: '', todo_priority: '', todo_completed: false }) } |
Now, we have to add a little bit of code in todos.js make everything working.
Let’s put the final code in todos.js Component
1 2 3 4 5 6 7 8 9 10 11 12 13 14 15 16 17 18 19 20 21 22 23 24 25 26 27 28 29 30 31 32 33 34 35 36 37 38 39 40 41 42 43 44 45 46 47 48 49 50 51 52 53 54 55 56 57 58 59 | import React, { Component } from 'react'; import { Link } from 'react-router-dom'; import axios from 'axios'; const Todo = props => ( <tr> <td>{props.todo.todo_description}</td> <td>{props.todo.todo_responsible}</td> <td>{props.todo.todo_priority}</td> <td> <Link to={"/edit/"+props.todo._id}>Edit</Link> </td> </tr> ) export default class TodosList extends Component { constructor(props) { super(props); this.state = {todos: []}; } componentDidMount() { axios.get('http://localhost:4000/todos/') .then(response => { this.setState({ todos: response.data }); }) .catch(function (error){ console.log(error); }) } todoList() { return this.state.todos.map(function(currentTodo, i){ return <Todo todo={currentTodo} key={i} />; }) } render() { return ( <div> <h3>Todos List</h3> <table className="table table-striped" style={{ marginTop: 20 }} > <thead> <tr> <th>Description</th> <th>Responsible</th> <th>Priority</th> <th>Action</th> </tr> </thead> <tbody> { this.todoList() } </tbody> </table> </div> ) } } |
Now, we have coded todos.js successfully. I have added some example data through frontend form, let me show you the output:
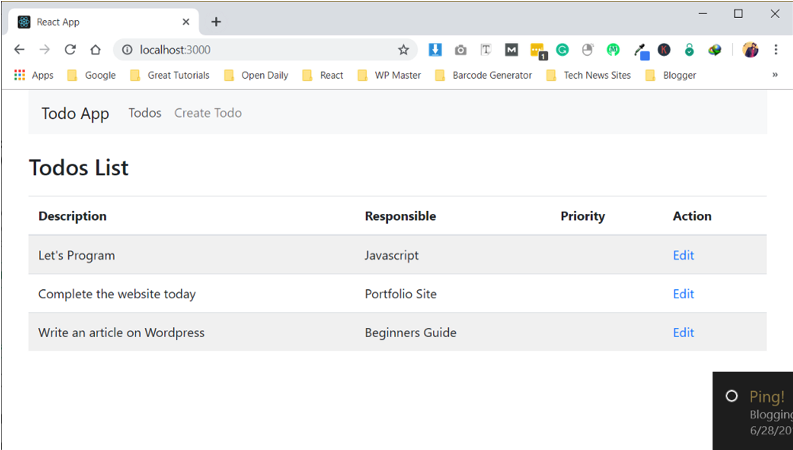
Finally, we have created a react app successfully which have the add some data into our to-do list database. There are still a few things left like editing the list items as we needed.
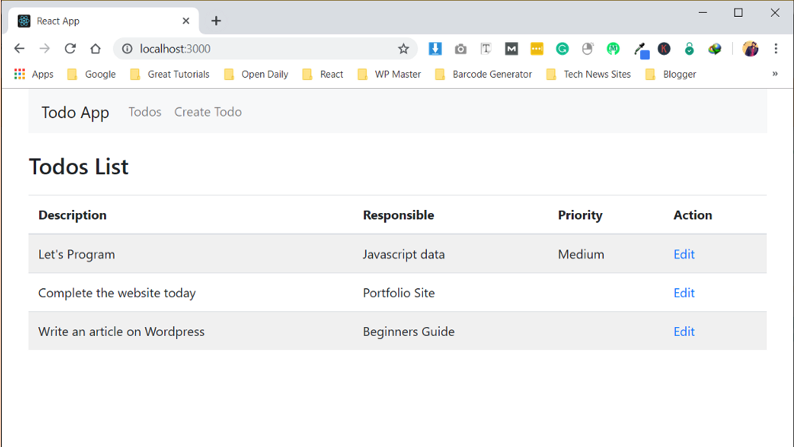
A Task For You
I have decided to give a task. Programming is something that you learn by doing. So, your task is to create a code snippet for edit.js component so you can update any data previously entered todo. After you’re done the application will like the picture below:
Conclusion
I hope, you got an idea that how you can setup React, Node and MongoDB together. I have covered everything from installing to implement in an easy to follow manner. If you got stuck at any point please let us know.

Pilot the ObjectRocket Platform Free!
Try Fully-Managed CockroachDB, Elasticsearch, MongoDB, PostgreSQL (Beta) or Redis.
Get Started