How to Setup a NodeJS App with MongoDB using MongoJS
Introduction
NoSQL databases and running your app’s backend with Javascript have both become increasingly popular. In this tutorial we will show you how to use NodeJS to connect with MongoDB using MongoJS to setup the backend for a simple web application.
If you’re unfamiliar with these technologies, MongoDB is a NoSQL database technology and NodeJS allows you to run your backend using Javascript code.
We won’t be showing you how to build a full app in this tutorial but just the basic setup so your Javascript can communicate to MongoDB using the npm library MongoJS. We’ll be using a little of the Express framework to show how you might setup your routes.
If you just want the starter code jump to the end of the article for Just The Code.
Prerequisites
- You should have MongoDB installed and running.
- Some command line experience is recommended.
Setup Your Project
First create a folder for this project. We call ours demo but you can call it whatever you’d like
1 | mkdir demo |
Now navigate into that folder and create an app.js file which will act as our server.
1 2 | cd demo touch app.js |
Add dependencies to your server file app.js
Next we’ll use the npm init command inside our demo project folder to allow npm to manage our dependencies. It will prompt you with a few questions but the defaults should all work for our application.
Now we need to add some dependency libraries to our app.js that will make our programming lives a whole lot easier.
- First we install the npm library mongojs will make it easy to connect and communicate with MongoDB
1 | npm install mongojs |
- Next we’ll install the npm library express which is a popular framework to create web applications. It makes creating routes extremely easy. Again we use npm to install it.
1 | npm install express |
Now that we have them installed we’ll require them in our app.js file so that we can actually use them in javascript.
1 2 | var express = require("express"); var mongojs = require("mongojs"); |
Setup Express
Now we’ll create a very basic express app and verify our server (app.js) will run and is listening for requests. The ammended app.js file looks like this now.
File: /demo/app.js
`js
// Dependencies
var express = require(“express”);
var mongojs = require(“mongojs”);
// Initialize Express var app = express();
// Set up a static /public folder app.use(express.static(“public”));
// Routes app.get(“/”, function(req, res) { res.send(“Hello from demo app!”); });
// Set the app to listen on port 3000
app.listen(3000, function() {
console.log(“Listening on port 3000.”);
});
`
We’ll work in order of the most important additions:
First we initialized our Express app in a variable called app which we will use going forward to create routes, listen on ports, and more.
Next we setup a static folder called “/public” in our directory. We put assets in here like index.html or style.css and they can be directly accessed by going to “/index.html” or “/style.css” respectively.
Then we setup the home route “/” for our application as an example of how to setup a route in express. In this case our response to a request to the home route (“http://localhost/) will be “Hello from demo app!”.
Lastly but most importantly, we made our app start listening on port 3000 and we gave a log message to indicate that our app is successfully listening.
We can run our simple app and just verify it is listening:
1 2 3 | $ node app.js Listening on port 3000. _ |
As you can see our simple app is now successfully listening on port 3000.
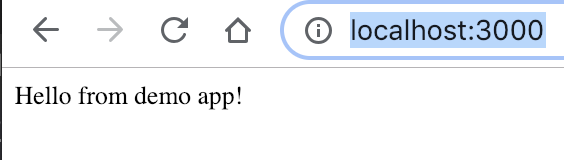
We can also go to ‘http://localhost:3000/’ and verify that we receive our “Hello from demo app!” response which we do:
Connecting to MongoDB using MongoJS
First let’s add some data to MongoDB through the MongoDB to do a little demo with. If you haven’t started MongoDB running yet, you can start the MongoDB daemon with
1 | mongod |
Then you can get to the MongoDB console by running the following command in a separate terminal tab
1 | mongo |
Now use these MongoDB commands to create a new database grocerydb and add a few products to a new collection called products
1 2 3 | use grocerydb db.products.insert({"name":"Soda", "quantity": 10, "brand":"demoBrand", "departments": ["Beverages", "Checkout"]}) db.products.insert({"name":"Soy Milk", "quantity": 5, "brand":"demoBrand", "departments": ["Dairy"]}) |
Now that we have a basic app running and some data in our databse, we want to figure out how we can interact with MongoDB through our javascript. We’ll show a new app.js file here and discuss the changes we added to connect to MongoDB.
File /demo/app.js
1 2 3 4 5 6 7 8 9 10 11 12 13 14 15 16 17 18 19 20 21 22 23 24 25 26 27 28 29 30 31 32 33 34 35 36 37 38 39 40 41 42 43 | // Dependencies var express = require("express"); var mongojs = require("mongojs"); // Initialize Express var app = express(); // Set up a static folder app.use(express.static("public")); // 1. Db config var databaseUrl = "grocerydb"; var collections = ["products"]; // 2. Hook mongojs to db var db = mongojs(databaseUrl, collections); // 3. Log any mongodb errors db.on("error", function(error) { console.log("Database Error:", error); }); // Routes app.get("/", function(req, res) { res.send("Hello from demo app!"); }); // 4. /all route, to display all products in grocerydb app.get("/all", function(req, res) { db.products.find({}, function(error, found) { if (error) { console.log(error); } else { res.json(found); } }); }); // Listen on port 3000 app.listen(3000, function() { console.log("Listening on port 3000."); }); |
We’ve numbered the changes so you can follow along as we describe the updates
- We created variables for our database name and an array of our collections.
- We gave mongojs our database and collection names so that it could establish a connection to the database.
- We added some error handling in case mongojs isn’t able to establish a connection.
- We added a new route
http://localhost/allthat will use the mongojs db.products.find({}) function to query all the documents in our collection and respond to the request with them.
Finally you can verify the connection by testing the route http://localhost/all and seeing if you get the documents you added to the database.

As you can see we do in fact get our products back.
Conclusion
Finally we have a basic app with a backend written in Javascript that can communicate with MongoDB. You can make requests to the server from a browser and the server will interact with the database and return results. Although we haven’t fleshed out the user interface we have concentrated on the building blocks of an application that connects NodeJS with MongoDB using the MongoJS library from npm. If you wanted to start expanding this application you would add more routes for creating documents, deleting documents, updating documents, and so on. Of course you’d also flesh out the front-end but this article was more focused on showing you the basic building blocks. We hope you found this information helpful and don’t hesitate to reach out with any questions or suggestions.
Just The Code
If you’re already comfortable with the concepts and technology mentioned in this article, here’s all the code we used for this demonstration:
Add demo data directly through the Mongo console:
1 2 3 | use grocerydb db.products.insert({"name":"Soda", "quantity": 10, "brand":"demoBrand", "departments": ["Beverages", "Checkout"]}) db.products.insert({"name":"Soy Milk", "quantity": 5, "brand":"demoBrand", "departments": ["Dairy"]}) |
File /demo/app.js
1 2 3 4 5 6 7 8 9 10 11 12 13 14 15 16 17 18 19 20 21 22 23 24 25 26 27 28 29 30 31 32 33 34 35 36 37 38 39 40 41 42 43 | // Dependencies var express = require("express"); var mongojs = require("mongojs"); // Initialize Express var app = express(); // Set up a static folder app.use(express.static("public")); // Db config var databaseUrl = "grocerydb"; var collections = ["products"]; // Hook mongojs to db var db = mongojs(databaseUrl, collections); // Log any mongodb errors db.on("error", function(error) { console.log("Database Error:", error); }); // Routes app.get("/", function(req, res) { res.send("Hello from demo app!"); }); // /all route, to display all products in grocerydb app.get("/all", function(req, res) { db.products.find({}, function(error, found) { if (error) { console.log(error); } else { res.json(found); } }); }); // Listen on port 3000 app.listen(3000, function() { console.log("Listening on port 3000."); }); |

Pilot the ObjectRocket Platform Free!
Try Fully-Managed CockroachDB, Elasticsearch, MongoDB, PostgreSQL (Beta) or Redis.
Get Started