How to Save MongoDB Document using Spring Data Part 1
Introduction
The Spring Initializr Spring Boot project generator offers the developer’s convenience in building stand-alone Spring applications. The popular Eclipse Integrated Development Environment (IDE) utilizes JavaScript, and it makes the perfect open-source platform for your Spring Boot project. But wait. You’ll also need a database application. That’s where the flexible and scalable MongoDB comes in to fulfill your needs. Let’s get started on your project. This tutorial is Part 1 of a multiple-series that explains how to save MongoDB document using Spring Data with the Eclipse IDE.
Prerequisites
Download and install MongoDB.
Download and install Eclipse IDE.
In a browser window, access the Spring Initializr online tool.
NOTE: You must know how to: (1) configure the above applications, and (2) use the Spring Initializr tool to create a Spring Boot project.
Download and install Java.
Verify that you have the correct version for your OS. The version number used for the examples in this tutorial is shown here:
1 2 | java version "1.8.0_221" Java(TM) SE Runtime Environment (build 1.8.0_221-b11) |
Creating Spring Boot Project in Eclipse
- Use the Spring Initializr tool available online to make a Spring Boot project so that you can save MongoDB document using Spring Data.
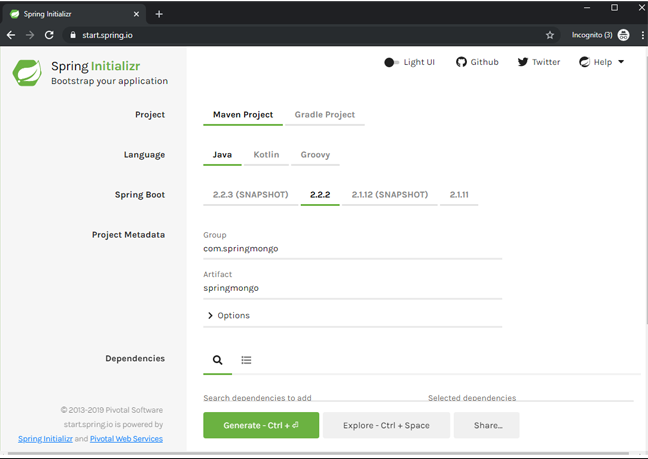
NOTE: Setup the details of your Spring Boot project based on your desired specifics.
Be sure and complete the sections for the
ArtifactandGroup.Next, get the dependencies for your project:
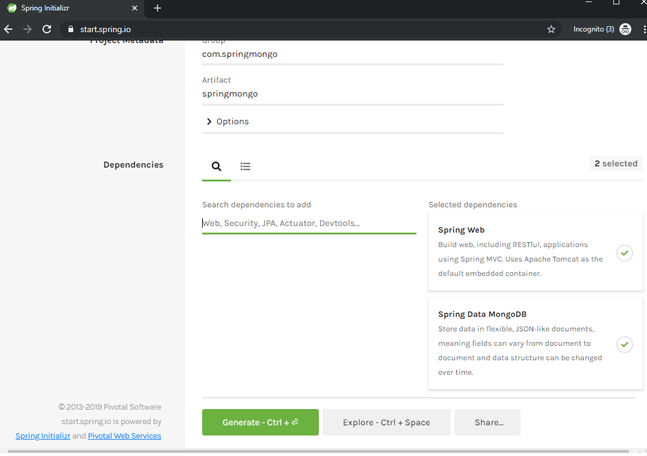
To simplify things, go to the section
Search Dependencies to add, and run a keyword search. Doing this will list available dependencies for your project. For our example, we looked under the category Web and picked Spring Web. We also selected from the category SQL, the Spring Data MongoDB dependency.When you’re finished selecting your dependencies and completing your configuration, press the
Generatebutton. A Zip file format of your configuration will be generated to save MongoDB document using Spring Data project.Inside the workspace directory of Eclipse IDE, extract the downloaded configuration Zip file.
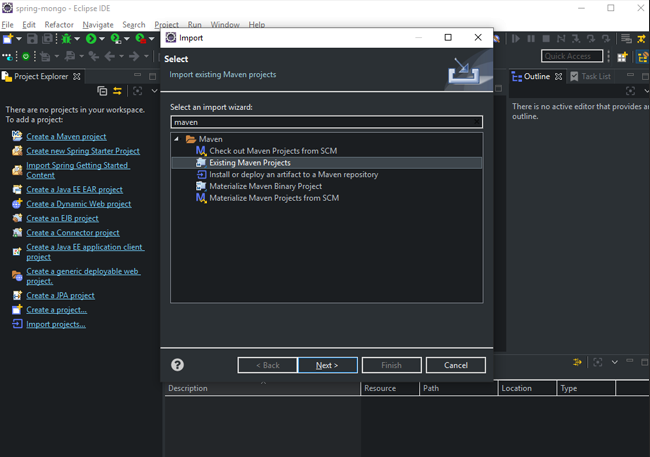
In Eclipse IDE, select Existing Maven Project as the type of project to import.
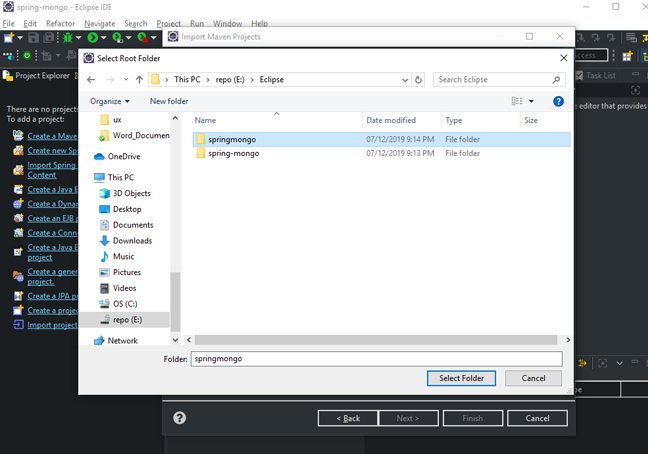
- Choose the file that was extracted like this:
- Finally, your spring boot project was successfully created.
Creating the Java Classes
Get the domain classes for Java. These three are the ones selected for the examples in this tutorial:
Resort.javaReview.javaAddress.java
Follow this process to obtain the required Java classes mentioned above:
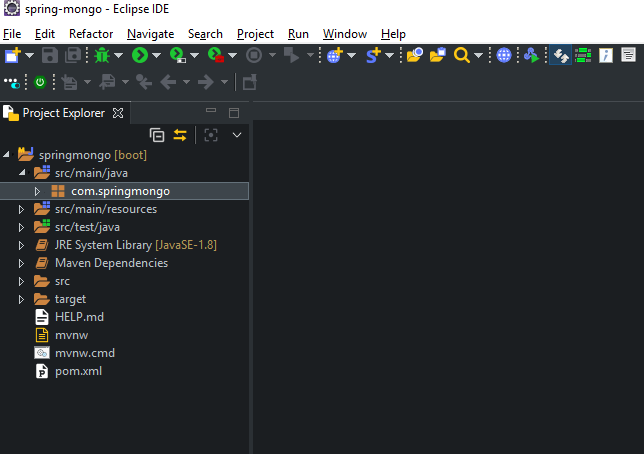
See the
com.springmongoand right-click it.Pick
New.Select
Class.Type
Resort.
NOTE: Skip adding the
javaextension to the class as you type it because this occurs instantaneously when the file is made.
- Press
Finish.
- Repeat the 5 steps above for the
Review.javaandAddress.javaclasses.
Coding the Java Classes
Add the code to each one of the three Java classes. Start by opening the Resort.java class file and applying this code:
1 2 3 4 5 6 7 8 9 10 11 12 13 14 15 16 17 18 19 20 21 22 23 24 25 26 27 28 29 30 31 32 33 34 35 36 37 38 39 40 41 42 43 44 45 46 47 48 49 50 | package com.springmongo; import java.util.ArrayList; import java.util.List; public class Resort { private String id; private String resortName; private String resortId; private int pricePerDay; private Address address; private List<Review> reviews; protected Resort() { this.reviews = new ArrayList<>(); } public Resort(String resortName, String resortId, int pricePerDay, Address address, List<Review> reviews) { super(); this.id = id; this.resortName = resortName; this.resortId = resortId; this.pricePerDay = pricePerDay; this.address = address; this.reviews = reviews; } public String getId() { return id; } public void setId(String id) { this.id = id; } public String getResortName() { return resortName; } public void setResortName(String resortName) { this.resortName = resortName; } public String getResortId() { return resortId; } public void setResortId(String resortId) { this.resortId = resortId; } public int getPricePerDay() { return pricePerDay; } public void setPricePerDay(int pricePerDay) { this.pricePerDay = pricePerDay; } public Address getAddress() { return address; } public void setAddress(Address address) { this.address = address; } public List<Review> getReviews() { return reviews; } public void setReviews(List<Review> reviews) { this.reviews = reviews; } } |
You just applied a basic code to make the constructors for the Resort.java class for you to save MongoDB document using Spring Data project. The code also contains the setter methods for updating variable values and getter methods for variable value reading for the class’s entity objects.
Repeat the same process for the other two classes: Review.java and Address.java.
- For the
Review.java, input this code:
The code for Review.java
1 2 3 4 5 6 7 8 9 10 11 12 13 14 15 16 17 18 19 20 21 22 23 24 25 26 27 28 29 | package com.springmongo; public class Review { private String userAlias; private int stars; private boolean approved; protected Review() {} public Review(String userAlias, int stars, boolean approved) { super(); this.userAlias = userAlias; this.stars = stars; this.approved = approved; } public String getUserAlias() { return userAlias; } public void setUserAlias(String userAlias) { this.userAlias = userAlias; } public int getStars() { return stars; } public void setStars(int stars) { this.stars = stars; } public boolean isApproved() { return approved; } public void setApproved(boolean approved) { this.approved = approved; } } |
- For the
Address.javaclass, use this code:
The code for Address.java
1 2 3 4 5 6 7 8 9 10 11 12 13 14 15 16 17 18 19 20 21 22 23 | package com.springmongo; public class Address { private String city; private String region; protected Address() {} public Address(String city, String region) { super(); this.city = city; this.region = region; } public String getCity() { return city; } public void setCity(String city) { this.city = city; } public String getRegion() { return region; } public void setRegion(String region) { this.region = region; } } |
Conclusion
This tutorial explained how you to save MongoDB documents using Spring Data. The easy online Spring Intializr tool generated your Spring Boot project rapidly. When you imported your file’s configuration as an Existing Maven Project to the Eclipse IDE, you didn’t have to give much thought to which dependencies you needed because they were downloaded during the importation process. Finally, you constructed the required Java classes and coded each one. Since there were only three classes, that was a breeze to complete. This concludes Part 1 of “How to Save MongoDB Document using Spring Data”, a multiple-series tutorial. Proceed to Part 2 to continue learning.


Pilot the ObjectRocket Platform Free!
Try Fully-Managed CockroachDB, Elasticsearch, MongoDB, PostgreSQL (Beta) or Redis.
Get Started