How to Install the MongoDB Driver for PHP
How to Install the MongoDB Driver for PHP
Introduction
The power of the PHP MongoDB driver is in its script information collecting and communication abilities. That being said, installing the correct PHP driver for your macOS or Linux and other UNIX-based system is the main key to successful computer script writing. When you follow the right steps, the installation of MongoDB driver for PHP is an effortless task that you’ll find easy to accomplish.
Prerequisites
Open a new terminal by entering Ctrl+Alt+T.
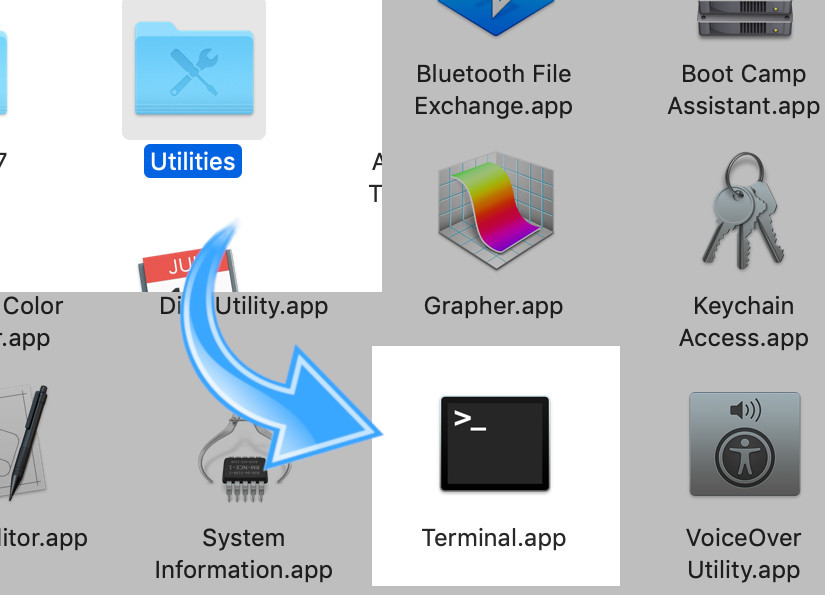
Give yourself privileges to access the system by using the
sudocommand. If you are using a mac OS, use the finder to get to the terminal app in the/Applications/Utilitiesfolder.
MongoDB – Install the application, then run it.
MongoDB PHP Driver – Install a compatible MongoDB driver based on your version of MongoDB.
1 | pecl search mongo |
Install MongoDB before you install the PHP driver. Try typing mongo to get into the Mongo shell server.
- In a terminal window, type
php -vorphp --versionto install PHP 7.
Package managers and MongoDB
Now install the PHP driver after the MongoDB installation is finished.
For Linux distros
Use ‘YUM’ (Yellowdog Updater, Modified) to install PHP-PEAR:
For Red Hat distros (of Linux such as Centros)
You have the option to install MongoDB first, then PEAR and use ‘YUM’ to do that.
You can do a YUM repository update:
1 | sudo yum -y update |
Use YUM to add driver dependencies
Install ""Development Tools""
1 2 | sudo yum groupinstall ""Development Tools"" sudo yum install php-pear php-devel |
Update the APT repository for distros: Install php-pear
- Update the APT repository and install the
php-mongodbMongoDB PHP Library:
1 | sudo apt-get update |
- Install the PHP-PEAR library:
1 | sudo apt-get install php-pear |
Use PHAR to install PEAR
- This script calls to install the repository for PEAR via PHAR.
1 | curl -O http://pear.php.net/go-pear.phar sudo php -d detect_unicode=0 go-pear.phar |
- The installation process will take you through a series of steps then you’re done.
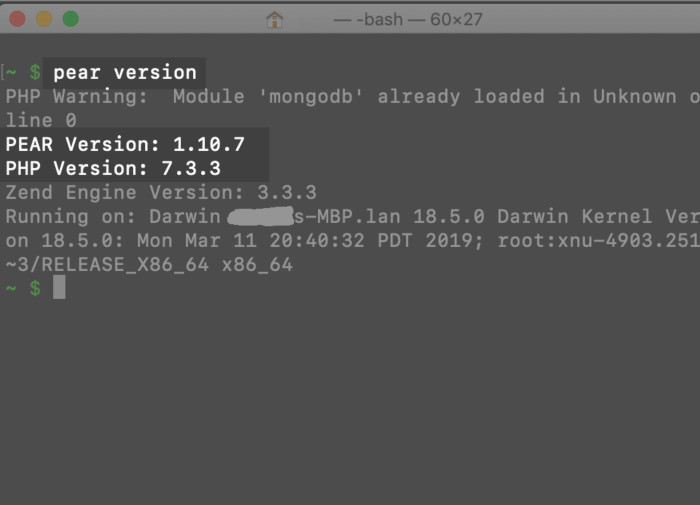
Verify that PEAR for PHP is installed properly
- Here’s the quick command to check your installed PEAR version. Type the following in a terminal window.
1 | pear version |
The pear version command entered on this macOS lists both PEAR and PHP versions. The installation packages will be installed on those versions.
About Installing the MongoDB PHP Driver
How both Linux and macOS install the MongoDB PHP driver is somewhat the same. For installing PHP packages, they can use the PEAR and PHP-dependent PHP Extension Community Library (PECL).
Install the MongoDB driver using PECL:
- Use the command
pecl install. The PHP-package repository, PECL, is for installing PHP packages including libraries for macOS, UNIX-based (such as Linux) systems.
1 | sudo pecl install mongodb |
- Check for PHP module or extension issues with the
php -vcommand at the terminal.
>NOTE If you experience problems with the installation process, you may have an older driver. For example, PHP 5 is considered an older version. In that case, it’s not mongoDB but referred to as mongo. Try this command sudo pecl install mongo to install the driver.
The MongoDB driver: Configure it
PECL automatically attempts to configure libmongoc and libbson packed versions.
- Wait until the installation has finished, then in a terminal window, use the command
grepto find thephp.ini.
1 | sudo php -i | grep 'Configuration File' |
NOTE: If you want, you can use the following commands to change the path for the configuration file.
1 2 3 | sudo pear config-set php_ini /path/to/php.ini sudo pecl config-set php_ini /path/to/php.ini |
A successful result in bringing up the file is
config-set succeeded.Edit the file. Now you can see the PHP
.iniconfiguration file’s path location.
example macOS location:
1 | Loaded Configuration File => /usr/local/etc/php/7.3/php.ini |
example Linux location:
1 | Loaded Configuration File => /etc/php/7.3/cli/php.ini |
The nano command line editor is handy for editing files. Use it or one like it to edit the PHP configuration file.
1 | sudo nano /etc/php/7.3/cli/php.ini |
- Include
extension=mongodb.soat the bottom of the PHP.iniconfiguration file, then save it.
The extension=mongodb.so to the PHP .ini file:
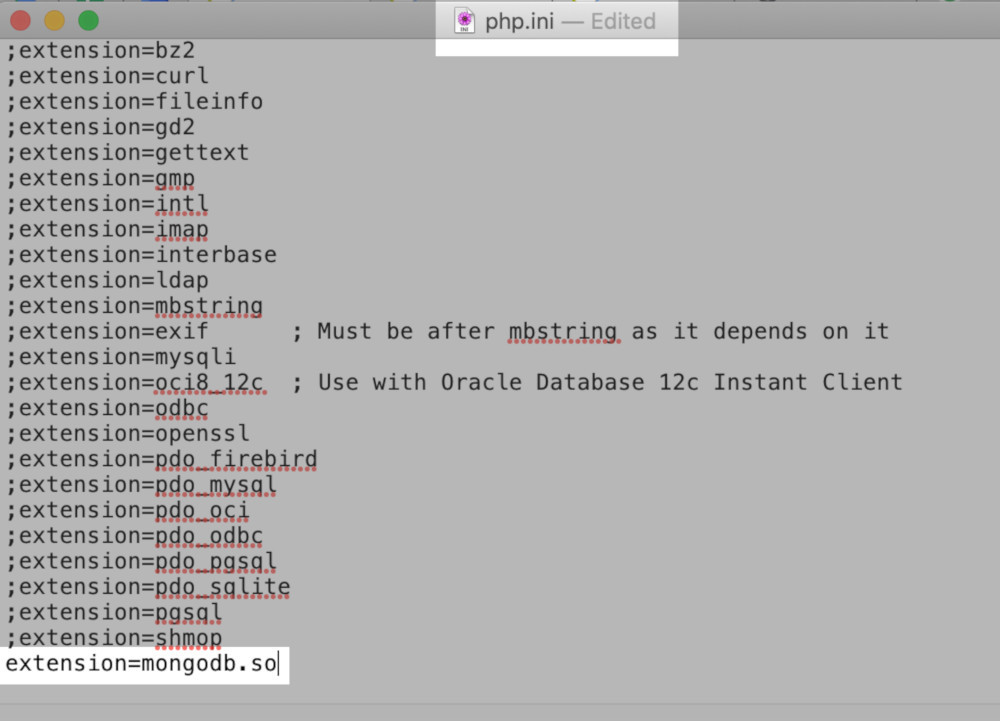
>IMPORTANT: Unlike the beginning of the other commands within the PHP configuration file, you won’t add a semi-colon (;) on the extension=mongodb.so command line. If you forget and add the semi-colon there, it will be just like the file wasn’t edited because PHP won’t read the command.
If you run into error results, there may be a conflict due to an older PHP 5 version installed on your OS. If this occurs, the best way to fix the issue is to remove the old extension from your configuration file.
Linux: Restart the Apache server
To make the changes to the
iniconfiguration file effective, restart the Apache server.Use
systemct1at the command line to restartapache2HTTPD service.
1 | sudo systemctl restart apache2 |
..or:
1 | sudo systemctl restart httpd.service |
MacOS: The Apache server — Restart it
- Use
brewto restart the Apache server if you used Homebrew to install Apache and PHP 7.
for a Homebrew installation of Apache and PHP:
1 2 | brew services restart httpd brew services restart php |
- Use
apachetlto restart the Apache server if you used the Apache default installation for Apple and you have a macOS.
For the default version of Apache that comes with macOS:
1 | sudo apachectl -k restart |
Make the MongoDB Connection with the PHP Driver
- Use the PHP driver to connect to MongoDB. After you connect using the MongoDB PHP driver, you should be set with the installation. Everything should be running now.
Start a PHP MongoDB project
- Setup a new MongoDB project for PHP. You’ll need to create a test project directory and a script that goes inside the directory. An example is shown below. The PHP script can be made with the command
touch.
1 2 3 4 5 | sudo mkdir mongo-php cd mongo-php sudo touch mongophp.php |
Run the Script for PHP Driver Testing
The OLD
MongoClient()function is replaced by NEWManager(). In this example, those changes are based on the newest PHP library changes. Adding to the directory path ofMongoDBDriveris necessary.Debug your project before production but during development. Use
display_errorsto show any PHP issues.
1 2 3 4 5 6 7 8 9 10 11 12 13 14 15 16 17 18 19 20 21 22 23 | <?php error_reporting(E_ALL); ini_set('display_errors', 1); // use error reporting for debugging // OLD MongoClient() class for PHP 5 and 'mongo' // $mongo_client = new MongoClient(); // NEW Manager() class for PHP 7 and 'mongodb' $mongo_client = new MongoDBDriverManager(); echo "" Connection to Manager(): ""; var_dump($mongo_client); |
>NOTE: Watch for this error message after you run the script: Fatal error: Uncaught Error: Class 'MongoDBDriverManager' not found. If you receive that error, check the configuration file for the proper wording of the extension=mongodb.so command and make sure it’s in the right file–the PHP 7 version’s php.ini file.
Installation Option: Use the Git Repository
Use the Git repository and the source code there to build the MongoDB driver if you experience installation problems with the other methods.
The
clonecommand, then the update on the submodule should work for you.
1 2 3 4 5 | sudo git clone https://github.com/mongodb/mongo-php-driver.git cd mongo-php-driver sudo git submodule update --init |
- Install the
php7.x-devpackage if you haven’t already. Theapt install php7.xcommand works for you if you have an APT repository that your Linux server uses.
1 2 3 4 5 | sudo apt install php7.1-dev # or: sudo apt install php7.2-dev # or: sudo apt install php7.3-dev |
- Build, configure, and install the driver:
1 2 3 4 5 6 7 | sudo phpize sudo ./configure sudo make all sudo make install |
Conclusion
This tutorial explained the installation of MongoDB Driver for PHP on a macOS or UNIX-like system, such as Linux. As you learned today, it can be achieved in many ways. Among those, you discovered how you can use PEAR and PECL to install MongoDB and the PHP driver. You read some tips and tricks to make the process more convenient to perform. Now that you’ve installed the MongoDB Driver for PHP, you’ll likely see a positive difference in developing all your PHP projects.


Pilot the ObjectRocket Platform Free!
Try Fully-Managed CockroachDB, Elasticsearch, MongoDB, PostgreSQL (Beta) or Redis.
Get Started