How to install mongoose with npm
Introduction
Mongoose is an Object Data Modeling (ODM) library that is used for schema validations and managing relationships among data. Mongoose is frequently used with NodeJS and MongoDB. Understanding mongoose is very important and it is also very simple at the same time. But before we can use mongoose in our NodeJS files, we need to install it. Installing mongoose is a simple process. All we need is the Node package manager, commonly known as NPM. In this article, we will discuss how to install mongoose with NPM.
Node Package Manager (NPM)
If you are going to work with mongoose, you will encounter the Node Package Manager (NPM) very frequently. It is the default package manager for NodeJS. It contains a huge amount of packages that can be installed by running the npm command in a terminal. Mongoose is one of these packages. The available packages can be searched on the official website of NPM.
On the main NPM registry, over 477,000 packages can be found.
As mentioned earlier, the mongoose is one of the packages available in NPM. So we need to install NPM before we can install mongoose.
Installing NodeJs
To install the Node Package Manager, we first need to download and install NodeJS. NPM automatically gets installed with NodeJS. Follow the following steps to install NodeJS.
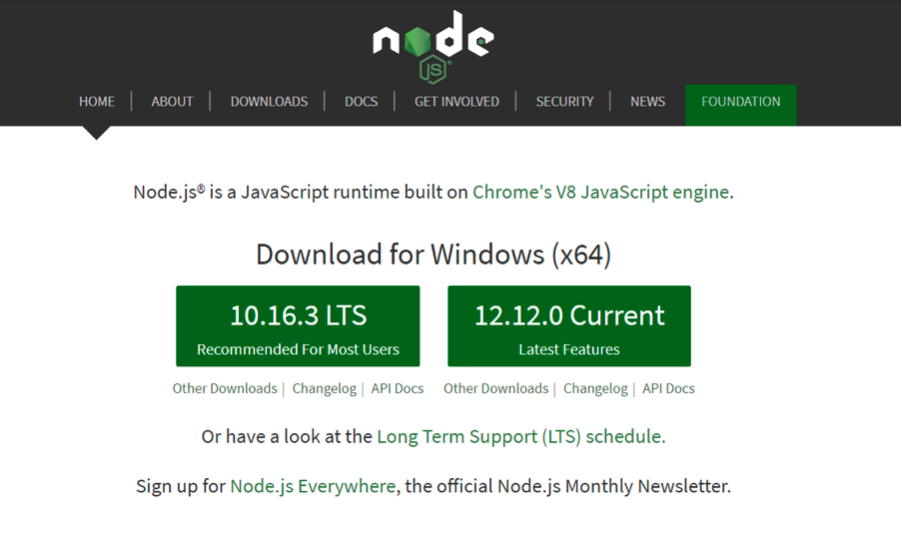
Go to https://NodeJs.org/.
Here, you will find two versions of Nodejs – LTS and the latest one.
Download accordingly. Our recommendation is the LTS version because it is the most supported one.
Wait for the download to finish and then click on the downloaded package.
Go through the installation steps and click “finish” when the installation is complete.
NPM automatically gets installed with Node.js. To make sure that installation was successful, open the terminal and type the following command.
1 | node -v; |
If the version of the node is displayed, then you are ready to go further.
As mentioned earlier, NPM automatically gets installed with NodeJs.
Installing mongoose using NPM
So now that we have NPM installed the next step is to install mongoose. It is a very simple step. Just run the following command in a terminal.
1 | npm install mongoose |
This is all that requires to install mongoose using NPM. If you want to confirm that you have installed mongoose you can check in the node_modules folder. This is the folder where npm installs everything. There is typically a folder for every package installed. You will find a mongoose directory if you have installed mongoose correctly. You can also check if it’s installed by running the following npm command which will list your version of mongoose.
1 | npm list mongoose |
Conclusion
In this tutorial we have showed you how to install mongoose via npm the node package manager. We also showed you a couple ways to verify that the package was installed correctly.
This is just the tip of the iceberg with mongoose though. It is a great ODM but it will require some refactoring if you already have queries in place. First off you’ll need to require it in the javascript files you use it in with the require statement like below:
1 | const mongoose = require("mongoose"); |
After this you will need to connect to your database and setup models. The code for that often looks like below and you should take a look at their quick start guide to get familiar with the process.
1 2 3 | mongoose.connect('mongodb://localhost:27017/demo', {useNewUrlParser: true}); const User = mongoose.model('User', { name: String }); |
Once you’ve created a model you can see the benefit of mongoose when your database interactions become much more succinct like below:
1 2 | const user1 = new User({ name: 'demouser' }); user1.save().then(() => console.log('yay!')); |
Thank you so much for joining us for another Object Rocket knowledge-base tutorial. If there’s any way Object Rocket can help you please don’t hesitate to reach out to us.
Pilot the ObjectRocket Platform Free!
Try Fully-Managed CockroachDB, Elasticsearch, MongoDB, PostgreSQL (Beta) or Redis.
Get Started


