How to Install and integrate Robo3T GUI in MongoDB
Introduction
In this article we’ll show you step-by-step how to install and integrate Robo3T in MongoDB. Robo3T is one of several GUI tools including Compass and Studio 3T that allow you to visualize your data which can be very hard to do through the MongoDB shell. Robo3T allows you to perform all of the primary functionality in a GUI without having to remember the MongoDB shell syntax. Robo3T also provides an embedded shell so users can still use the MongoDB shell if necessary. In the embedded shell Robo3T provides a great autocomplete feature which is invaluable for developers who jump back and forth between different languages and have a hard time remembering the exact syntax. There is a version of Robo3T for Mac OS X, Windows, and Linux systems. We find Robo3T strongest feature is that it doesn’t hog your resources. Please continue reading as we show you how to install Robo3T on your system.
Prerequisites
Ensure that latest Java JDK is properly installed and configured beforehand.
Ensure that MongoDB service is running. If MongoDB is installed you can run it with the
mongodcommand.
Installing Robo3T
Download the latest version of Robo3T from the official Robomongo website, here.
Extract the downloaded
tar.gzfile via terminal using the below command.
1 | sudo tar -xvzf robo3t-1.3.1-linux-x86_64-7419c406.tar.gz |
- Copy and paste the extracted file in the
/optfolder.
NOTE: if conflict in permission and access rights occurred, use the following command: sudo chmod -R 777 /opt in order to have elevated access rights to perform read and write operations.
Navigate to this
opt/robomongo/binthen right-click on the robo3t to create a shortcut.To lunch the robo3t application, double click the shortcut that was created in the previous step.
Integrating Robo3T in MongoDB
NOTE: Ensure that the MongoDB service is running in the background.
Once the robo3t application is running for the first time, a MongoDB Connections configuration window will prompt the user to Create, edit, remove, clone or “reorder connections via drag’n’drop”.
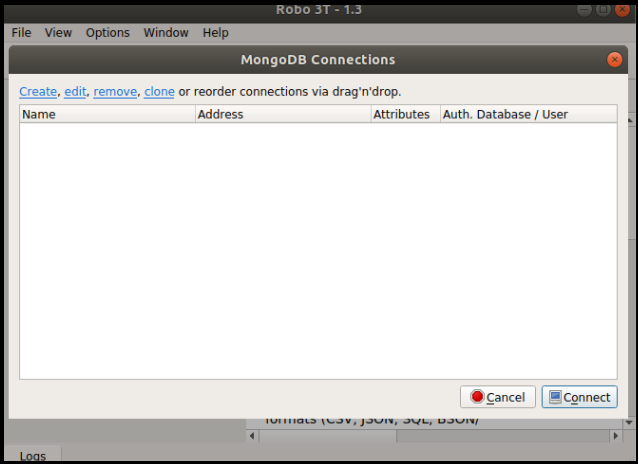
To create a new MongoDB Connection, click Create menu in upper left corner of the window.
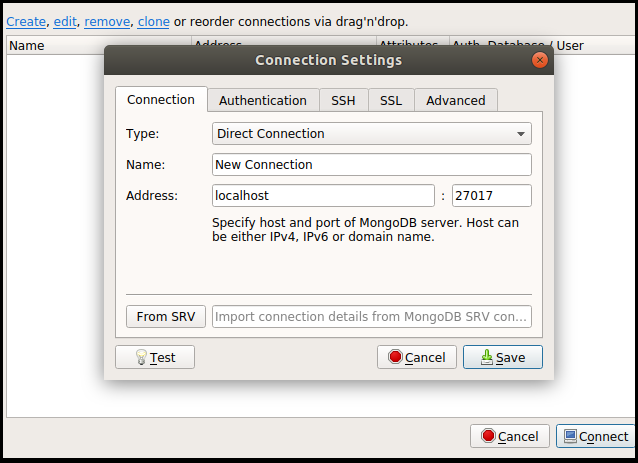
Change the details therein to meet the connection, but for this example the default will be accepted as is.
Click Test button at the lower to see if the connection settings is correct.
The result should resemble something like the following:
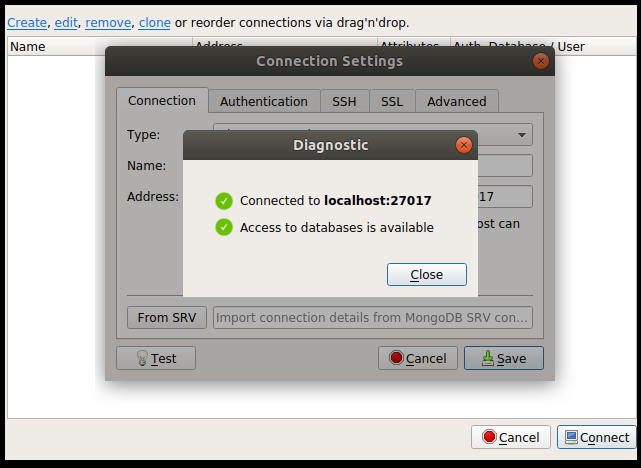
After that, click Save to save the connection settings and click Connect to connect to a MongoDB deployment.
Below is the result of the above procedure.
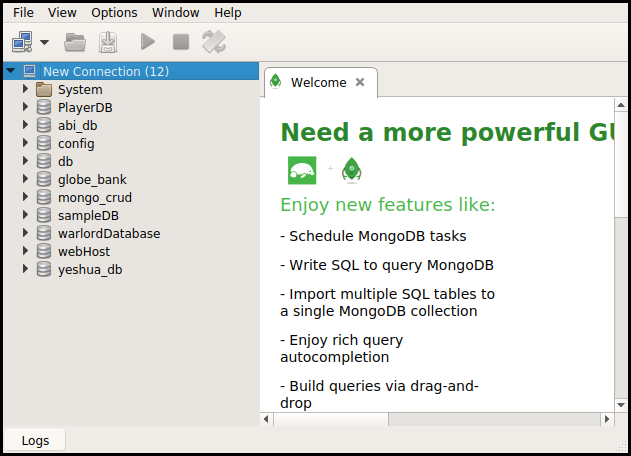
Robo3T lists all the available MongoDB databases on the left-side pane of the window and welcome note in the right-side pane of the window.
Conclusion
In this tutorial we went step-by-step how to install Robo3T and integrate it with MongoDB. We made a connection in Robo3T to MongoDB and saved the connection. At this point with Robo3T setup and ready to go, we recommend you create a test database and explore the functionality available in Robo3T. To get familiar with Robo3T you should create new databases, new collections, new documents, query documents, delete documents, and create new indices. Make sure to explore the embedded shell which provides some great functionality that the native MongoDB shell doesn’t have.
Thanks for joining us in this tutorial on installing Robo3T with MongoDB and if you have need any assistance please reach out to us at Object Rocket. If offloading the work of database configuration and management sounds appealing to you, please don’t hesitate to reach out to us because it’s what we do best at Object Rocket.

Pilot the ObjectRocket Platform Free!
Try Fully-Managed CockroachDB, Elasticsearch, MongoDB, PostgreSQL (Beta) or Redis.
Get Started