How to Delete a MongoDB Document using Spring Data Part 1
Introduction
If you’re building an application with Spring Data that interacts with MongoDB, you may want your application to perform certain database operations such as deleting documents. Fortunately, this task isn’t a difficult one to accomplish, even if you’re new to Spring Data. In this article, we’ll start by showing you how to set up a basic Spring Data project in an Eclipse IDE (Integrated Development Environment) that uses MongoDB as its database. We’ll then show you how to work with Spring Data and MongoDB to perform a basic DELETE operation.
Prerequisites
Before we start learning how to delete a MongoDB document using Spring Data, let’s take a moment to review the prerequisites that are necessary for our tutorial:
- First, you’ll need to make sure that Eclipse is already installed and configured.
- You’ll need to have a basic understanding of how to create a Spring boot project for Eclipse. For this tutorial, we’ll be using Spring Initializr.
- It’s also important to have some understanding of how to use the Eclipse IDE.
- Make sure that Java has been installed and properly configured. The Java version used in this tutorial is:
1 2 | java version "1.8.0_221" Java(TM) SE Runtime Environment (build 1.8.0_221-b11) |
- Last but not least, you’ll need some basic knowledge of the Postman application for performing CRUD operations.
Creating The Spring Project
In this section, we’ll create a Spring project using ‘Spring Initializr’.
- To do this, go to the following URL: https://start.spring.io
- Then, follow the steps below:
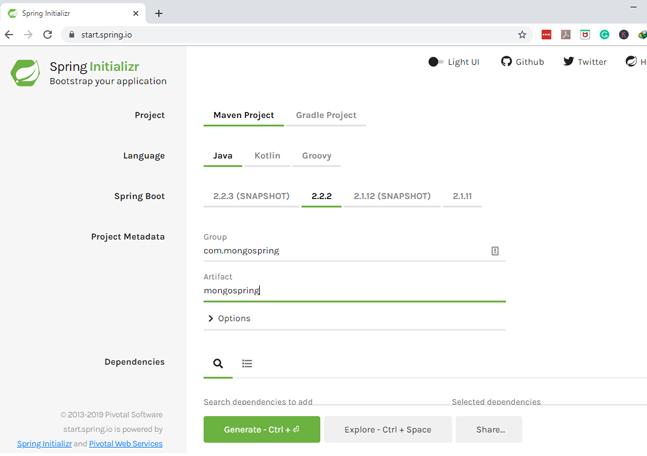
You can provide your own meaningful names for the required fields
GroupandArtifactor just use the same ones we’re using for this article.Next, we’ll add our dependencies as shown in the image below:
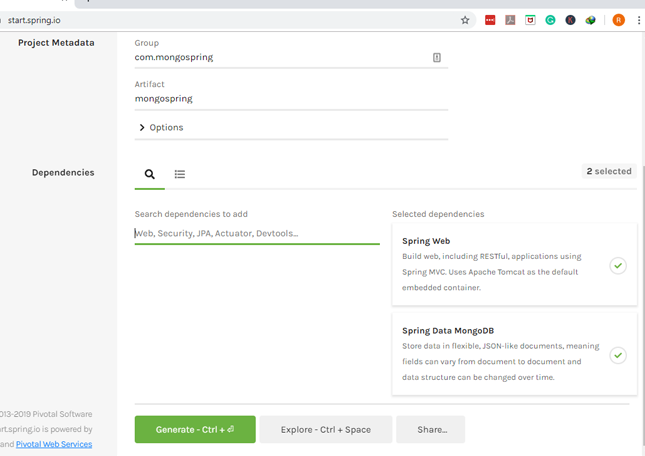
We can use the search bar to search for any dependencies that we need. Simply enter the categories, then select the necessary dependencies from the list of dependencies.
After that, we can click the ‘Generate’ button on the lower left part of the window and download the file as a zip file. It’s best to download the file within your project directory and extract it there at the same time.
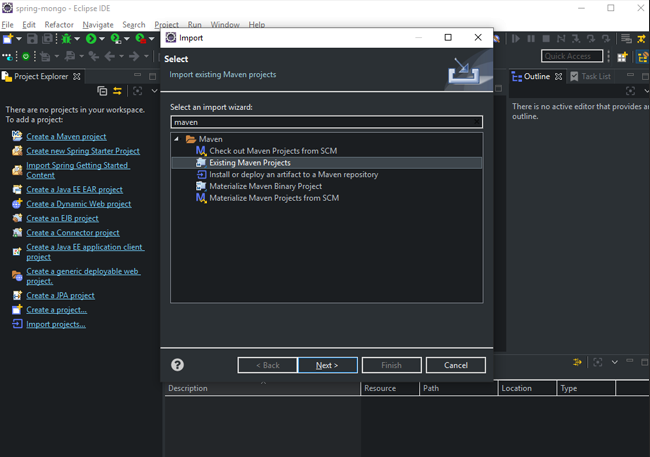
To import this file, we’ll need to open up Eclipse and import the extracted file as an Existing Maven Project:
- We’ll then select the extracted file as shown below:
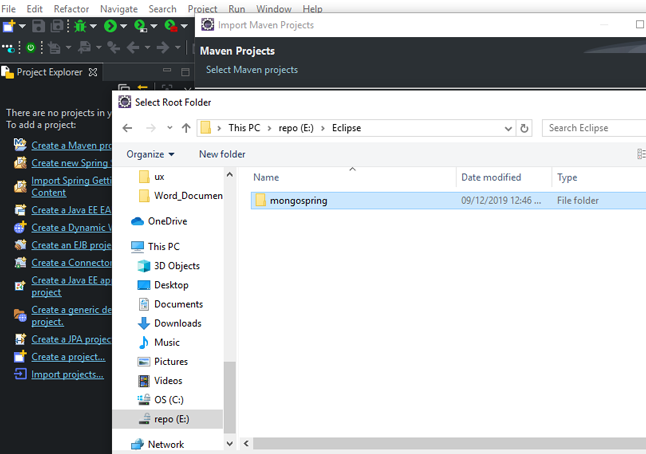
- At this point, we’ve successfully created our Spring boot project.
Creating the Java Classes In Eclipse IDE
In the previous section, we showed you how to create a Spring boot project within Eclipse IDE. Now, we’ll be creating the Java domain classes needed for our tutorial. We will require two Java classes named EmpInfo.java and JobDetails.java.
To accomplish this task, we’ll perform the following steps:
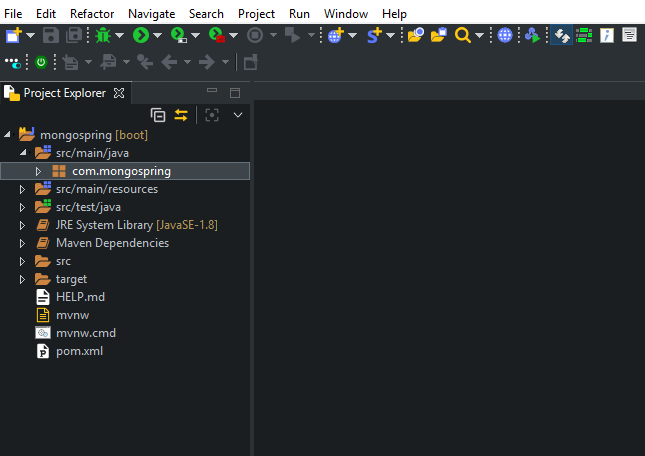
- First, we’ll right-click on the main package
com.mongospring. - We’ll select ‘New’, then we’ll select ‘Class’ from the sub-menu. After that, we’ll enter the name of our first Java class, which is
EmpInfo. NOTE: There’s no need to add the extension.javaas Eclipse will automatically append it once the file is created. - Finally, we’ll click the ‘Finish’ button to create the Java class.
NOTE: We can follow the same process to create the Java class JobDetails.java.
Coding the Java Classes
So far, we’ve successfully created two Java classes. In this section, we’ll add some code to these files.
Coding the Java Class EmpInfo.java
Let’s open up EmpInfo.java and add the following Java code:
1 2 3 4 5 6 7 8 9 10 11 12 13 14 15 16 17 18 19 20 21 22 23 24 25 26 27 28 29 30 31 32 33 34 35 36 37 38 39 40 41 42 43 44 45 46 47 | package com.mongospring; public class EmpInfo { private String id; private String empId; private String name; private String gender; private int age; private JobDetails jobDetails; protected EmpInfo() {} public EmpInfo( String empId, String name, String gender, int age, JobDetails jobDetails) { this.empId = empId; this.name = name; this.gender = gender; this.age = age; this.jobDetails = jobDetails; } public String getId() { return id; } public void setId(String id) { this.id = id; } public String getEmpId() { return empId; } public void setEmpId(String empId) { this.empId = empId; } public String getName() { return name; } public void setName(String name) { this.name = name; } public String getGender() { return gender; } public void setGender(String gender) { this.gender = gender; } public int getAge() { return age; } public void setAge(int age) { this.age = age; } public JobDetails getJobDetails() { return jobDetails; } public void setJobDetails(JobDetails jobDetails) { this.jobDetails = jobDetails; } } |
The code shown above creates constructors for the entities in our Java class EmpInfo.java. We’ll be doing something similar with our other Java class JobDetails.java:
Coding the Java Class JobDetails.java
1 2 3 4 5 6 7 8 9 10 11 12 13 14 15 16 17 18 19 20 21 22 23 24 25 26 27 28 | package com.mongospring; public class JobDetails { private String department; private String position; protected JobDetails() {} protected JobDetails(String department, String position) { this.department = department; this.position = position; } public String getDepartment() { return department; } public void setDepartment(String department) { this.department = department; } public String getPosition() { return position; } public void setPosition(String position) { this.position = position; } } |
Conclusion
When you’re working with a MongoDB database using Spring Data, it’s easy to perform various database operations from your application. In this article, we provided step-by-step instructions for creating a Spring boot project using an online tool called ‘Spring Initializr’, and we explained how to upload the generated file into the Eclipse IDE as an existing Maven project. We also showed you how to create the Java classes that we’ll be using throughout our tutorial. The next installment of this tutorial series will pick up where we left off, showing you how to delete a MongoDB document using Spring Data.


Pilot the ObjectRocket Platform Free!
Try Fully-Managed CockroachDB, Elasticsearch, MongoDB, PostgreSQL (Beta) or Redis.
Get Started